Search This Blog

Friday, April 12, 2019

Herdwick Shaker box

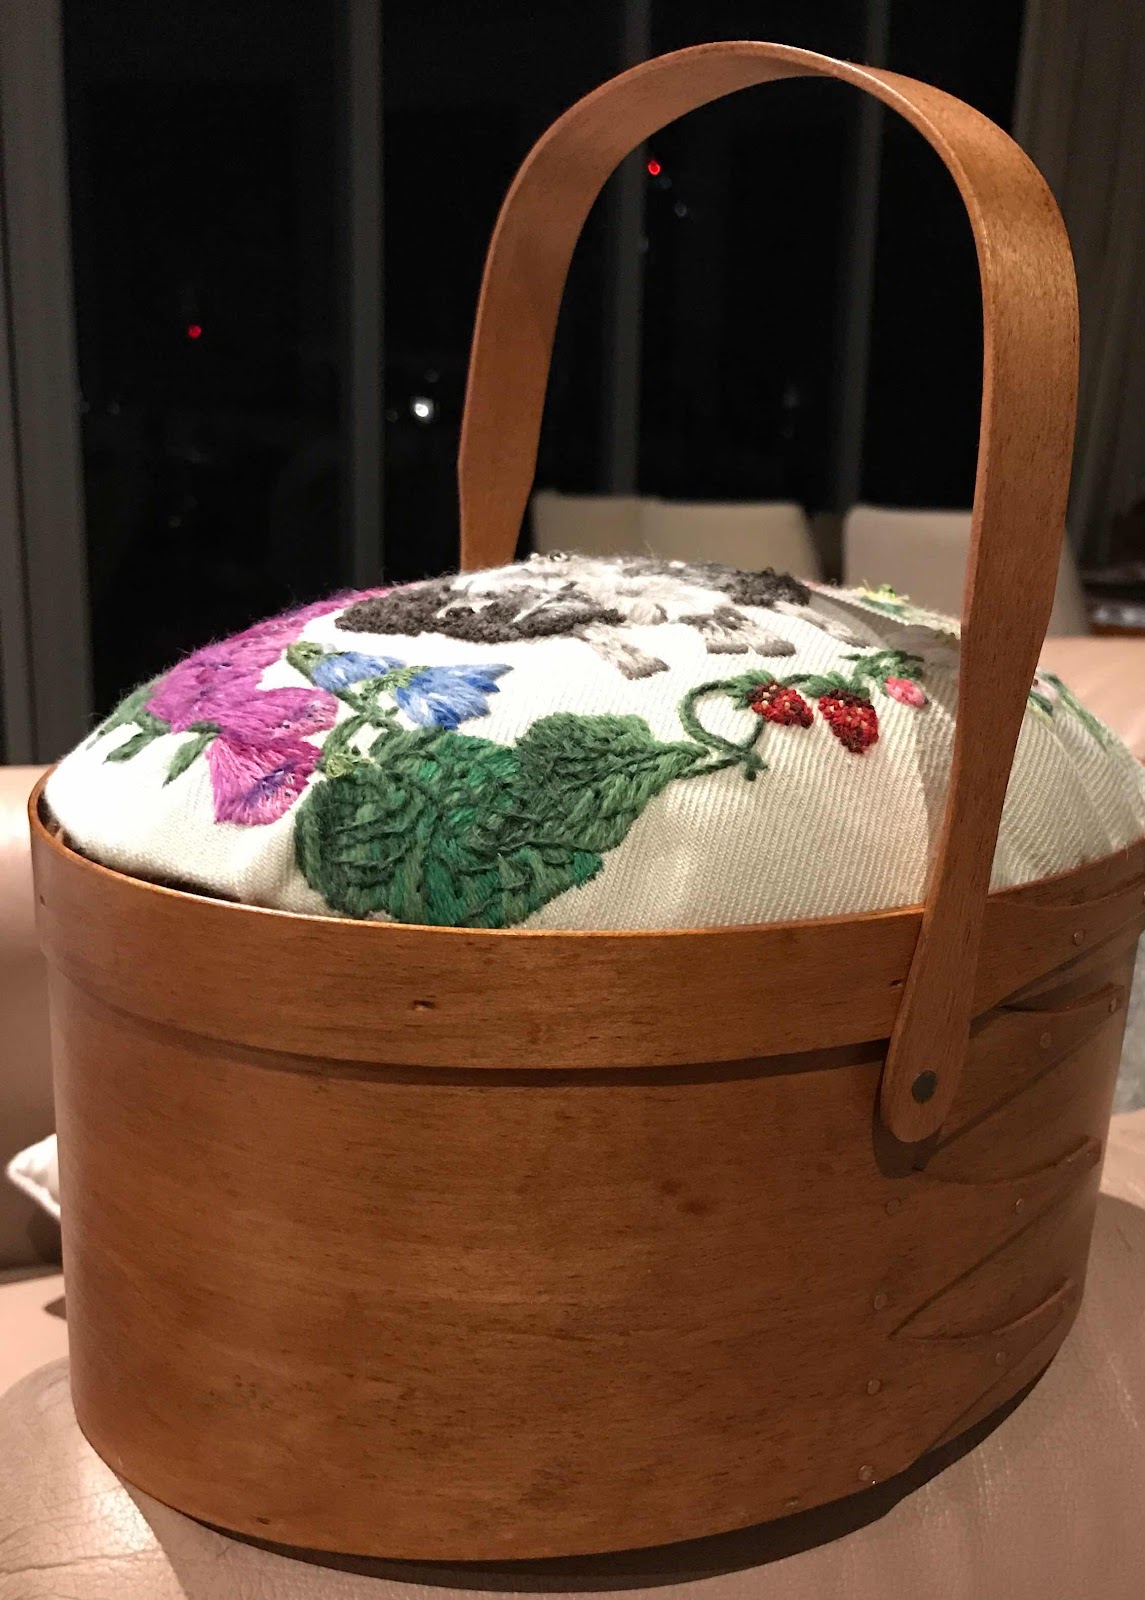
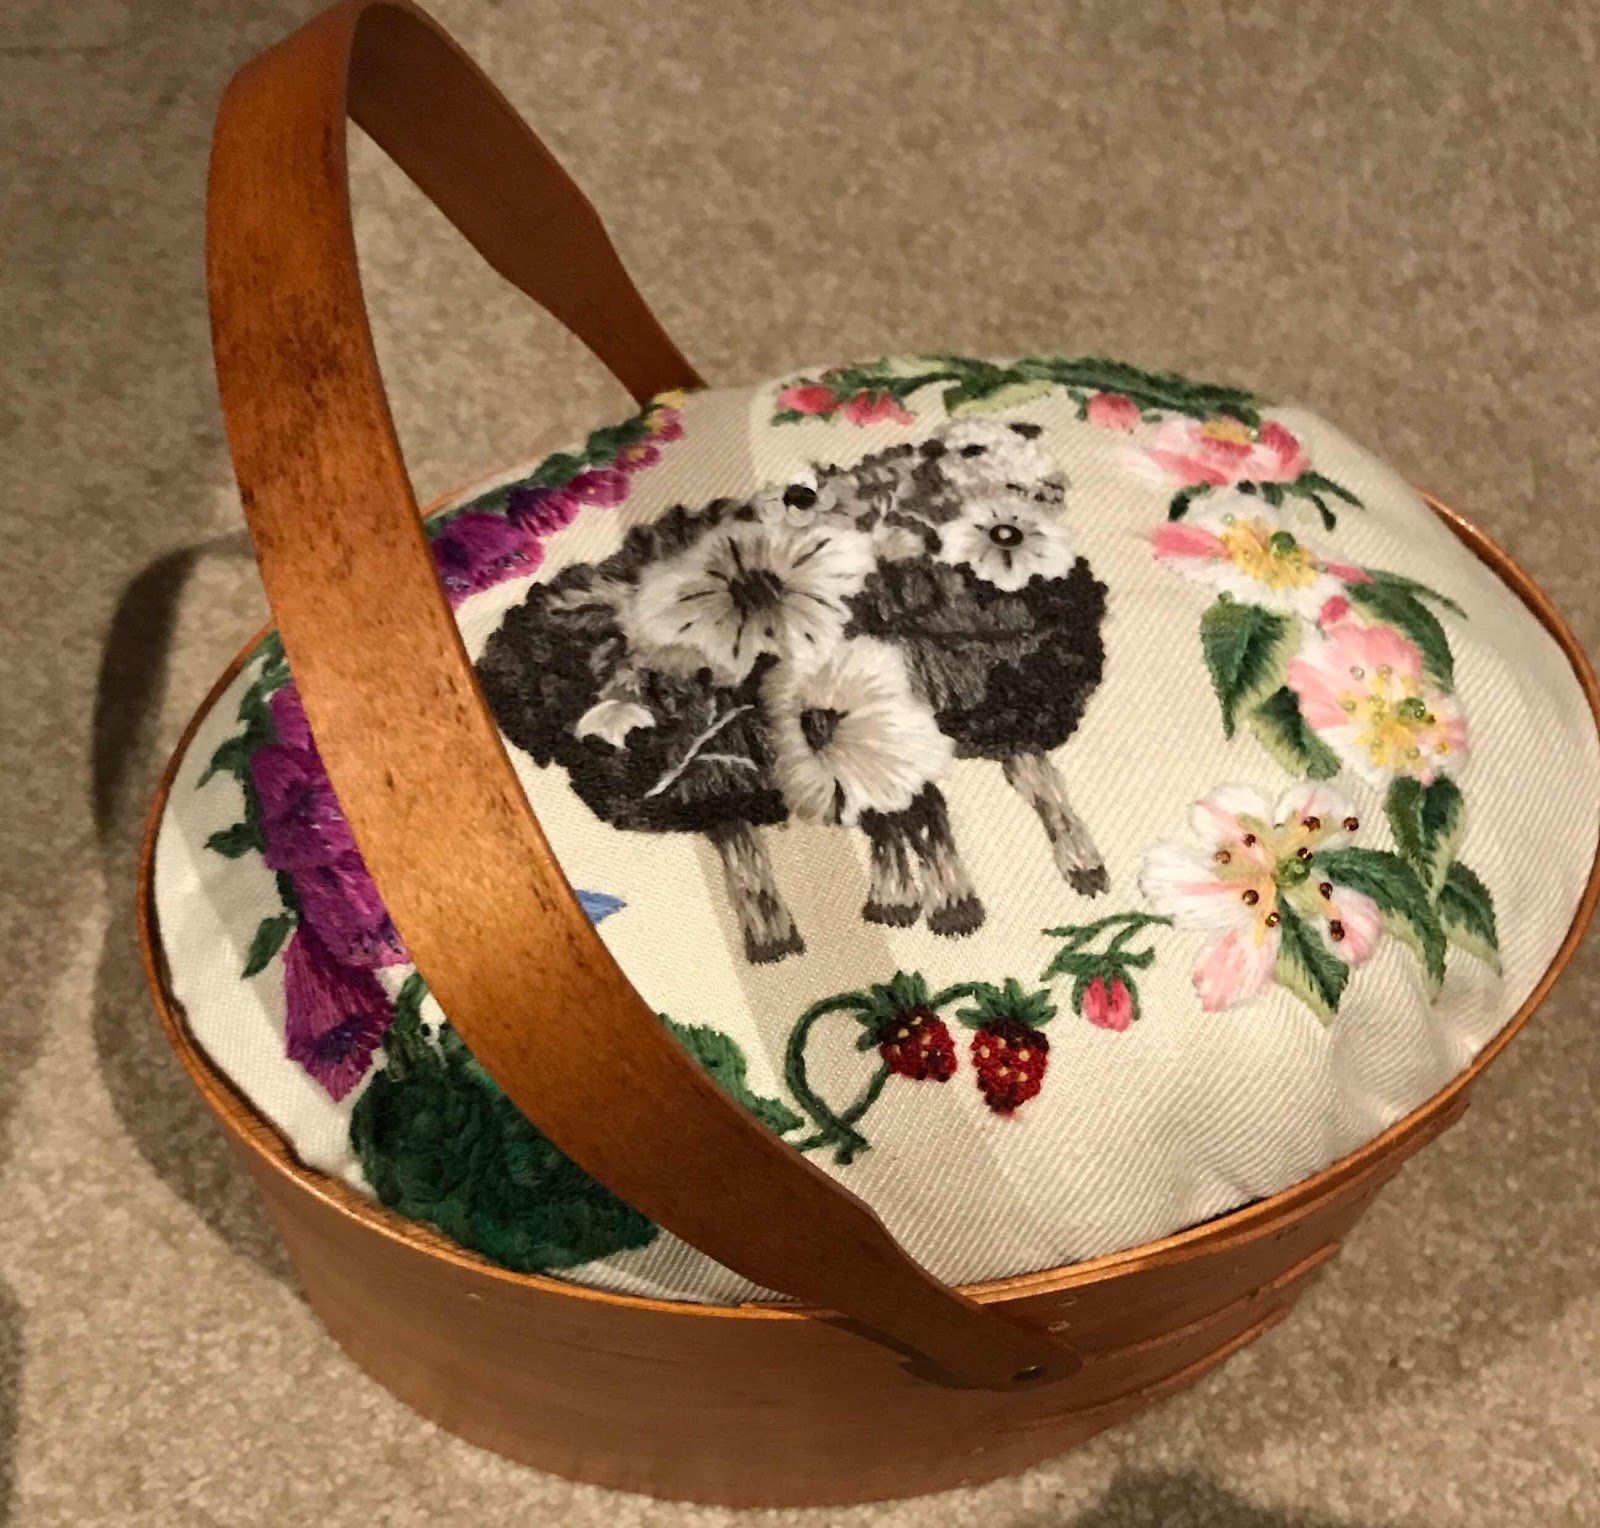
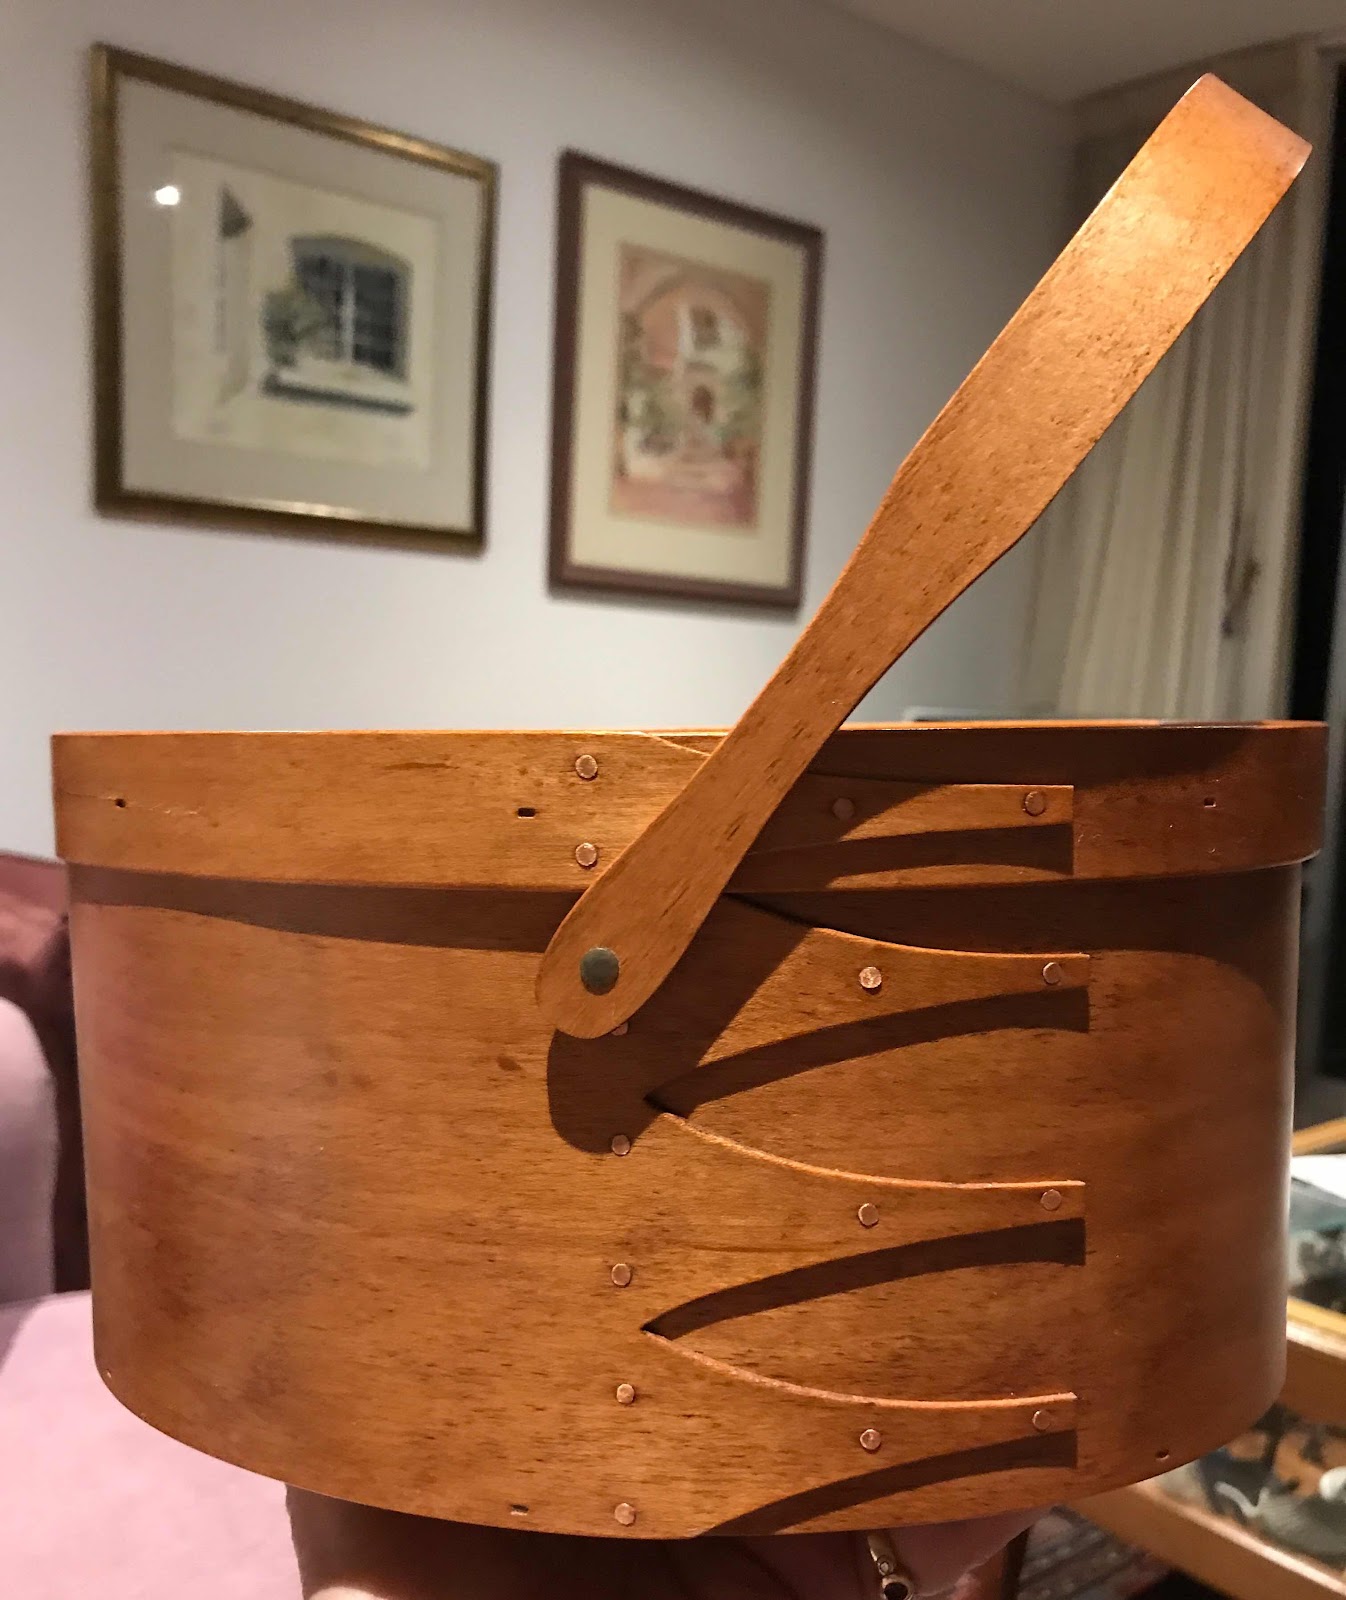
This week my Shaker Box arrived. I didn't waste much time in getting to work to attach my version of Nicola Jarvis's Herdwick sheep design.


There were instructions for the mounting.
The fit was very good, but in order to fit in the edges of the leaves on the diagonal, I needed to mound the piece to raise it up.

I did this using a layer of felt and a lot of wool-based stuffing over cardboard. I gathered the embroidery over this, cut off the excess and then  lashed it across the back.


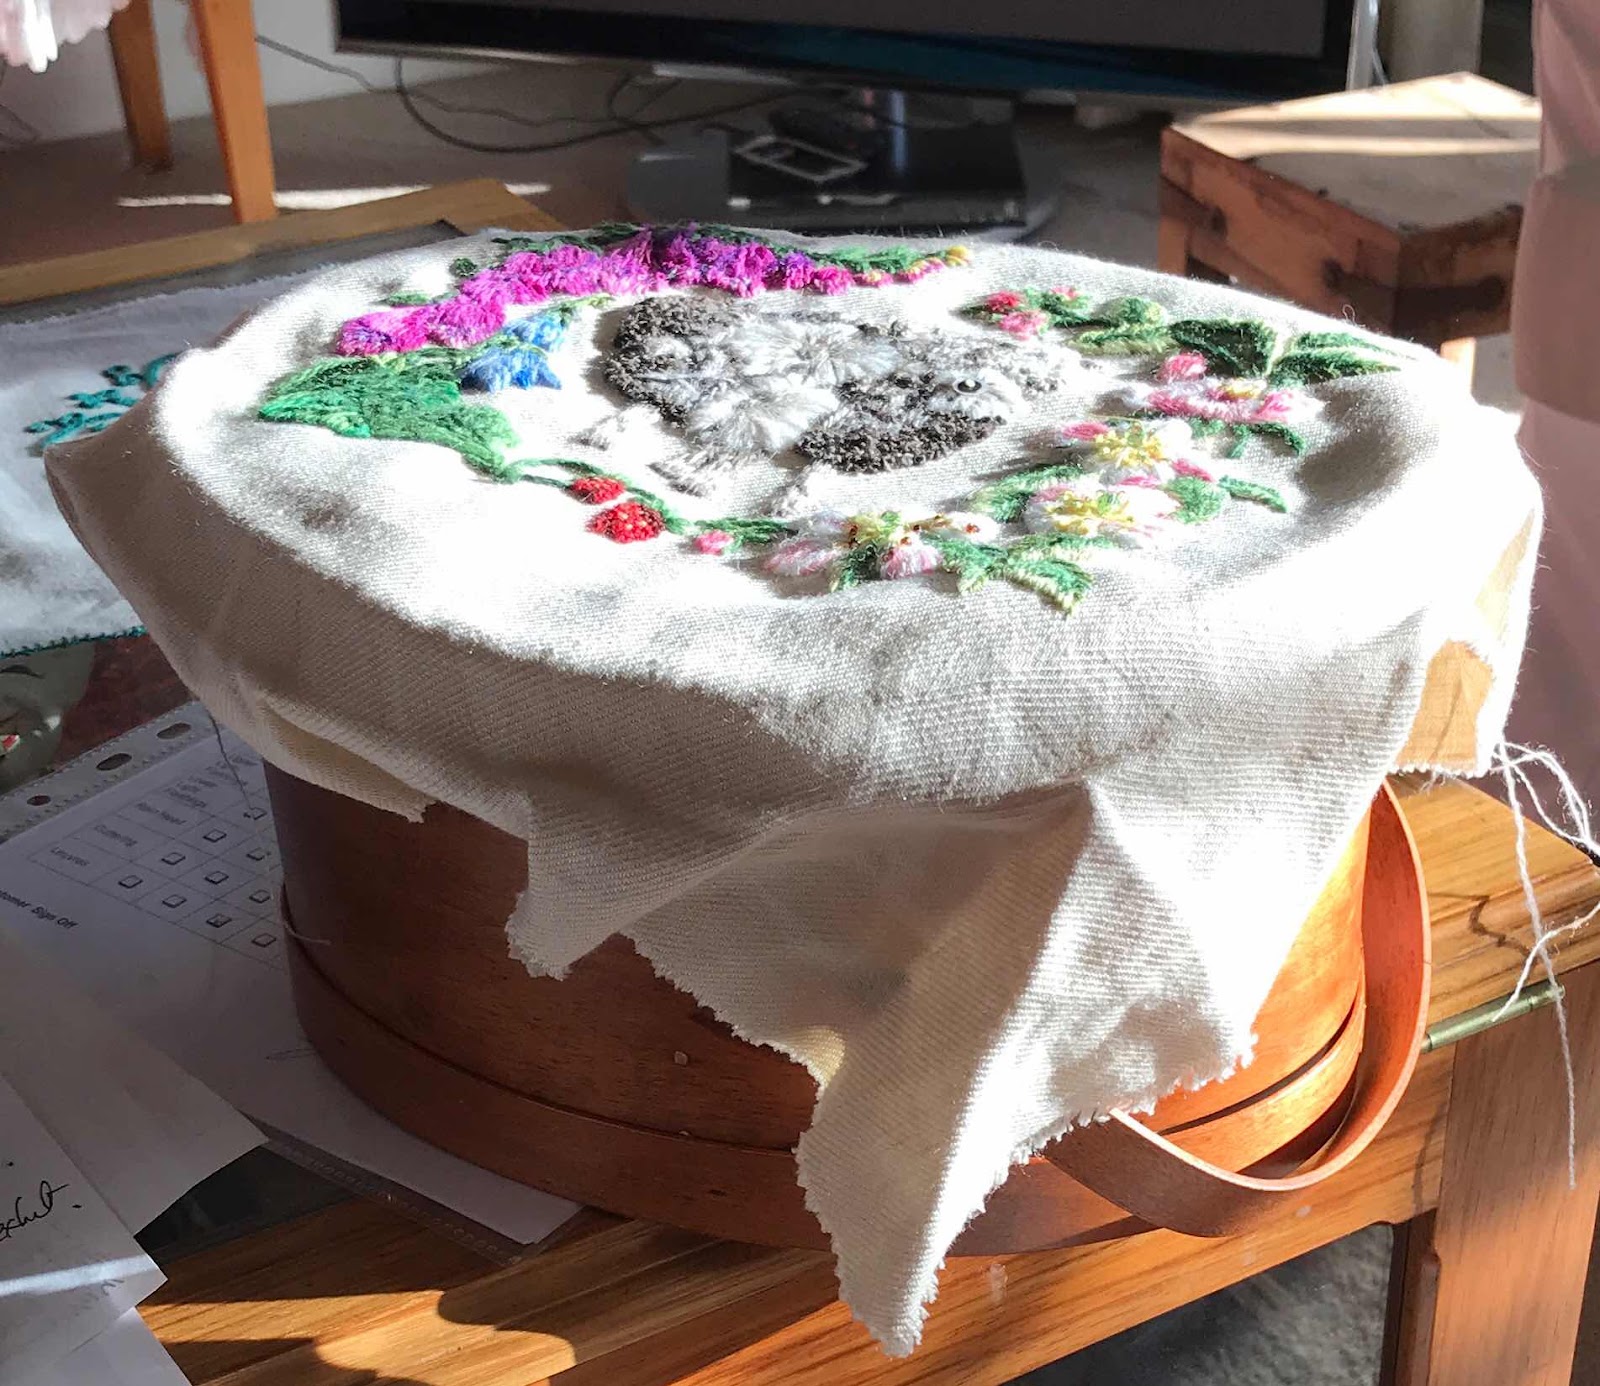
I decided against using glue, and opted for double-sided tape. This worked well for most of the piece, but the short ends would not stick easily. I clamped them overnight but they still lifted a little.


In the end I bought some heavy duty double-sided tape and again clamped it.


The inside of the box is plain. I think I might use it as a sewing box, and keep a complete set of tools in it. While I usually assemble a set for each project bag, it would be really useful to have a set that always stays in one place.


So here it is, finished. Flora amongst her flowers.
I am very happy with it.


Sunday, April 7, 2019

Flora, the Herdwick Sheep


This was originally a very short post begun in 2017. While visiting Ruskin Cottage in the Lakes District that year, I bought a single ball of Herdwick wool. It was a natural coloured boucle and I thought it would make a good shawl.
I found a pattern I liked that I thought might do justice to the wool. It was knitted as a rectangle, folded and joined to form a kind of poncho. There was a patterned border along the front edge.

After knitting about 4 inches I decided it was a bad idea. The pattern did not show amongst the boucle and the wool merely looked grubby. I was hoping it might come in useful for one of the projects in the March 2019 Lady Anne's Needlework Retreat in the Lakes District, which focused on the life and work of Beatrix Potter.  This didn't work out either, so the boucle wool is down to experience.
I mention this by way of introduction to Nicola Jarvis's 
Herdwick sheep project from the retreat.                                                                                                                                                                    This is the project as it began. The beginning of the work, conducted in Bowness-on-Windermere last month is outlined in my travel blog.                             
By the end of my travels I had finished the sheep and a little of the dog roses. At the suggestion of one of my daughters, she is now called Flora.


As soon as I arrived home I got to work on the remainder.


I finished embroidering the dog roses


then moved on to foxgloves.


I found these quite tricky.  While I felt confident on light-shade balance on individual flower heads in front and behind each other , I was less convinced I managed the colour change up and down the stem.
The harebells and foxglove leaves were the last to go in.


Finally, I returned to the centres of the dog roses. I varied the stitch a little.


I'm very pleased with this result. I have enjoyed working on this. The texture of the finished piece is marvellous.

I am waiting for my Shaker Box to arrive to mount this piece in the lid. Wendy, from Australian Needle Arts has it ready to mail as soon as she recovers from the flu.


I will post again when the box arrives and I have the embroidery it mounted.


Saturday, March 30, 2019

Crewelwork Tree of Life


As I post this I am back home after a month in the UK, having been to another Crewel Work Company Embroidery Retreat in the Lake District. The blog of my travels tells the story. I had hoped to post to this blog as well while away - but did not manage it. I'm now back to weekly postings.

I  made good progress over the Summer with another panel to go on the Ikea chair that I am covering with crewelwork.

I had been working on the Tree of Life panel - the firescreen design from the Crewel Work Company.


I began with the hound and hillocks ( yes, I admit to rushing in without reading the instructions, which suggest elsewhere!)


I did, nevertheless, have a really good time stitching it.


It took two hoop positions to get to this point, after which, I returned to where I should have started....


Much of this was done on holiday at a beach south of Adelaide. Since I travelled there by car there was no trouble transporting hoop and stand.

After returning from the beach, I managed to quickly work another hoop.


Then on to the  last full hoop - and finally the two  moves to finish areas either side of this.

I wanted to have this finished and added to my chair before I left for the Crewel Work Company Retreat in the Lake District at the end of February.

I wasn't stressed about it - I was enjoying it too much for that!


I managed to work on steadily, section by section.
When I took it out of the hoop it had the usual raggy look.


Blocking soon fixed that.
The weekend before I left I managed to add it to my chair.


 As it was a bit longer than the chair I have a couple of strips I can embroider to fit alongside the squarish piece on the seat - now I am back I can attend to it.


Next step is the parrot panel to go on the other side of the back.

I have, of course, a couple of projects to finish from the Retreat - as well as one from a one-day RSN course. These will take priority - but it won't be long now. I'll report progress next week.

Thursday, February 21, 2019

Morocco Projects-Certificate Course


On the last Saturday in January there was a large gathering for the first of the SA Embroiderers' Guild's Certificate Workshops.

One of the convenors of the Certificate Course, Barbara Mullan, takes embroidery tours to India and Morocco. A number of Guild members, including Christine Bishop, the other Certificate Course Convenor, accompanied her to Morocco in 2018.

This workshop presented information about Morocco and taught three aspects of Moroccan embroidery.

No wonder so many attended the workshop!

Our first project was making a Djellaba button. A djellaba (the purple garment on display to the left) is a garment worn outside, over other clothes, by Moroccan men. It resembles a kaftan, and is secured all the way down the front by tiny hand-made buttons.


Fortunately for us, Phyllis Coxhill, who taught this segment of the workshop, had prepared a much larger teaching tool!

I'm sure, once you have the hang of it, this becomes quite rhythmical and practised. It will take me a while to reach that point!

Our second project of the day was Fes Embroidery, taught by Christine.

This is counted thread work, in double running stitch, on linen, usually two-toned, and often blue.  It usually follows a border and corner pattern. Some Moroccan women seem to do this work by eye, without actually counting.

Christine charted two edging motifs for us.

The third stitching session for the day was on design, using Berber symbols. We were asked to design a carpet, or more accurately, a rectangle, which we could stitch, using running and weaving stitches found on Berber carpets.
My effort was certainly not complicated, but I have ideas for it!


At home I got carried away with Fes stitch. This is going to be a year of improving my counted work.

The fact that Moroccan women often do this work by eye, rather than counting, gives me encouragement. I did count, but when my eye-sight lets me down I am not going to stress!


I took this work with me when I visited Sydney for a few days the week following the workshop. It worked well as a grab-and-go.

On my return home, I was inclined to leave the piece in one colour, rather than filling in the shapes with light blue. I was encouraged by several Guild members to leave it as is, so I did.

I found a piece of Japanese cotton in my stash (yes, a bit of cultural impurity) with which to line it, pulled some threads and worked a gusset with loops.


I then made a twisted cord.


I had intended to make djellaba buttons for the ends of the cord.

After a bit I gave up, and covered the plastic tubing with needlelace.


I am delighted with week's work and my bag.


I also have a plan for my carpet design - but that's another story!


Saturday, February 9, 2019

Zenbroidery 3.1


I last posted an update on my latest zenbroidery project in September 2018. This is a grab-and-go project that has not seen much activity in the light of the other things I've had on the go.


I have worked some of the larger, more solid flowers in a version of Portuguese knot stitch and lots of the leaves in a variety of filling stitches - trying things out.

I've tried to flow the colours across the piece, shifting from red-yellows into blue-purples.


I just love working these pieces. It is freeing, experimental work and the results make useful bags (always an incentive!).


I've played with bullion knots  needle-weaving and stars.


I still have a bit to finish, but  probably not enough to take it with me when I travel in March. It is a good grab-and-go project, but only has a few hours left in it, so it is in my sights to finish before the end of the month.

Let's see how I go!