Search This Blog

Saturday, March 20, 2021

Another Turkmen Pouch

 I've been working on another of Alison Snepp's Turkmen Pouch (Inspirations 69, 2011). Back then I made one, and yes, the green fabric is the same. I've made many variations on this. The shape is versatile.  I cut this out a couple of years ago, when a friend wanted to make one. She finished hers long ago and my fabric stayed in the drawer, cut out but not assembled. The friend now has a craft group engaged in making them, and got me involved.


I had to remind myself of the processes for putting it together. Measuring - never my strong point - is crucial, because the design depends on a more-or-less perfect square. Given the dominance of the wattle lining fabric, I decided to limit myself to threads in the colours in that print - greens, yellow and a little bit of brown. There was already enough black!

The design calls for button-hole pinwheels in the squares of the grid. I don't much like stitching them and I decided it would be fitting to use Ghiordes knots to make little wattle blooms instead.I fluffed them up using my faithful boo-boo stick.  

I liked the result.


The edges are decorated simply, the piece folded and the joins ladder stitched. While this was easy stitching, the black fabric was a bit denser than is ideal for hand-stitching. I realised that the next steps were not going to be easy.                                

I tried several different needles and threads, but stitching along the edge was difficult through 4 layers of fabric, two of them dense. While the colours work, and it has an appropriate folksy look, the stitches are far from smooth and even.

Similarly, the triangular insert with it's turkmen stitch, gives the right effect, but isn't accurate.
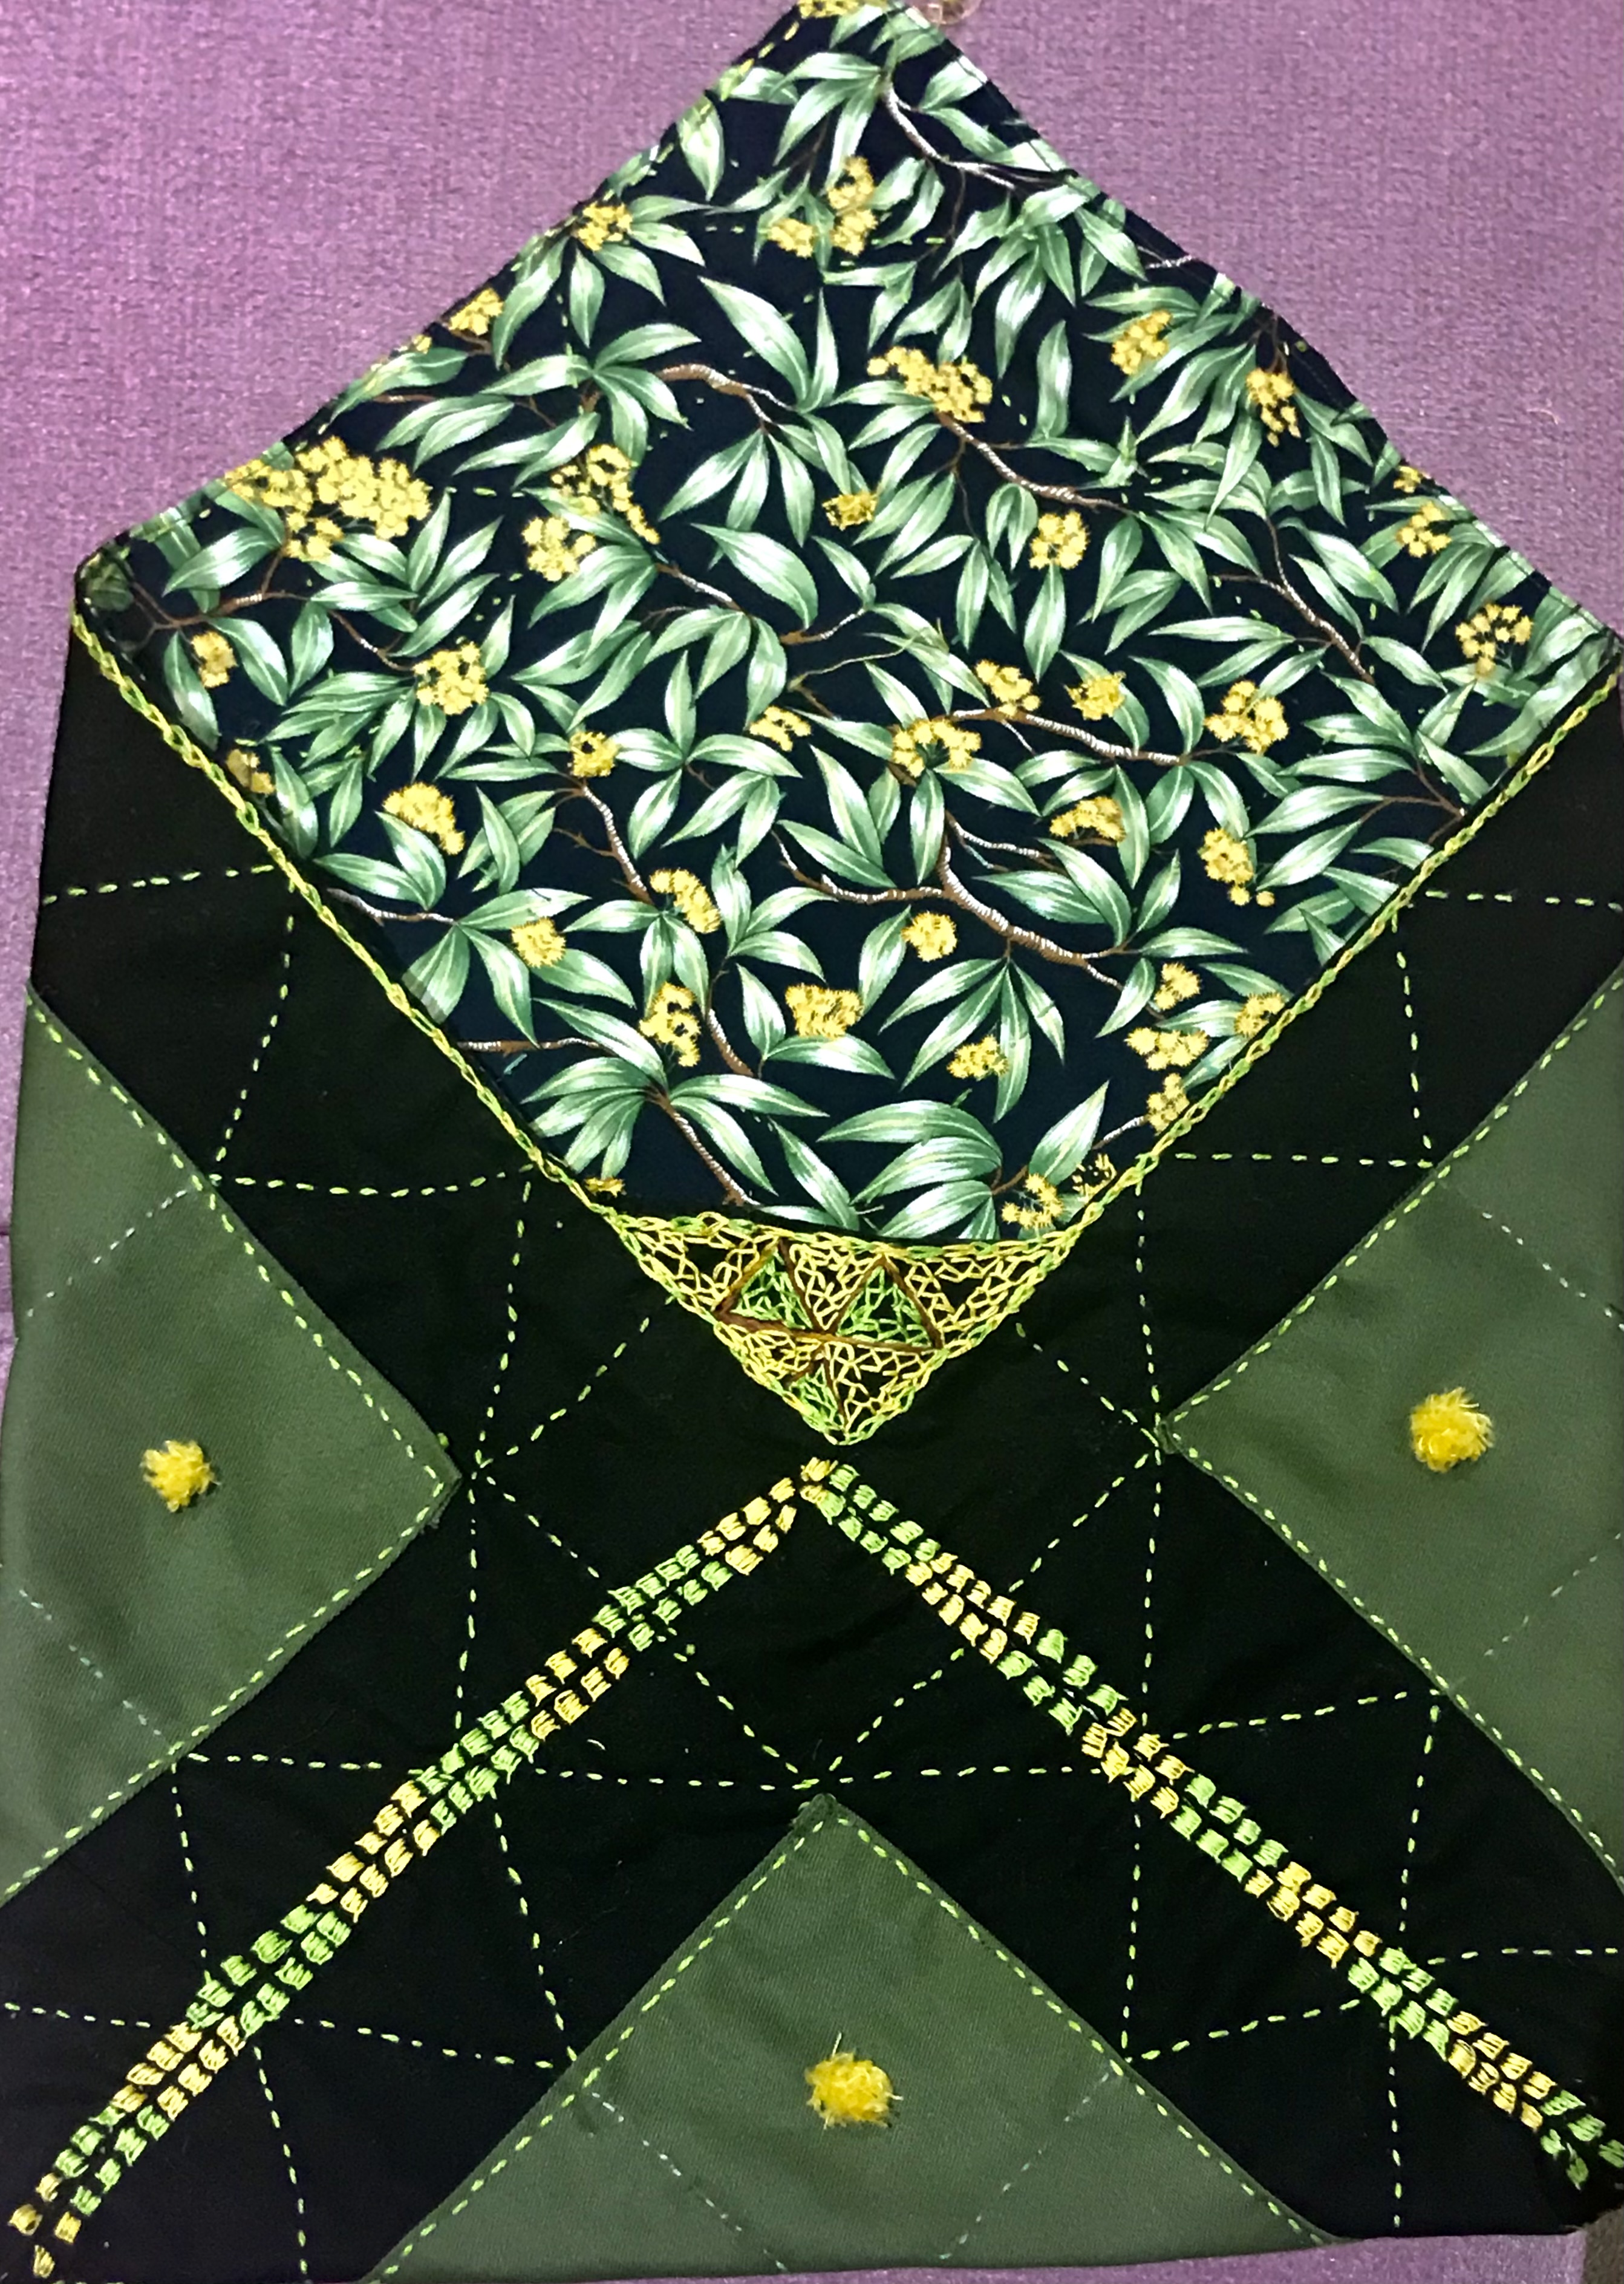
The pouch did, however, join up nicely. and works together as it should.


The final challenge was the button and tassels. The button was easy. I have had this one from Tasmania for quite some time.  Made from a large gum nut, the clever artisan who made it inserted a piece of fine dowel to form a shaft. It was, I think, a gift from my daughter Alison after a trip to Hobart. It was easy to add a tassel and attach it to the point of the fold-over, then to make a loop on the back of the pouch
I gathered a few small gumnuts from a street tree and gilded them with acrylic paint, then tested them as a tassel. I decided against it. I thought they would make the pouch a bit fragile and involve too much glue. The gumnuts are too hard to pierce easily with a needle. 

The pouch needs to be used without fear of damaging part of it.


I opted instead for a tassel from variegated linen thread with one gumnut attached. I was able to pierce the gumnut with the point of a darning needle, then insert a fine needle through the small hole with machine thread attached. Once through, I attached a bead to one end of the the thread and tied it on with several knots, then pulled it into the gumnut as a stopper. The other end of the thread I stitched to the tassel. 

If the gumnut comes off in use not much is lost and the tassel still functions.
This is how it folds over for closure.
It can, of course, be easily used  without the closure.

I'm satisfied with this finish. 


The pouch will be useful, and act as an example to anyone wanting to make one in the future.

Sunday, March 7, 2021

Mend and Make Do - or Repair and Renew

After many months of inactivity on the hexie front, on Tuesday this week I got out my winter quilt and began to applique the remaining 60 or so hexies around the edges. By Friday I realised I would be 3 hexies short, so I created 3 more. That evening I finished appliqueing them around the edge. This (left) is what it looks like. 


This is what it looked like when I originally finished it in April 2014.

In 2018 I realised that the wadding was leaking through the black edge, along the quilting, which was straight horizontal lines. I decided the best way to deal with this was to cover the border with more hexies. The easiest way to do it was to construct the hexies, then applique them to the black border. By March last year I had covered the top edge, one side edge and part of the second side edge before I ran out of hexies. I spent most of last Winter constructing the  77 hexies needed to finish it. Meanwhile I used the quilt on my bed with one and a half sides still not covered.

When the quilt came off my bed at the end of Winter  I had 75 hexies ready to apply - but other projects took priority and it remained waiting reproachfully in a prominent place in the linen cupboard. This week, when I finished the Remembrance Poppy, I bit the bullet and got the quilt out - it is, after all, only a couple of months to the return of Winter.

The appliqueing of the hexies was the easiest of the required tasks. The most tedious part was removing the tacking and the papers before they could be appliqued. Aside from the paper hexigons, that task produced lots and lots of tiny threads that refuse to budge from the hexie, or cling to the black background, or litter the carpet. 

My ort pot was put to good service! 

Fortunately, because these have been folded for ten months, they hold their shape when the tacking and papers are removed
meaning I could place them on the quilt with a couple of pins to get a layout without them coming apart.

While the actual stitching on of the hexies is easy, and a task for doing in front of TV, the manipulation of the fairly heavy quilt, with hexies pinned to it, was more challenging.  It's also not a project to carry around with you!
All in all, I'm pleased to have it finished. Originally, all the black hexies had either a red or a purple hexie in the centre. This is more difficult where I have appliqued the hexies, as the remaining black background is not always perfect hexagon shape. I also need a bit more red fabric and possibly some purple too. I am not worrying about this at the moment. I will look into it and count the numbers needed once I have the quilt on the bed for Winter. That might be an improvement for next year.


Tuesday, March 2, 2021

Remembrance Poppies

I'm beginning somewhere near the end, because the photo shows some up flaws, but still, I think, looks good.


I bought the kit for this project from Inspirations 109. My first problem was the colour of the poppy. I should have picked up from the magazine photo that there was a great deal of orange in the colour of the poppy. When the kit arrived, both the fabric and the thread were decidedly orange.  As the article points out, the red of remembrance poppies represents the blood of the fallen. I couldn't live with orange. Just before I set out to buy replacement thread, I checked my stash and found an excellent red silk that would do the job. It is  Soie Cristale, by Caron, part, I think, of a monthly thread pack that Katherine gave me for my birthday a couple of years ago. It is lovely to work with and the perfect colour.

I was not so worried about the fabric, as it was to be covered with stitching. As a background on which to work red it was OK.  I also wanted to make two poppies. There was enough fabric to do this if I placed the petals carefully.


I read the instructions several times but couldn't find anything telling me how many strands of thread to use. Eventually I experimented and settled for two strands for couching and three for the long and short fill. Eventually I found the instruction, right at the very beginning of the article, in the "Before you begin" section! I should have used 1 strand throughout, but by then I had finished the embroidery. I must be getting old!
The leaves were a somewhat tricky shape to cover, and the small hoop meant holding it in my hand, never good for RSI,  but the fabric was good to work with and it wasn't a lengthy task.
The centre is a bead, covered with thread. I was still working with several strands of silk when I did the first one and getting the needle through was tricky. By the time I did the second one, I had found the 1 strand instruction. This made it easier, but gave problems with coverage. There is also a tiny piece of felt, glued over the top of the bead and stitched down. Even more tricky.

The first one is a bit wonky. The second one is better.


Cutting out and assembling took time and patience, but worked.

As you can tell from these photos, the edges of the petals show white threads. This is because the background fabric has quite a lot of white in it.  The green background thread is dyed all the way through, so doesn't present the same problem.  There was no way of avoiding the white threads in the petals as I cut away the excess fabric against the wires, no matter how closely I cut.    

The pin on the back is mounted on felt, pin stitched to help hold the whole thing in place ( I can't get the colour right on this photo - pink=red!)
I resolved the white thread issue in the end with the help of a Porcelain felt pen, just gently touching up the white threads around the edge of the petals.

This is the improvement from the photo with which I began this post. 

There have been quite a few trials in making these, but I think they are fit for purpose - a lapel pin for wearing on Anzac Day or Remembrance Day. One for me, one as a gift.