Search This Blog

Showing posts with label Sashiko. Show all posts

Monday, August 25, 2025

A Sashiko Tablecloth Finish.


For my birthday in 2023 a friend worked this table runner, which I loved. It was part of a suite of Sashiko designs, called Galaxy Dreaming, from Indigo Niche in Queensland. There were two square panels in addition to the runner and I thought it would be good to work the square panels as placemats. 
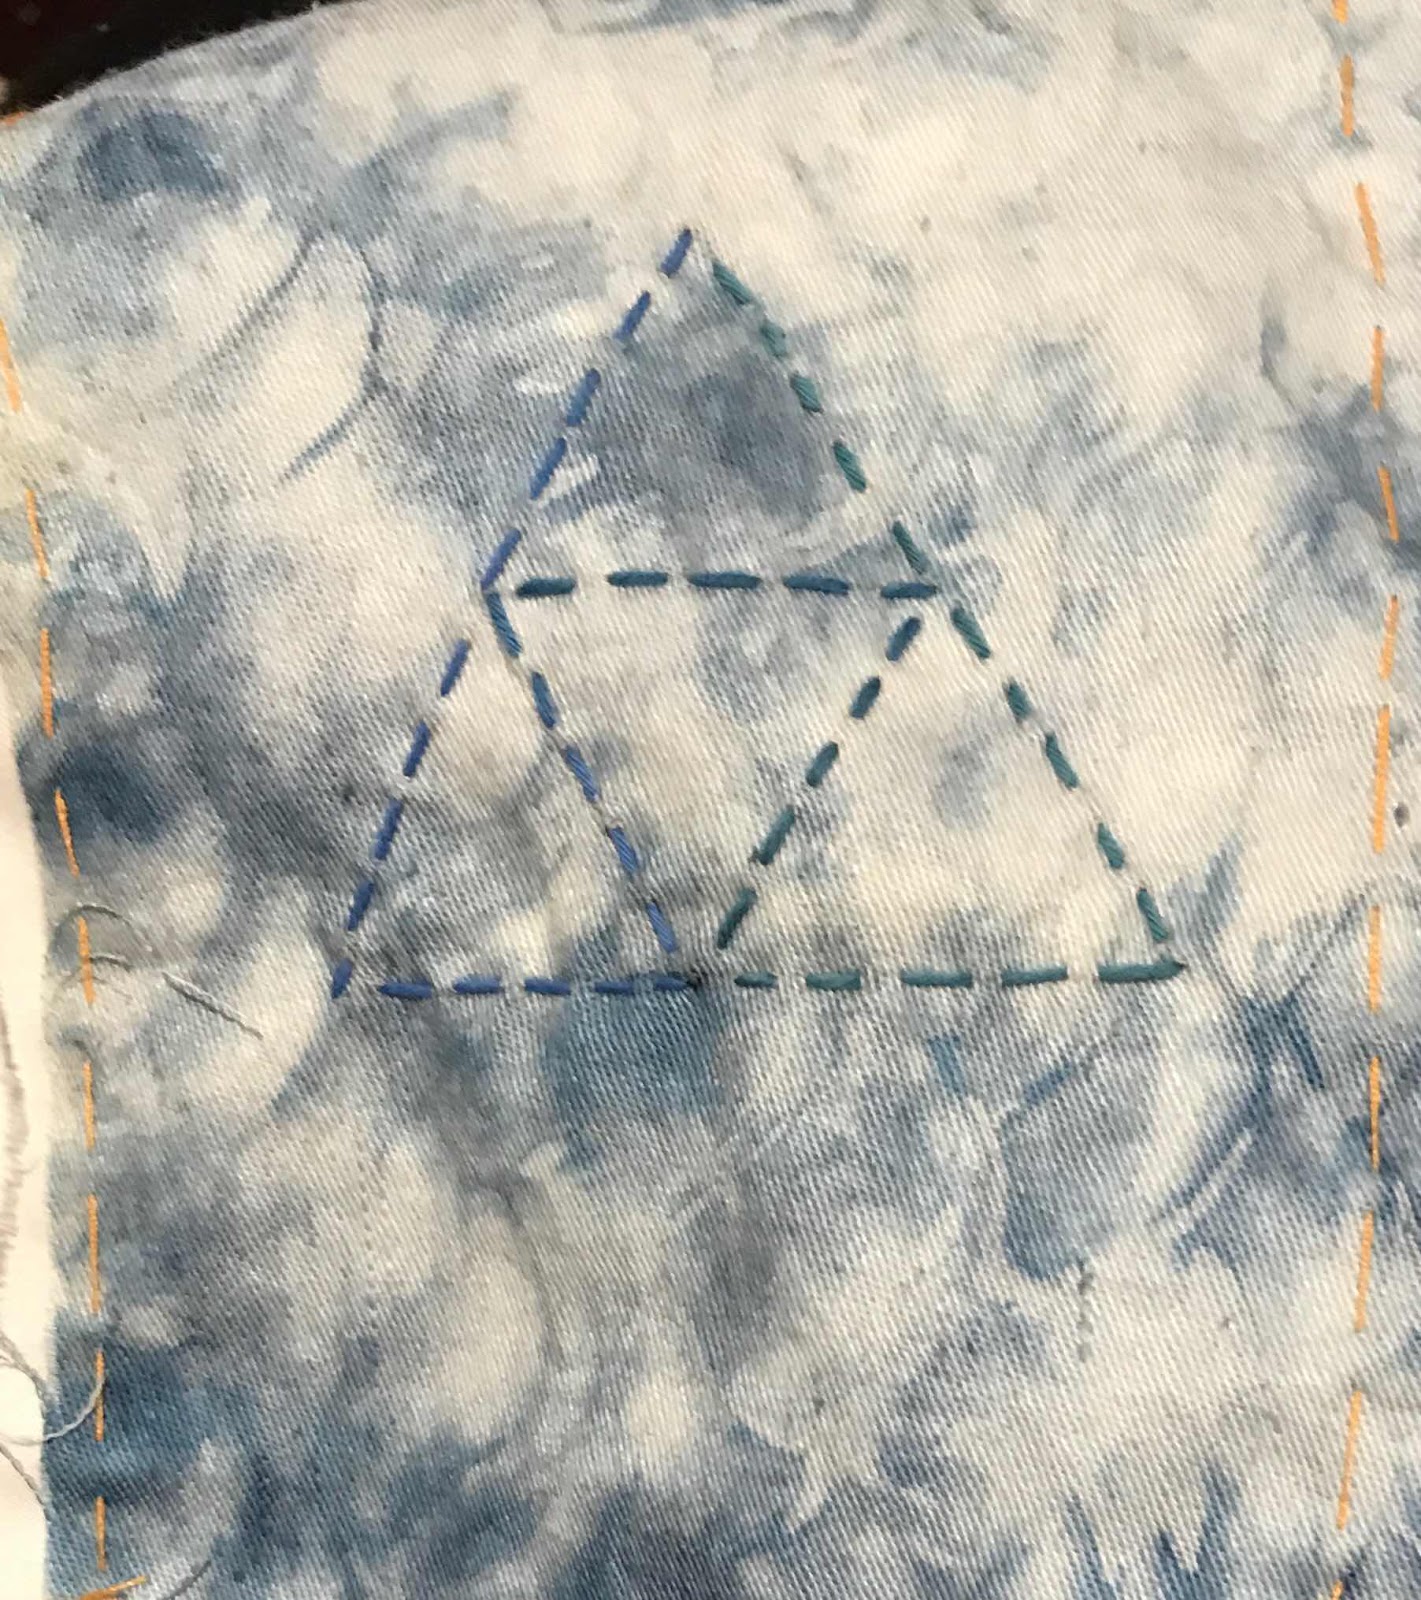
My friend got on board and made me two for my 2024 birthday, and I bought another six panels to make a full set. 
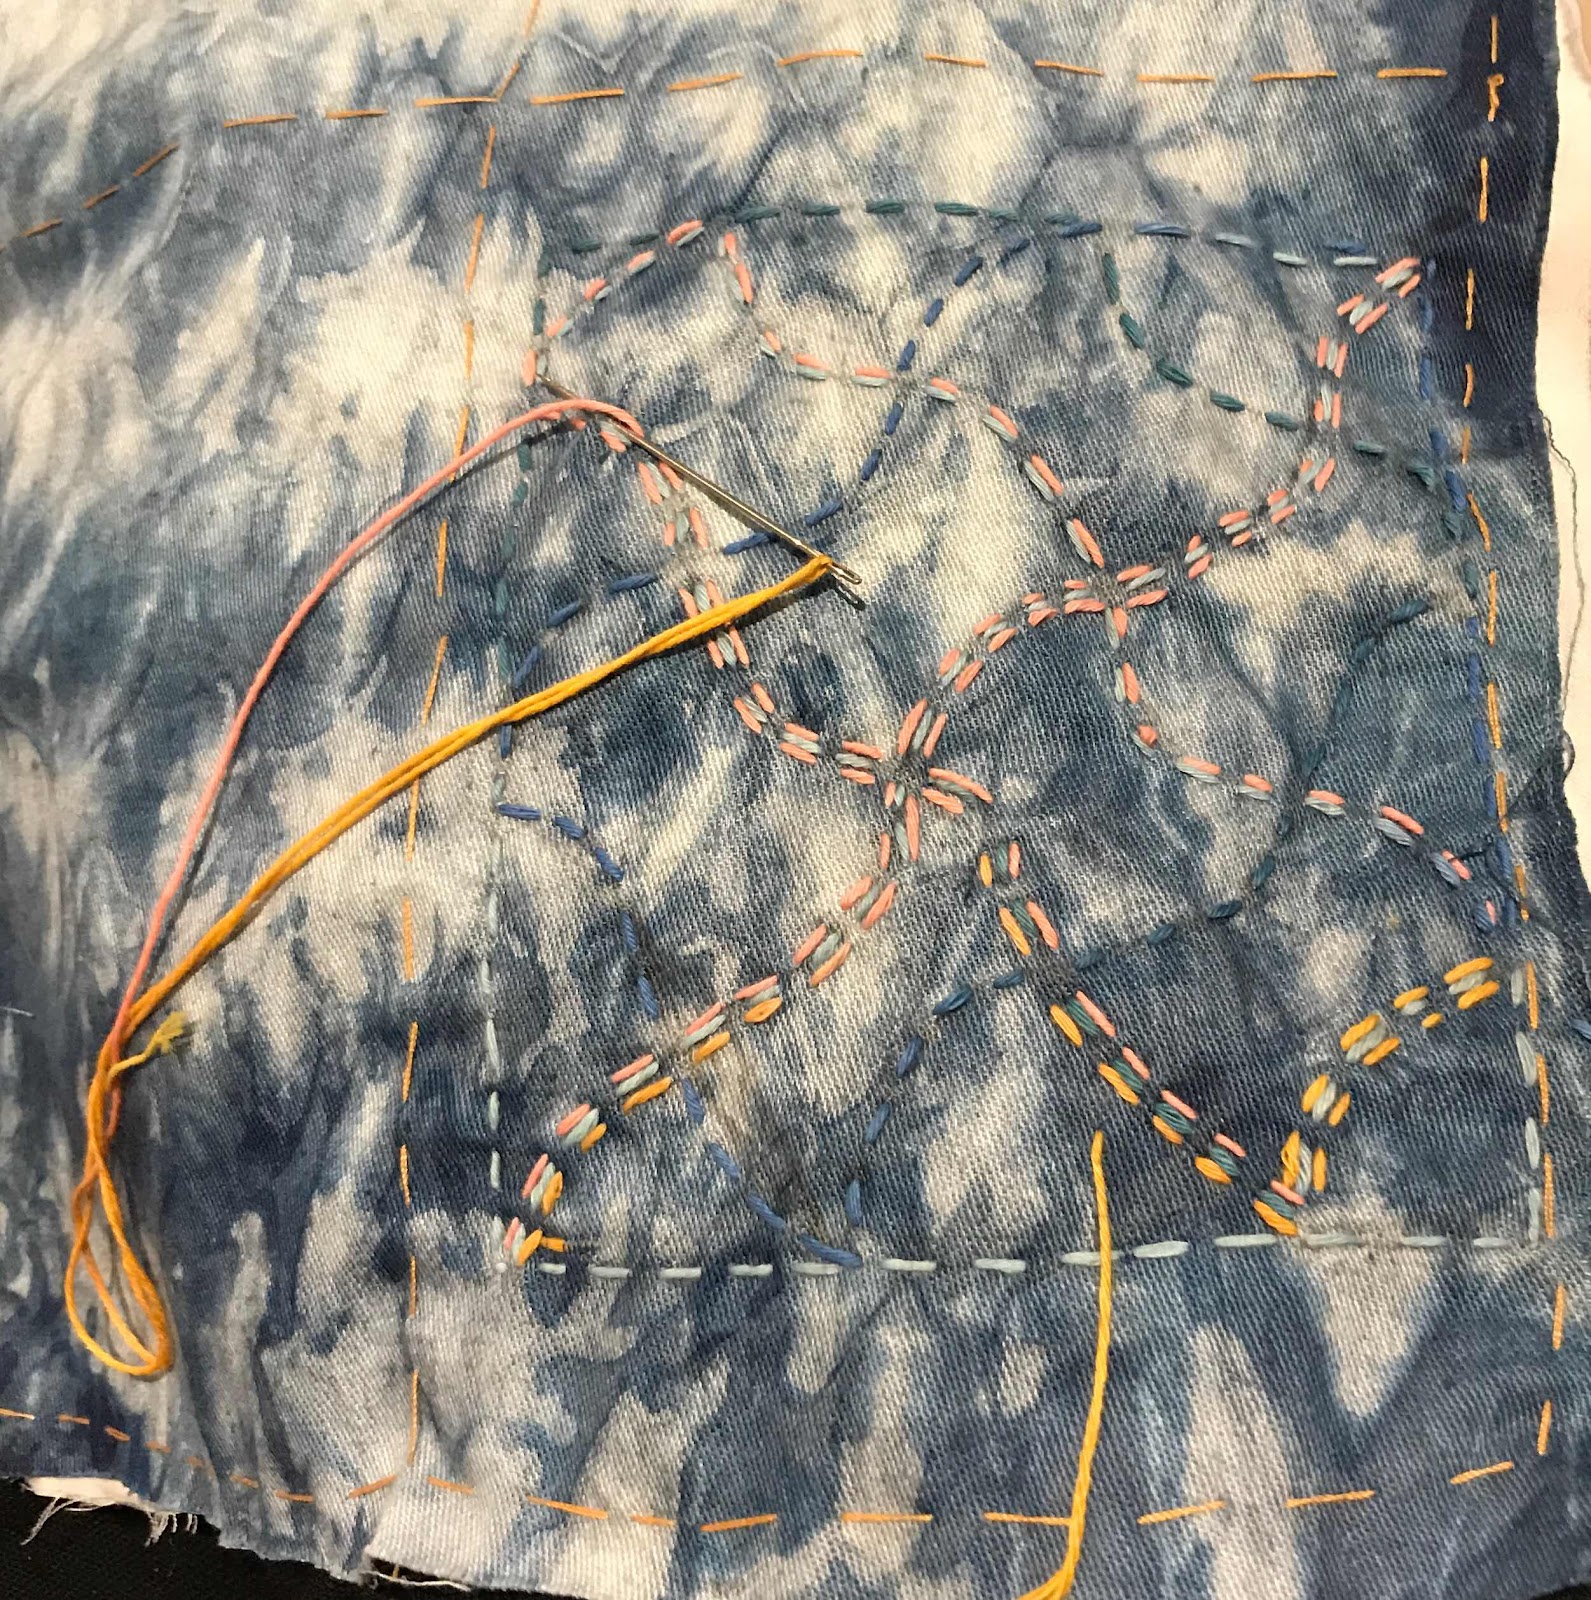
The designs are beautiful and a joy to work. It became obvious the squares were too large for placemats so I decided to join them into a tablecloth, and bought another runner. 


I have been working these over the last two years between other projects. They are ideal ”grab and go” projects. All you need is a panel, one hank of thread, a Sashiko needle and scissors, ready in a pouch. Once I got to the second last panel I made an effort to push on and finish.
Until then, I had assumed I could arrange the panels either side of the two runners. When I did so, it wasn’t straightforward.


I tried several configurations on my extended table, deciding in the end to go with a variation of my original idea.

To make it work, I needed to buy some matching indigo fabric to add a border - and to fill the gap in the centre.It took a while to purchase the fabric.
There is only one shop in Adelaide with a range of indigo fabrics for Sashiko and I had to wait for their latest shipment to arrive to get a close match. The colour variations in indigo are astounding. The shop owner tells me she has 1000 bolts of blue - all different.  Only one bolt worked. It is a linen/cotton mix and the panels are cotton. The mix will, I hope, stand the test of time.
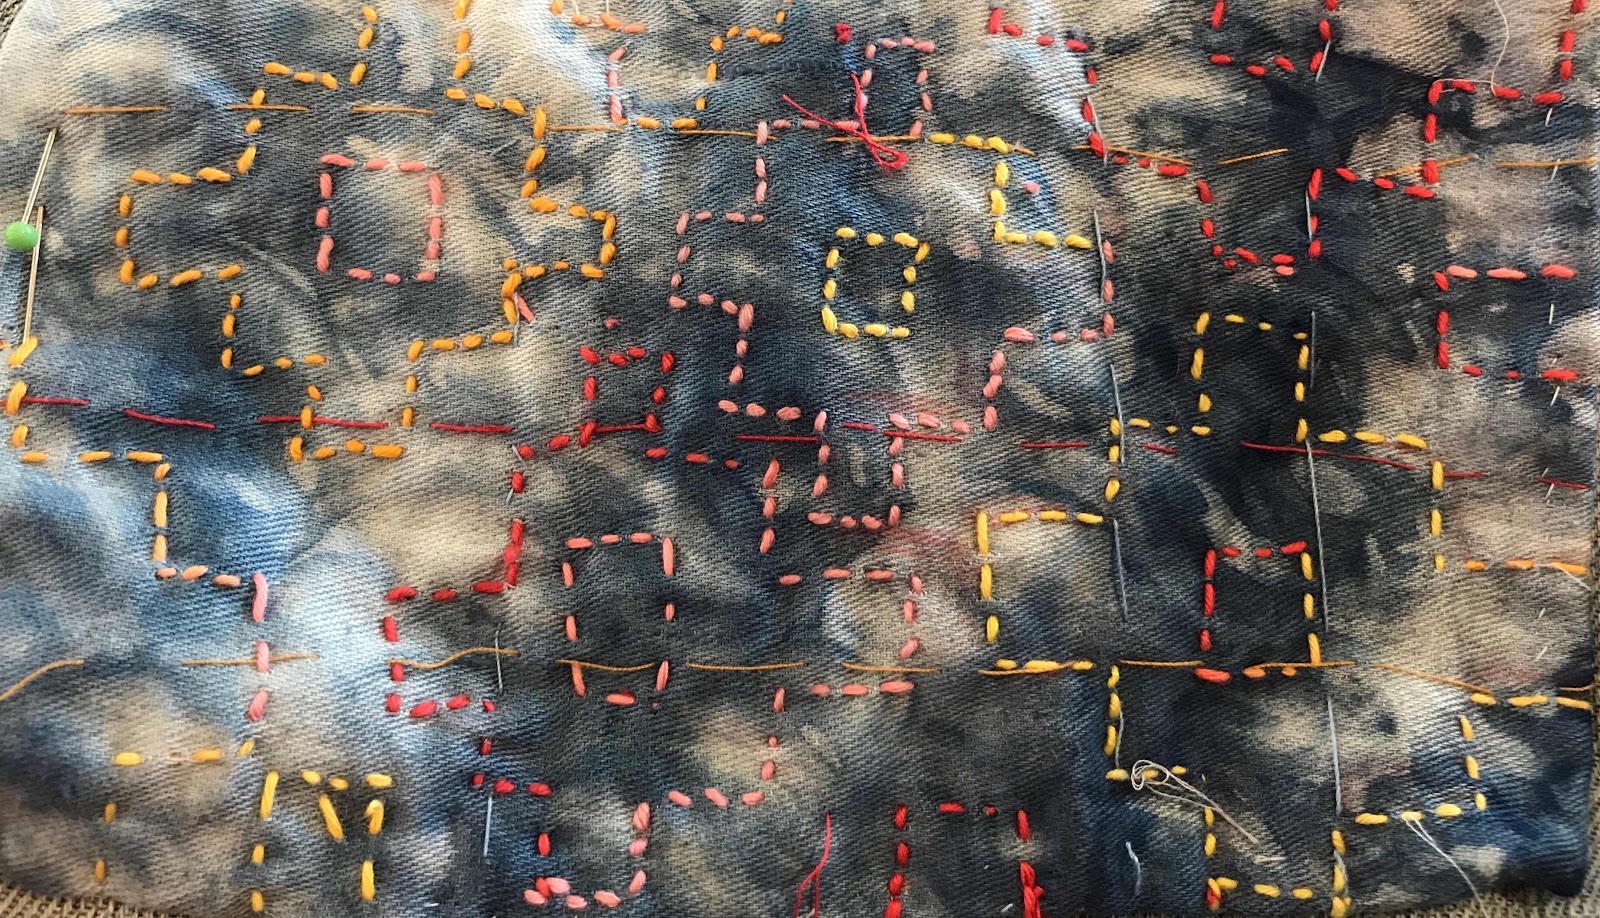
My quilting friends would be unimpressed with my construction techniques, but I did measure carefully, and use a chalk marker to get straight lines. I had hand- hemmed each panel to the marked border, but they were not identical in size; nearly, but not quite.  I accommodated the difference in the overlap as I stitched it together by machine.
I considered taking it to a laundry for pressing, but settled for spreading beach towels on the table and pressing in situ. That worked. I then tried the tablecloth out for a family dinner. It worked very well, generating discussion.
Time then to wash it. I put in into the washing machine on a short, cool cycle on a day with no rain forecast and a lot of wind. It came off the line bright, clean, crisp and robust, the fabric plump and consistent. 

I decided ironing would achieve little, folded it into eighths and rolled it for storage. 
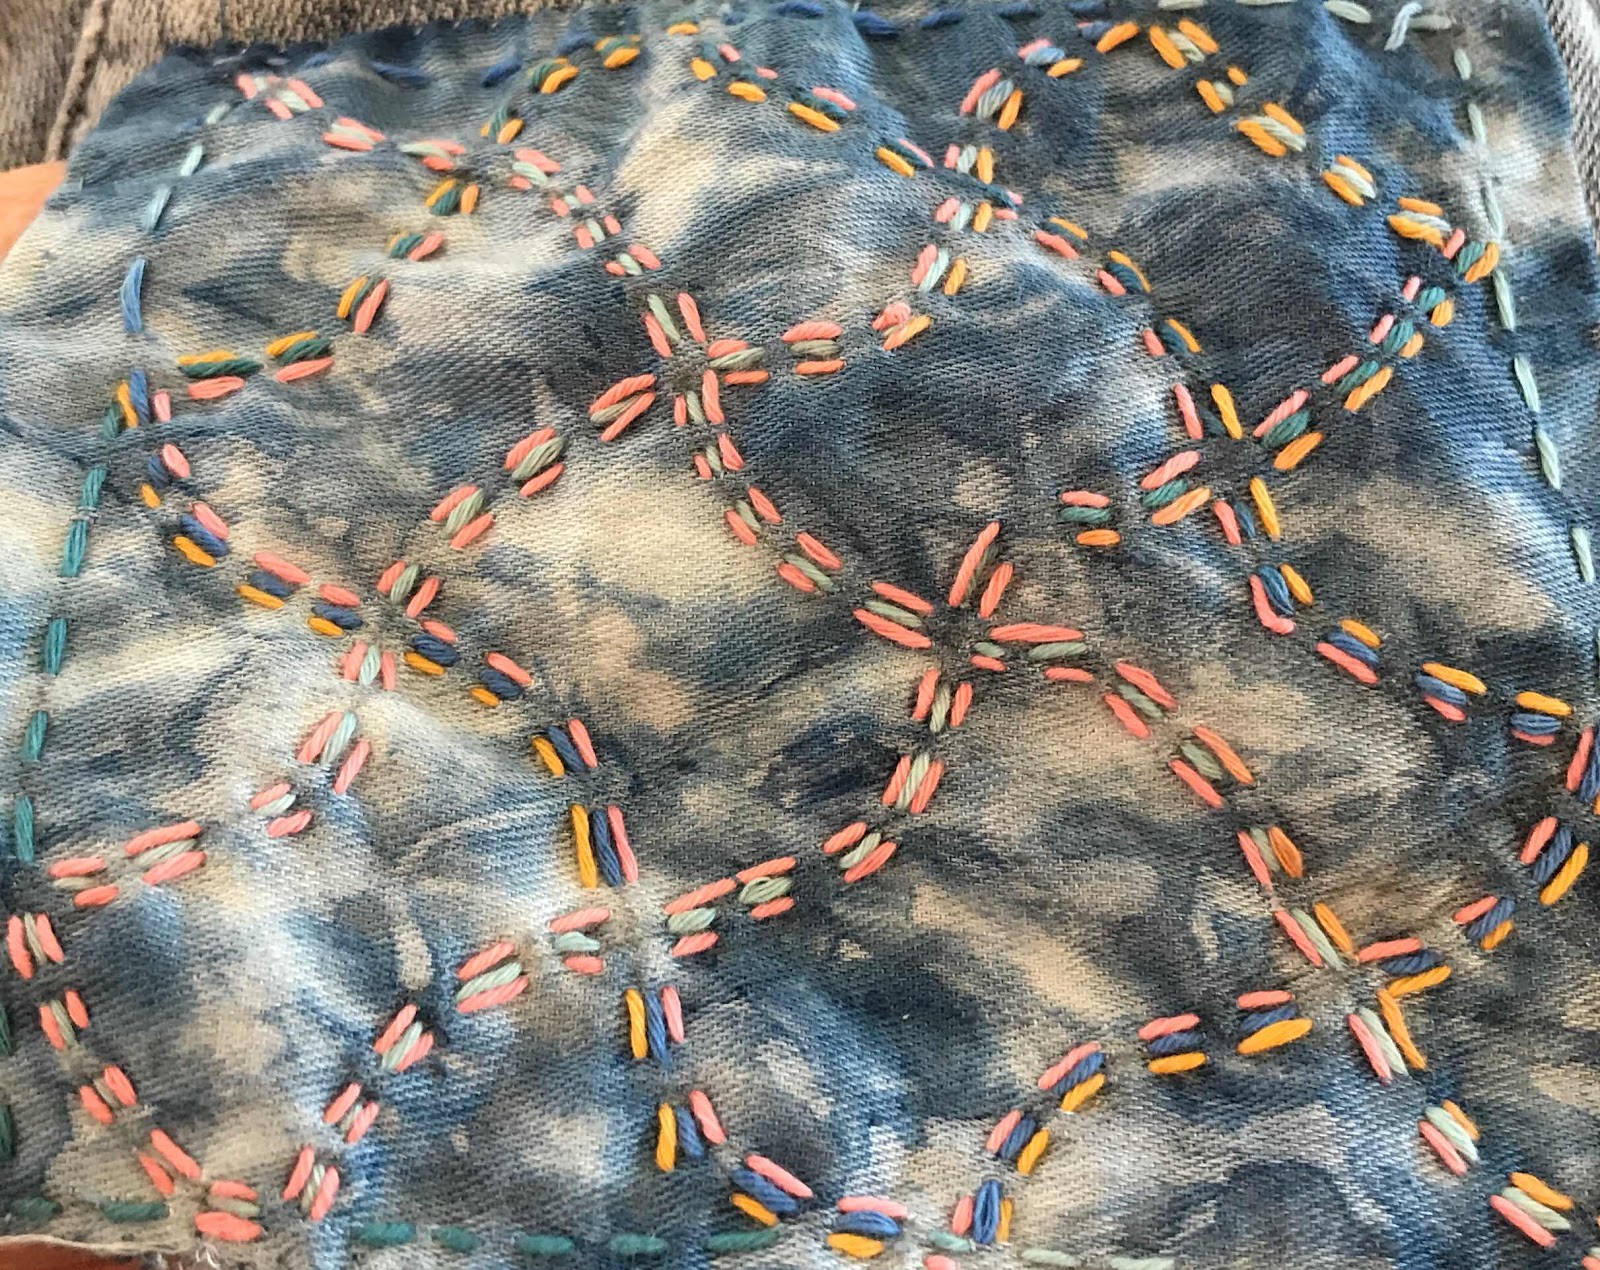
In spite of the simplicity of Sashiko, this has proved complex. In the final stages I began to think about how design traditions are melded. These designs were inspired by Aboriginal stories and translated into a Japanese stitching tradition. Embroidery, like other crafts and art forms, has evolved in this way for millennia. I have spent a lot of time exploring such transitions in Viking, Anglo-Saxon, Celtic, Mexican, Ukrainian, Indian - and several other cultures. This tablecloth confronted me with a contemporary cultural transition. 
I got in touch with Sue Howie, the designer of the panels. She has been generous with information about her design processes. There is also  a lot of useful information on the Sashiko Australia website.
I am planning to offer the tablecloth as a trigger for discussion in one of our World Embroidery Study Group meetings next year. 
In the meantime, I have a tablecloth to enjoy.

Thursday, March 6, 2025

Sashiko bag construction

By now I should be able to construct a bag on auto-pilot but there were a couple of tricky bits to this one. While there were cutting diagrams, there were no instructions for insetting the magnet closure, other than  to stitch it on by hand.

I had misplaced the magnet supplied with the kit so ordered more from Spotlight.When they arrived I cut the fabric, added the pocket to the lining and stitched the side-seams on the bag and lining. I then played around trying to work out how to place the magnets between the lining and the outer bag, before putting these together. I got them in the right position, but the wrong way around. .


I had attached the interfacing to the fabric before embroidering it, in contravention of the instructions. I think this was a good decision. It improved the embroidery and simplified construction. In the end I removed the magnets, pinned the lining in place, then tried again: successful.

I thought a lot about the strap. A strong 65cm woven webbing strap was provided. I considered inserting a side release buckle so it is adjustable. I decided it was overkill and proceeded to add reinforcement to the attachment point and insert the strap. The result still seemed rather long, so I found a buckle I had recycled from a shoe some 40 years ago and worked out a way add it to the handle so it creates a loop, which can be secured by a button on the side of the bag.


This seems to have worked. The strap now has two lengths. If more variety is needed I can add more button loops.

I also decided against a gusset at the base of the bag. It seems to hang well without it, and shows the fabric to advantage.

This has been an adventure - a step outside my norm. I really like the result. I did a lot of adapting, but I like that it demanded that. I'm not sure how it will be put to use, but I''m sure it will be.


Tuesday, March 4, 2025

SashikoTote Embroidery

This kit was a present for my birthday in January, and I am trying to stay on top of kits as I get them, rather than adding to my much-too-large stash, so once I finished the fourth Evil Eye Mandala, I got to work on this one.

The kit consists on a single piece of Shima fabric, a piece of interfacing exactly the same size, lining fabric a little larger to allow for a pocket, thread and a woven strap. Instructions are brief, mostly amounting to suggestions. Suits me.

My first problem was finding my sashiko needles. I had one I was using on my tablecloth project, and  I knew I had a packet somewhere..... Eventually I gave in and bought some more. Create in Stitch was waiting on a shipment but Riverlea Quilts had a supply. A couple of days later I realised I had a good set of sizes in the harp I had made with Jenny Aiden Christie back in 2019! They would probably benefit from use!

In the meantime, I had begun rows of running stitch straight along one edge - an easy feat to accomplish while talking or being Desk Hostess at the Guild.
Circles were a bit more challenging. I dug out a circle-maker (far left) that you anchor in the centre with a pin, then insert a chalk pencil into the relevant hole and rotate, but the chalk kept breaking. The colour wheel proved more useful.  I used it to make three concentric circles using the outer edge and the top and bottom of the cut-out sections, then drew circles in between freehand.

I varied them, single row, 

double,
triple, and overlapping.


I have now added some more straight lines and finished the embroidery. Construction should be relatively straightforward, but I mislaid the magnet closure and am awaiting a replacement. I'm also thinking of adding an adjustment buckle in the woven strap.


      Rather than wait for these I will post this and add the construction story later.

Thursday, February 25, 2021

Four months on I resume with a catch up

 I last posted to this blog in October, when I summarised the embroidery I had completed over the previous three months.  This had been reported in a haphazard way in the daily blog posts I undertook in https://jillian-england2020.blogspot.com/ which I began as a travel blog during my visit to the UK in March 2020 but continued when I returned to lock-down and then Covid restrictions. Friends encouraged me to keep that blog going as a record of Covid experience in Adelaide, Australia. I kept it going on a daily basis for a full year. As of 25 February I intend to keep it going on a weekly basis until our borders open up - probably the end of this year.

The weekly posts will summarise what I've been doing. This will include embroidery, but without a lot of detail. I'm planning therefore, to return to posting detail about my embroidery adventures here on Jillian-AlwaysStitching.

This post is a quick summary of completed embroidery projects since my post here in October last year.

1. Crewel Feathers

This series of feathers is from a cushion by The Crewel Work Company. I have worked the feathers as separate additions to my Crewel chair. Rather than ostrich feathers, which the design reflects historically, I worked them in the colours of native Australian birds that I see regularly.


 2. Inuit embroidery
This odd-looking piece is a result of a World Embroidery Study Group meeting to look at Inuit embroidery.  We used some templates from a book on the subject to try out common stitches and figures (mostly worked on hide). This is a hunter and bear (yes, others have commented it looks like a meerkat!)


We plan to put these together as an entry into the Guild Exhibition next month.
3. Shawl
This is the shawl I was working on when I last posted here. It was finished in time for my daughter to wear it to a wedding in November.
4. I worked a number of crewel pieces from The Crewel Work Company   

  and added them to the chair, along with the feathers discussed above.

This leaves one space on the back of the chair for the Aesop Fables Frame which I am working on at the moment. 
.
 5. Before Christmas I worked a couple of Sashiko panels and turned them into a pouch and a zip bag respectively.

6. This hussif was the product of a Counted Sashiko  class with Carol Mullan at the Guild in November.
7.  Embroidered tote bags - four of these are Nicola Jarvis birds, embroidered on linen and appliqued on to bags I made from fabric from Ink and Spindle. The fifth (lower right) is an Anna Scott design from Inspirations Magazine, embroidered directly on to the bag. These are entries in the Guild exhibition and will be mostly gifts when the exhibition is over. 
8.I have just finished working this quote from Alan Garner's The Owl Service.

We are now more or less caught up. I will try to post here more regularly from now on.  

Sunday, July 7, 2019

Sashiko Workshop


I have a number of printed Sashiko cloths in my stash, so when Barbara Mullan offered a Sashiko workshop at the Guild, I jumped at the chance to enrol, even changing tickets I had for a Voces8 concert at Ukaria in order to go!

I didn't regret my decision.

An enthusiastic and eager group of us gathered on the day. Barbara had thoughtfully reorganised the tables so we could see and hear each other.

I had read my preparation instructions carefully and assembled a bag with the items. The day before the class I bought myself the last item - a fat quarter of blue fabric. My mind not being what it once was, I did not immediately put the fat quarter into the bag I had prepared, so found myself at the class without my fabric! 
Barbara, of course, came to the rescue, with some fabric she had 
indigo-dyed some time ago at a class at Marden TAFE. It was lovely, and I only used the minimum I needed.
.
Barbara had prepared templates of some Sashiko patterns. The suggestion was that we choose 4 of these and work them on four squares of fabric, backed with cotton.

I had my cotton, so tacked it on to my four squares (well, rectangles, anyway) and began with a very simple triangle.


We learned the conventions (rules?) of evenness of stitch, even numbers of stitches and dealing with corners. All these were new to me and invaluable in doing anything with the printed pieces I have.

I tried to move from simple to more complex. I had variegated Sashiko thread in blues and yellow/orange/red as well as white. I had thought to use the blue, but it didn't show up well on Barbara's lovely hand-dyed cloth so I went around the original blue, 


which worked, I thought, quite well. 


I then switched entirely to yellow/orange/red for the last two pieces.


We learned too, how to finish the edges off with slip-stitch so that the backing did not show. Miss Monk, who first taught me slip stitch, would not be happy with my work here. I had, however, by now the germ of an idea of what I would do with these pieces, and it didn't require invisible slip stitch!


I dug out a bag I had made ages ago (can it really have been 2011? Afraid so!) from an old pair of jeans and applied the patches.


From my fabric stash I retrieved a shirt of Jim's that I had kept because I knew he would have wanted to be part of future projects.

The two fronts were a perfect shape for cutting a lining for this odd shaped bag and the colour was just right.

The original idea stopped here - but the bag cried out for more - so off I went, using, after an initial experiment, the blue thread.


I kept going


and going.


I attempted to cover the whole bag with running stitch, but beyond this point the bag twisted out of shape, so I stopped. I added a button to the pocket where one was missing.


I'm not sure how and where this bag will end up being used, but I've had a lot of fun and learning making it.