
 I've been working on another of Alison Snepp's Turkmen Pouch (Inspirations 69, 2011). Back then I made one, and yes, the green fabric is the same. I've made many variations on this. The shape is versatile. I cut this out a couple of years ago, when a friend wanted to make one. She finished hers long ago and my fabric stayed in the drawer, cut out but not assembled. The friend now has a craft group engaged in making them, and got me involved.

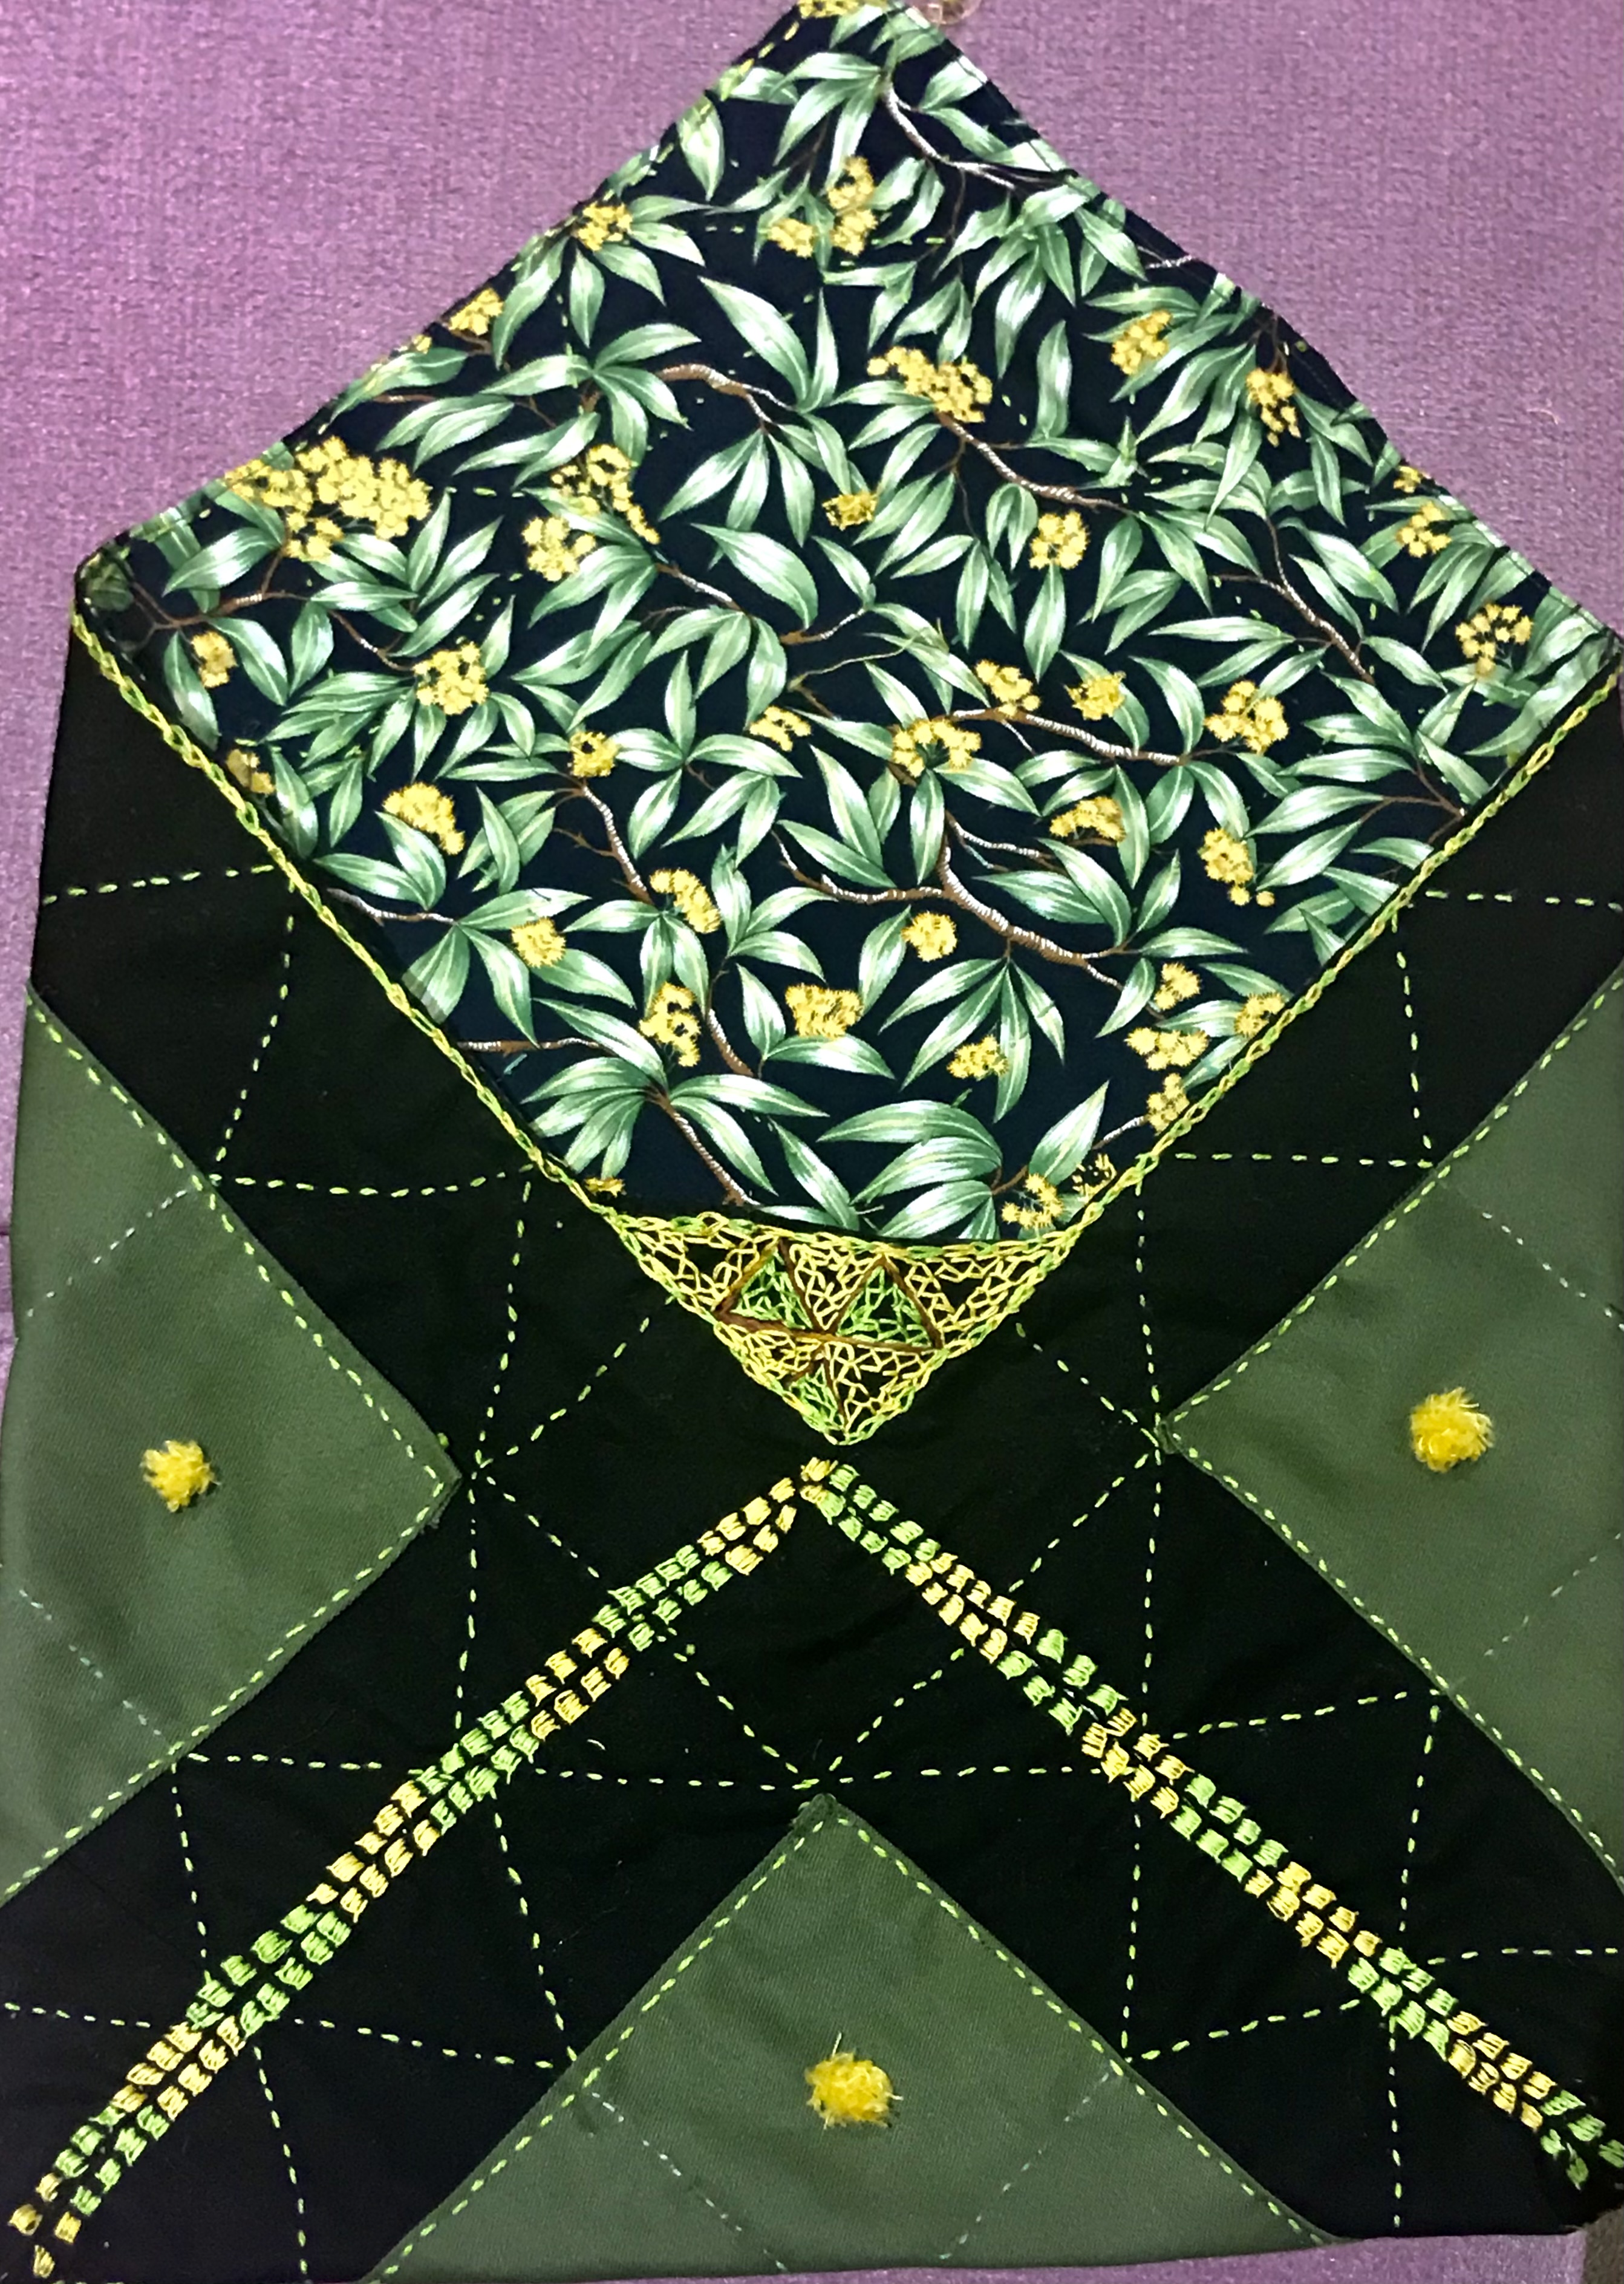
I had to remind myself of the processes for putting it together. Measuring - never my strong point - is crucial, because the design depends on a more-or-less perfect square. Given the dominance of the wattle lining fabric, I decided to limit myself to threads in the colours in that print - greens, yellow and a little bit of brown. There was already enough black!


The design calls for button-hole pinwheels in the squares of the grid. I don't much like stitching them and I decided it would be fitting to use Ghiordes knots to make little wattle blooms instead.I fluffed them up using my faithful boo-boo stick.
I liked the result.


The edges are decorated simply, the piece folded and the joins ladder stitched. While this was easy stitching, the black fabric was a bit denser than is ideal for hand-stitching. I realised that the next steps were not going to be easy.

I tried several different needles and threads, but stitching along the edge was difficult through 4 layers of fabric, two of them dense. While the colours work, and it has an appropriate folksy look, the stitches are far from smooth and even.

Similarly, the triangular insert with it's turkmen stitch, gives the right effect, but isn't accurate.


The pouch did, however, join up nicely. and works together as it should.

The final challenge was the button and tassels. The button was easy. I have had this one from Tasmania for quite some time. Made from a large gum nut, the clever artisan who made it inserted a piece of fine dowel to form a shaft. It was, I think, a gift from my daughter Alison after a trip to Hobart. It was easy to add a tassel and attach it to the point of the fold-over, then to make a loop on the back of the pouch


 I gathered a few small gumnuts from a street tree and gilded them with acrylic paint, then tested them as a tassel. I decided against it. I thought they would make the pouch a bit fragile and involve too much glue. The gumnuts are too hard to pierce easily with a needle.
The pouch needs to be used without fear of damaging part of it.

I opted instead for a tassel from variegated linen thread with one gumnut attached. I was able to pierce the gumnut with the point of a darning needle, then insert a fine needle through the small hole with machine thread attached. Once through, I attached a bead to one end of the the thread and tied it on with several knots, then pulled it into the gumnut as a stopper. The other end of the thread I stitched to the tassel.
If the gumnut comes off in use not much is lost and the tassel still functions.


This is how it folds over for closure.

It can, of course, be easily used without the closure.
I'm satisfied with this finish.
The pouch will be useful, and act as an example to anyone wanting to make one in the future.

 I've been working on another of Alison Snepp's Turkmen Pouch (Inspirations 69, 2011). Back then I made one, and yes, the green fabric is the same. I've made many variations on this. The shape is versatile. I cut this out a couple of years ago, when a friend wanted to make one. She finished hers long ago and my fabric stayed in the drawer, cut out but not assembled. The friend now has a craft group engaged in making them, and got me involved.


 The pouch did, however, join up nicely. and works together as it should.


 I gathered a few small gumnuts from a street tree and gilded them with acrylic paint, then tested them as a tassel. I decided against it. I thought they would make the pouch a bit fragile and involve too much glue. The gumnuts are too hard to pierce easily with a needle.

 This is how it folds over for closure.
2 comments:
What an interesting piece! I so like the fluffy wattle blooms, the lining fabric and the gumnut addition to the tassels.
Many thanks Lyn. It was a lot of fun. I’m glad you like my adaptations!
Post a Comment