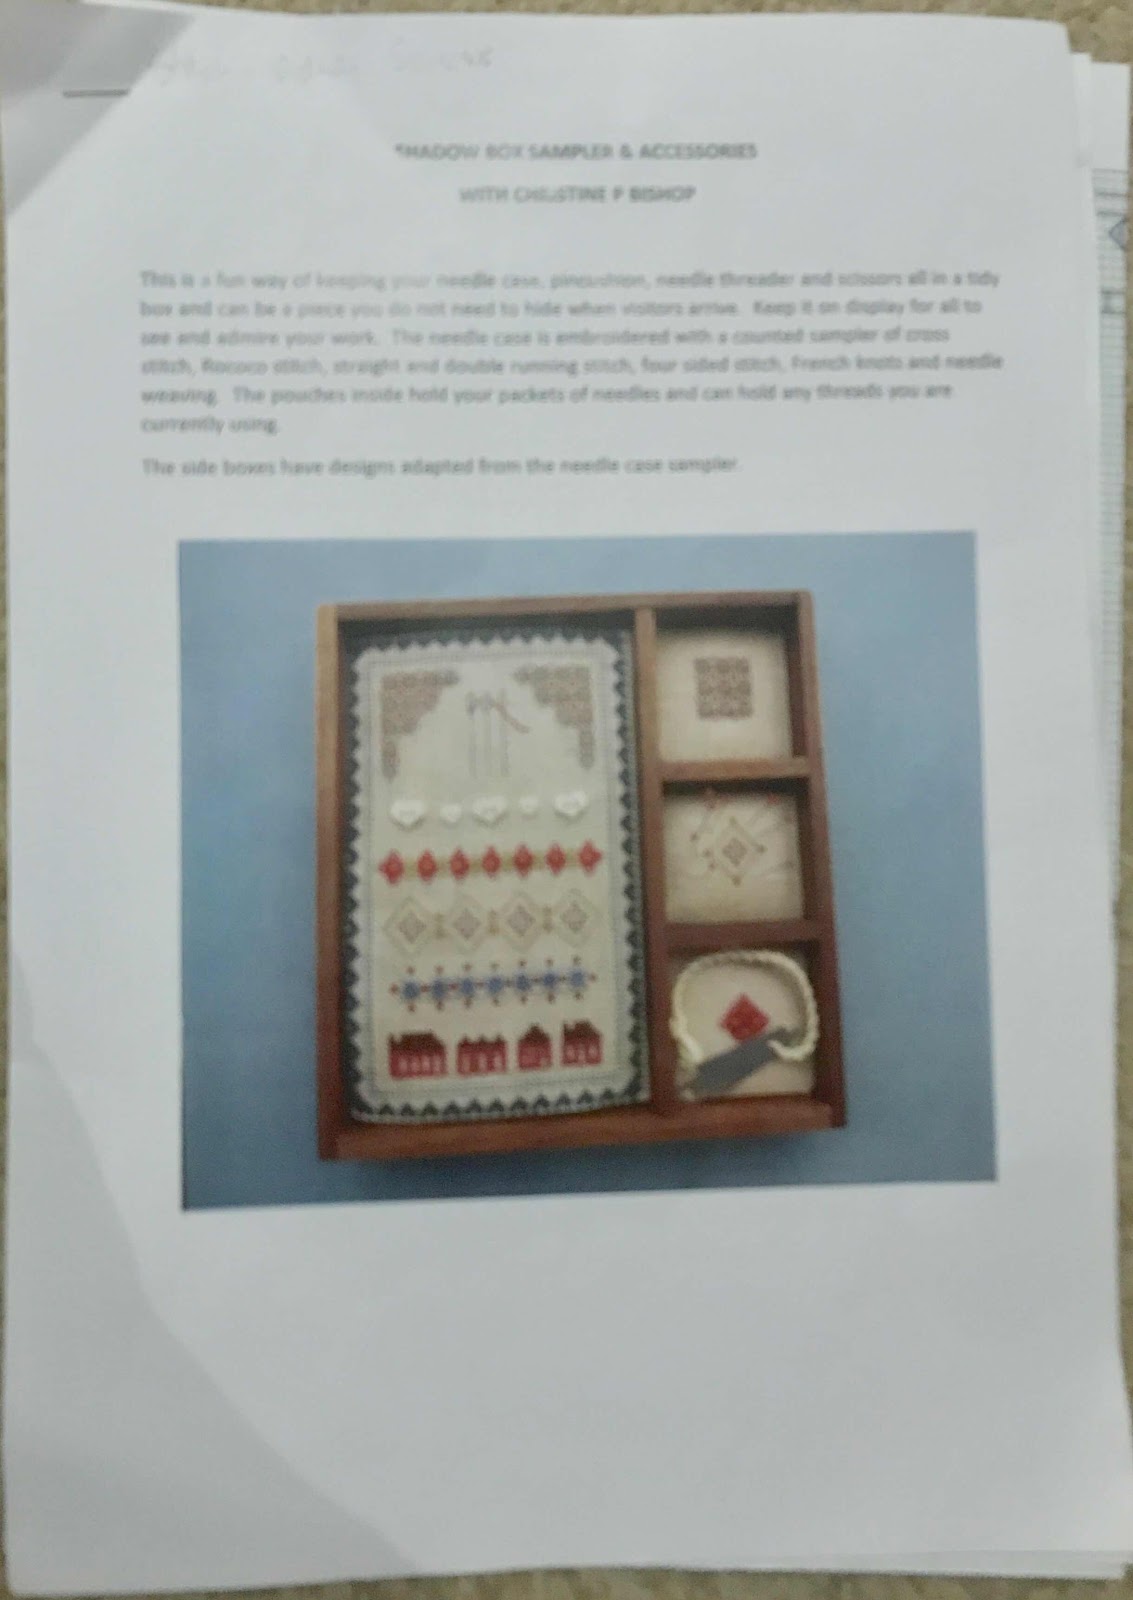
 Late last year the Embroiderers' Guild of SA offered a two day class with Christine Bishop to populate a Shadow Box with a needle-case, scissors, pincushion and needle threader. I wasn't convinced I needed another box in my workspace, but I did like the box, the embroidery and concept. I could also see that something solid to hold embroidery necessities might mean they were always in the same place - and there's sense in that. I notice Christine is teaching this project at Beating Around the Bush this year.
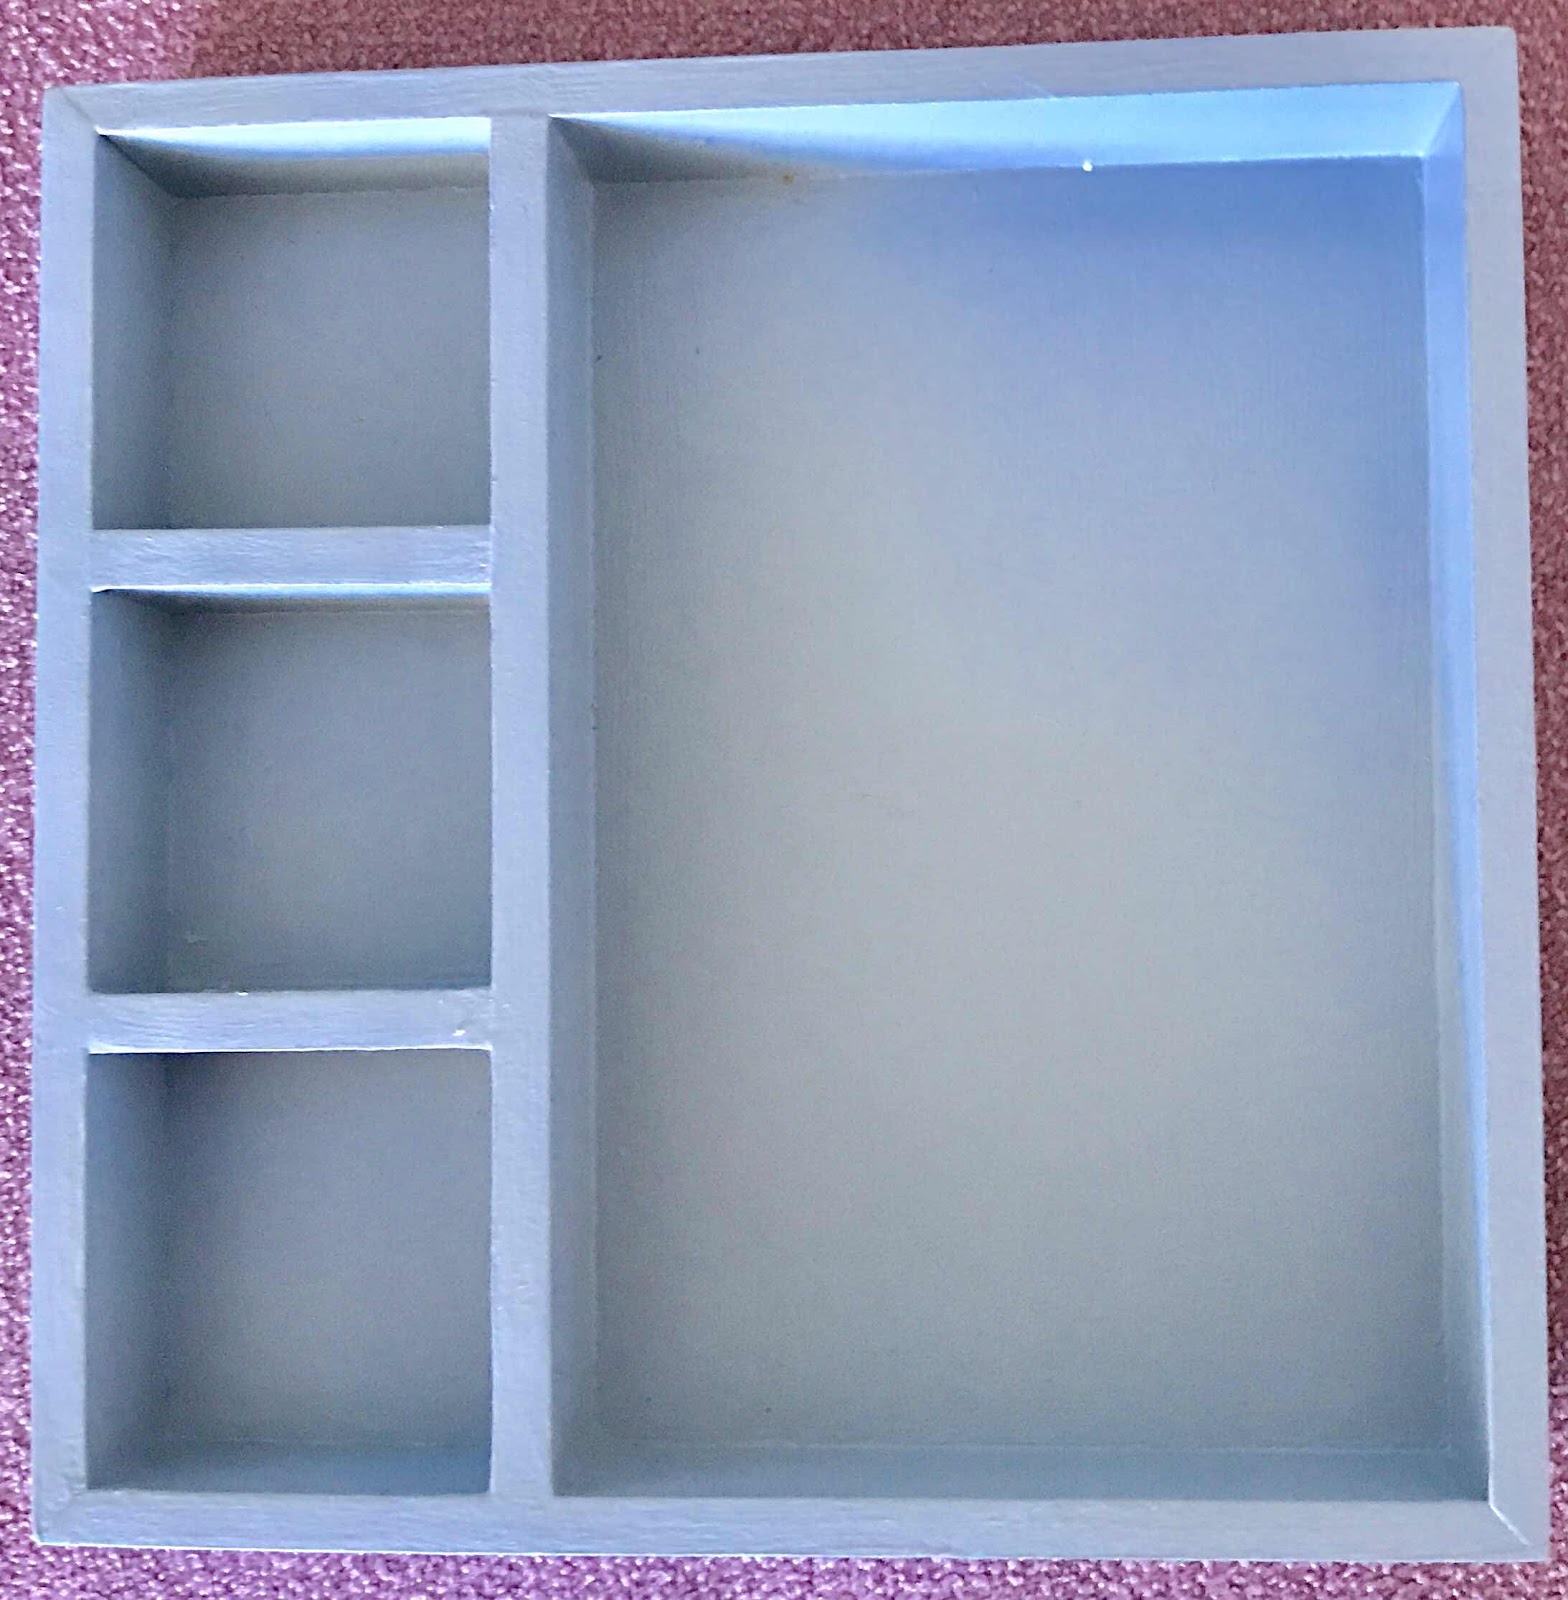 It was a fun class, over two Sundays. A great group of enthusiastic embroiderers . I knew when I enrolled that I would only be able to attend for half the second Sunday, as I had a subscription concert. Christine was OK with this, so I went ahead.
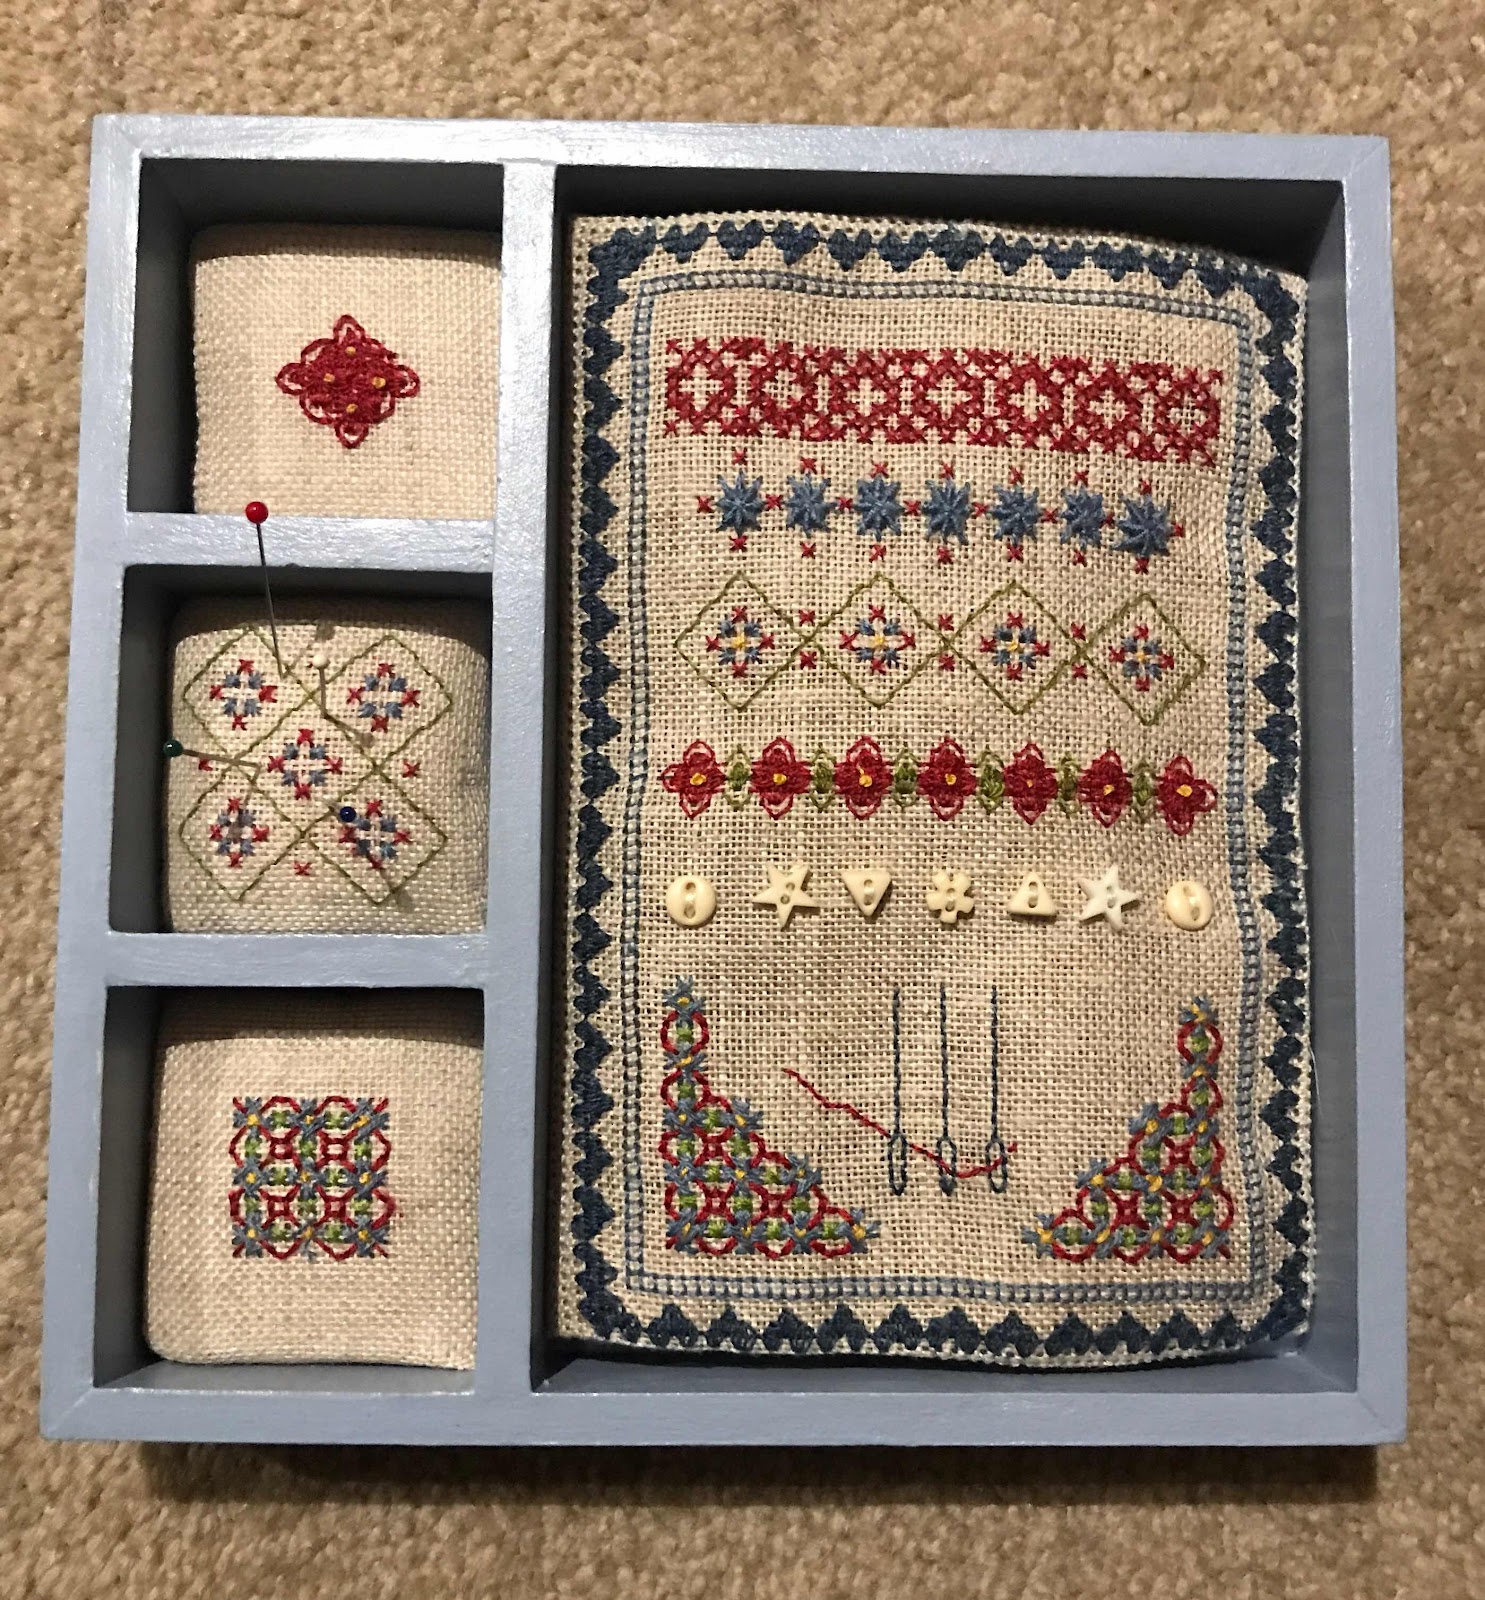
We got to choose our box, which Christine had had made for us - there was a choice of white, red or blue. I chose the blue.
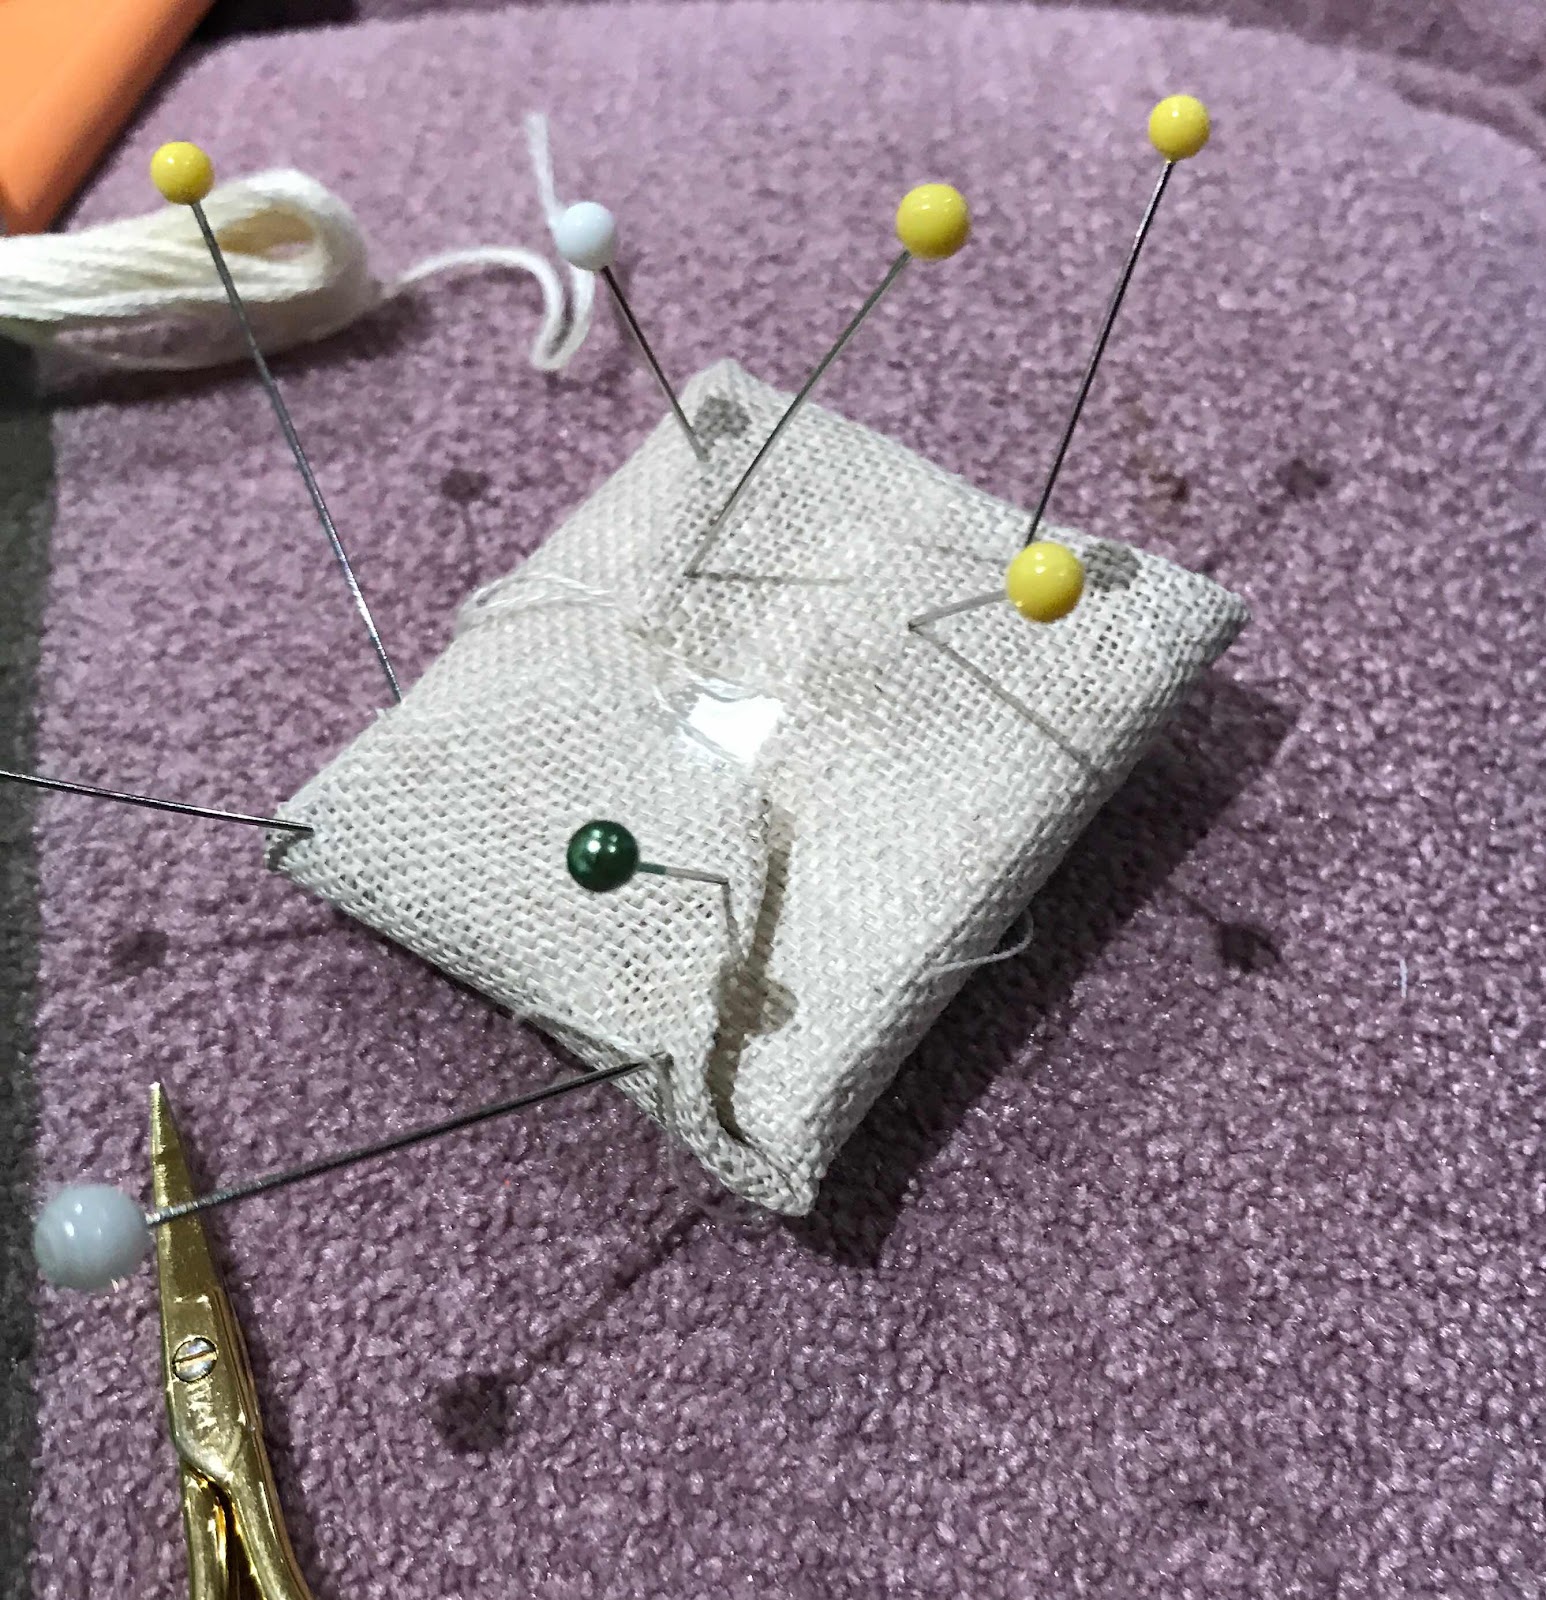
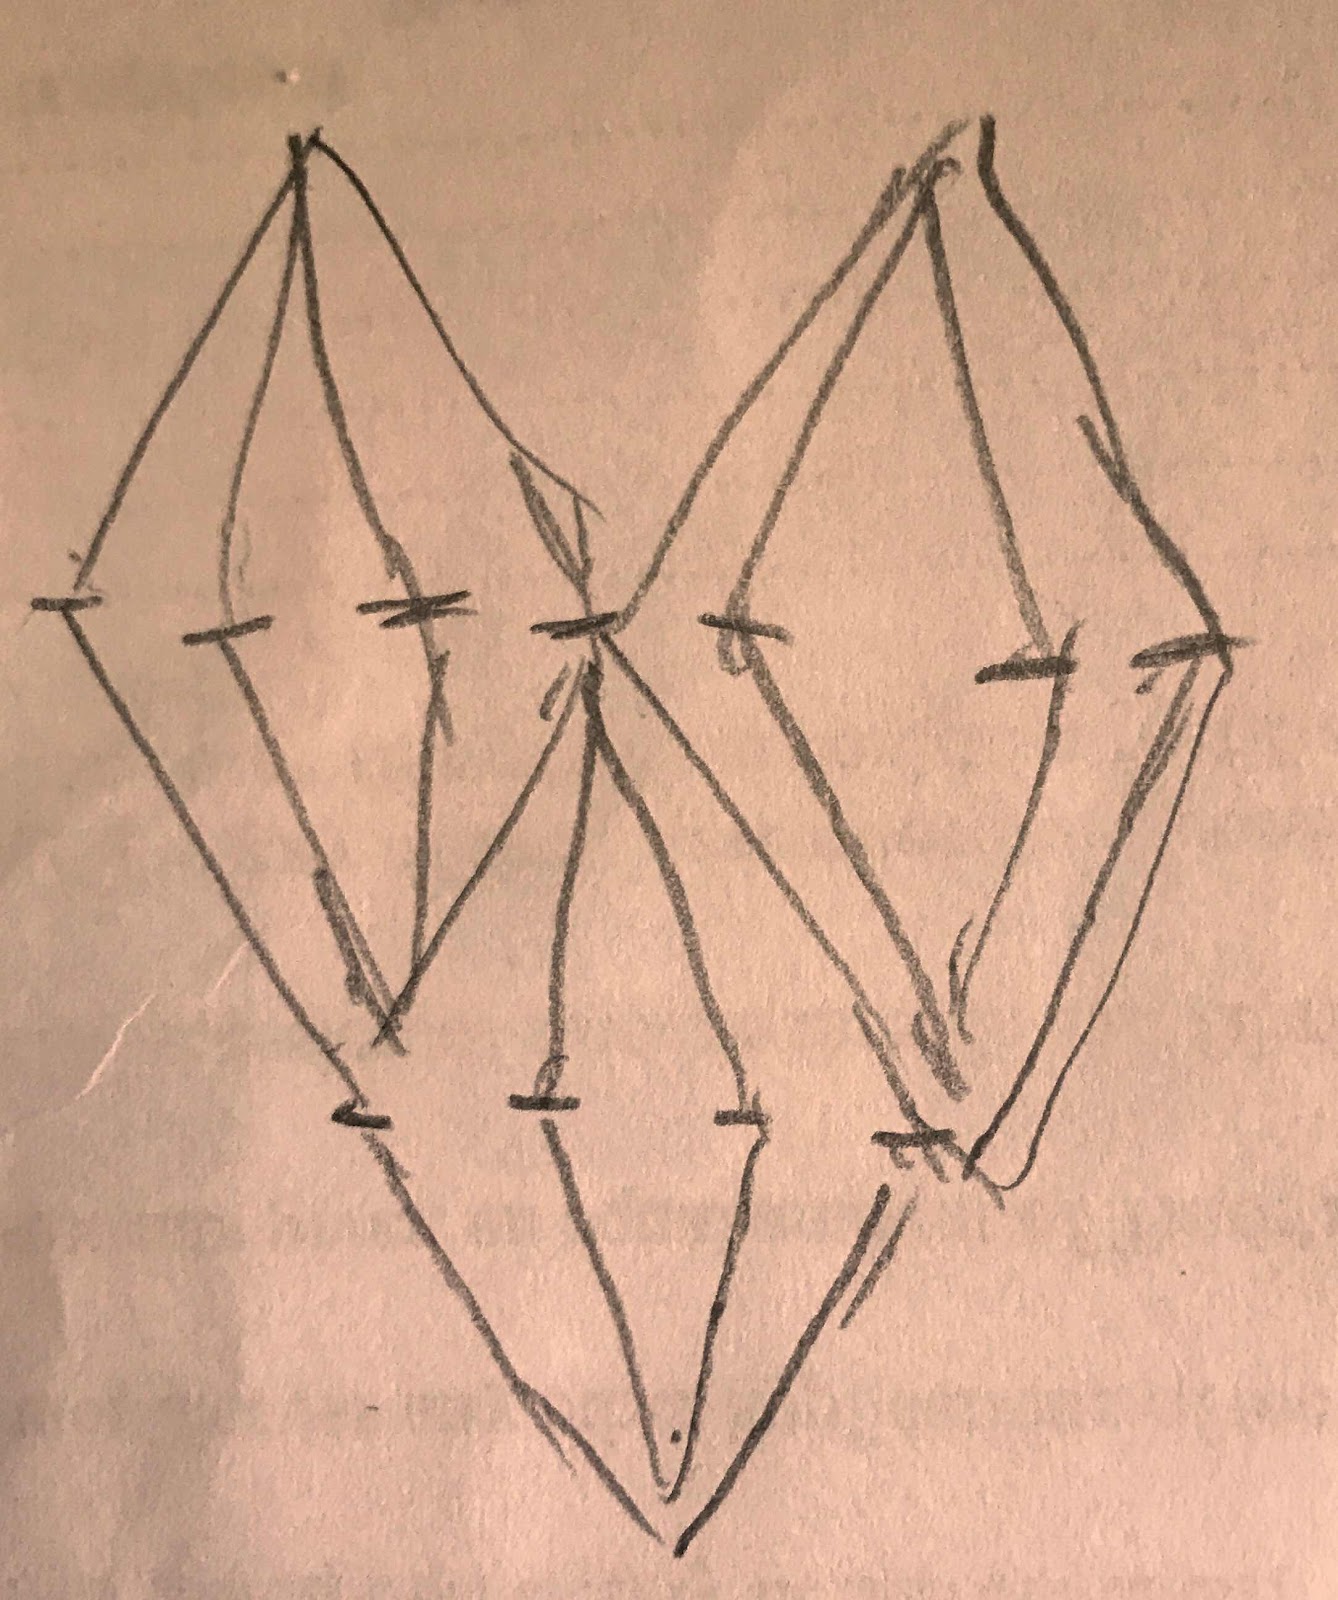 We began stitching the needle book, Christine demonstrating the stitches to get us started and then more or less on demand. We began with Rococo stitch - new to me. It took me a while to get the hang of the way the stitches fit together. Once I did, I was hooked. I hope I can use it again.
Because I knew I would miss the last few hours of the second day, I put in quite a bit of time between classes to finish as much stitching as I could, so I could have some help with construction on the second morning.
Like a few others in the class, I played a bit with the designs. I altered the row of houses at the bottom of the needle book cover to a symmetrical design, so it would not matter which way the book was lying in the box. I'm going to use this, and I can see I won't be careful about how I place the book!
 My strategy worked well. The kit came with a lovely piece of Liberty cotton for the lining of the needle book. Christine went through the construction steps and I was able to complete the construction fairly quickly after the class.
The book is designed to hold needle packets. rather than loose needles. There are a few options, however, to accommodate both.


I opted to add little squares of doctor's flannel.
One of the other students embroidered quotes on the linen pockets.
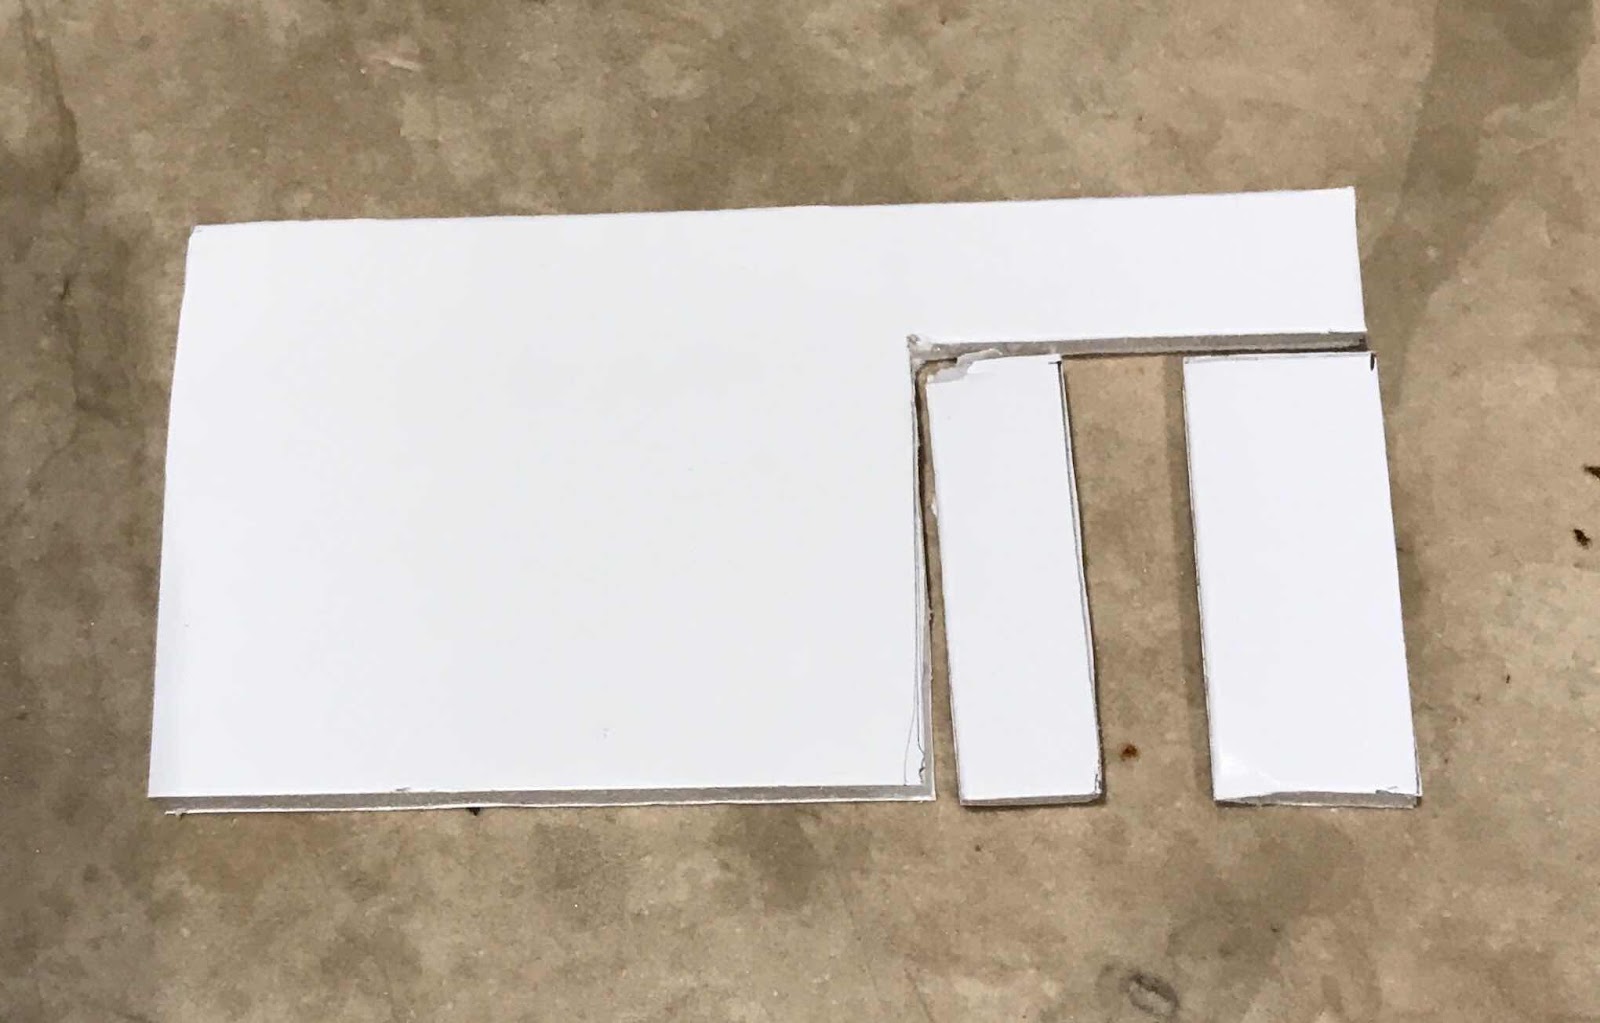
 I found some off-cuts of acid-free mounting board left over from a previous task
and used these to back the pin-cushion, scissor keep and holder for the needle threader.
The box made a handy holder for the bits required throughout the process!
Gay's quotations on the linen pockets gave me an idea when I realised that the back of the needle book was blank.
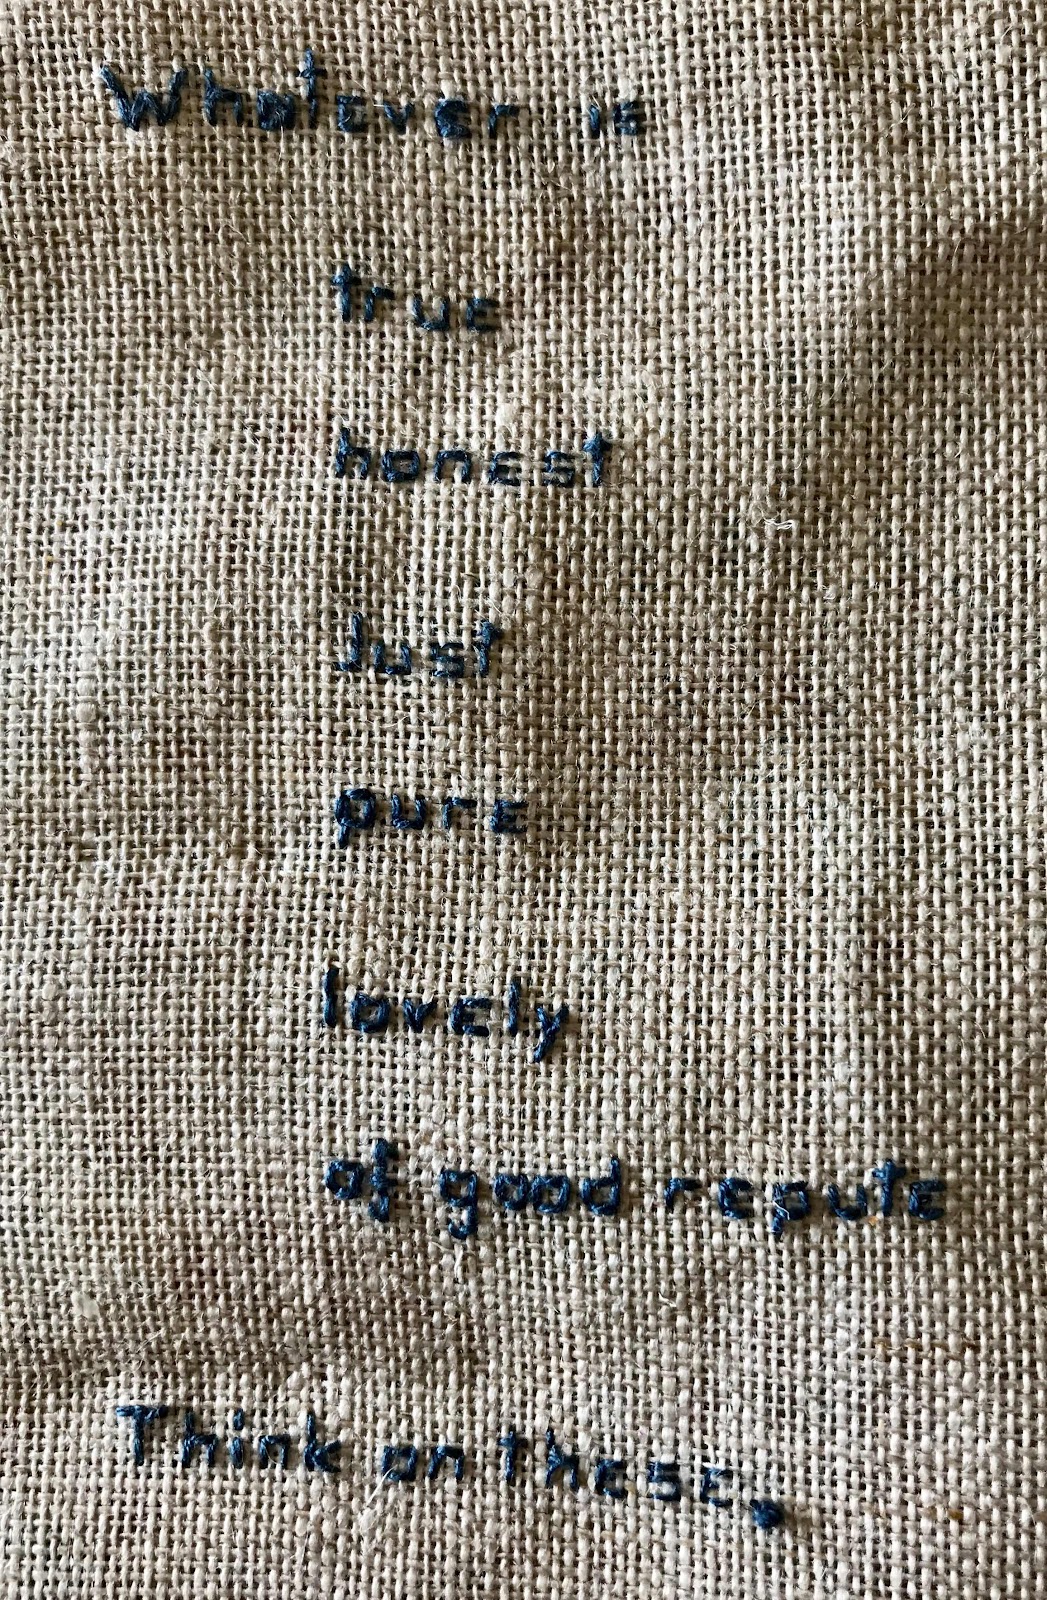
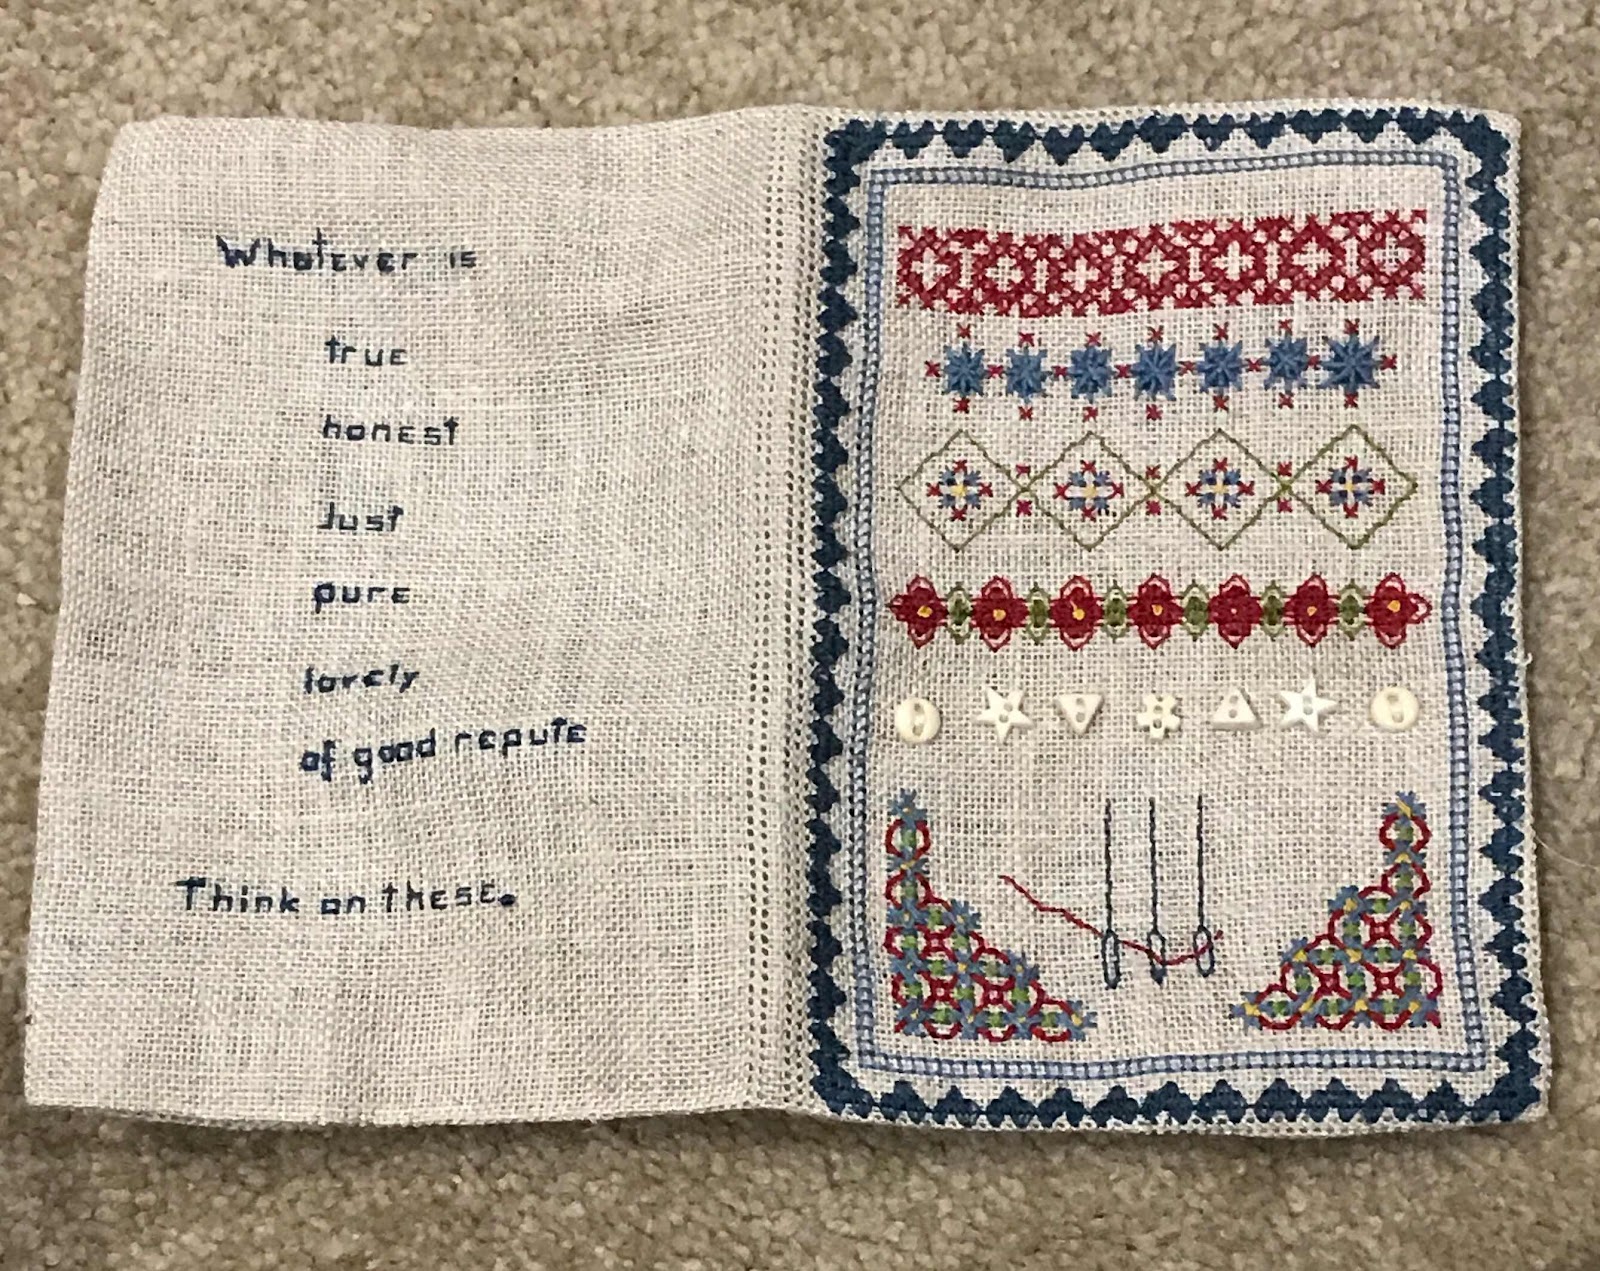
I embroidered a paraphrased version of Philippians 4:8. This is a principle I try to live by and a mantra that helps to keep depression at bay in the face of so much bad news. It will be reassuring to have it always there when I am stitching.
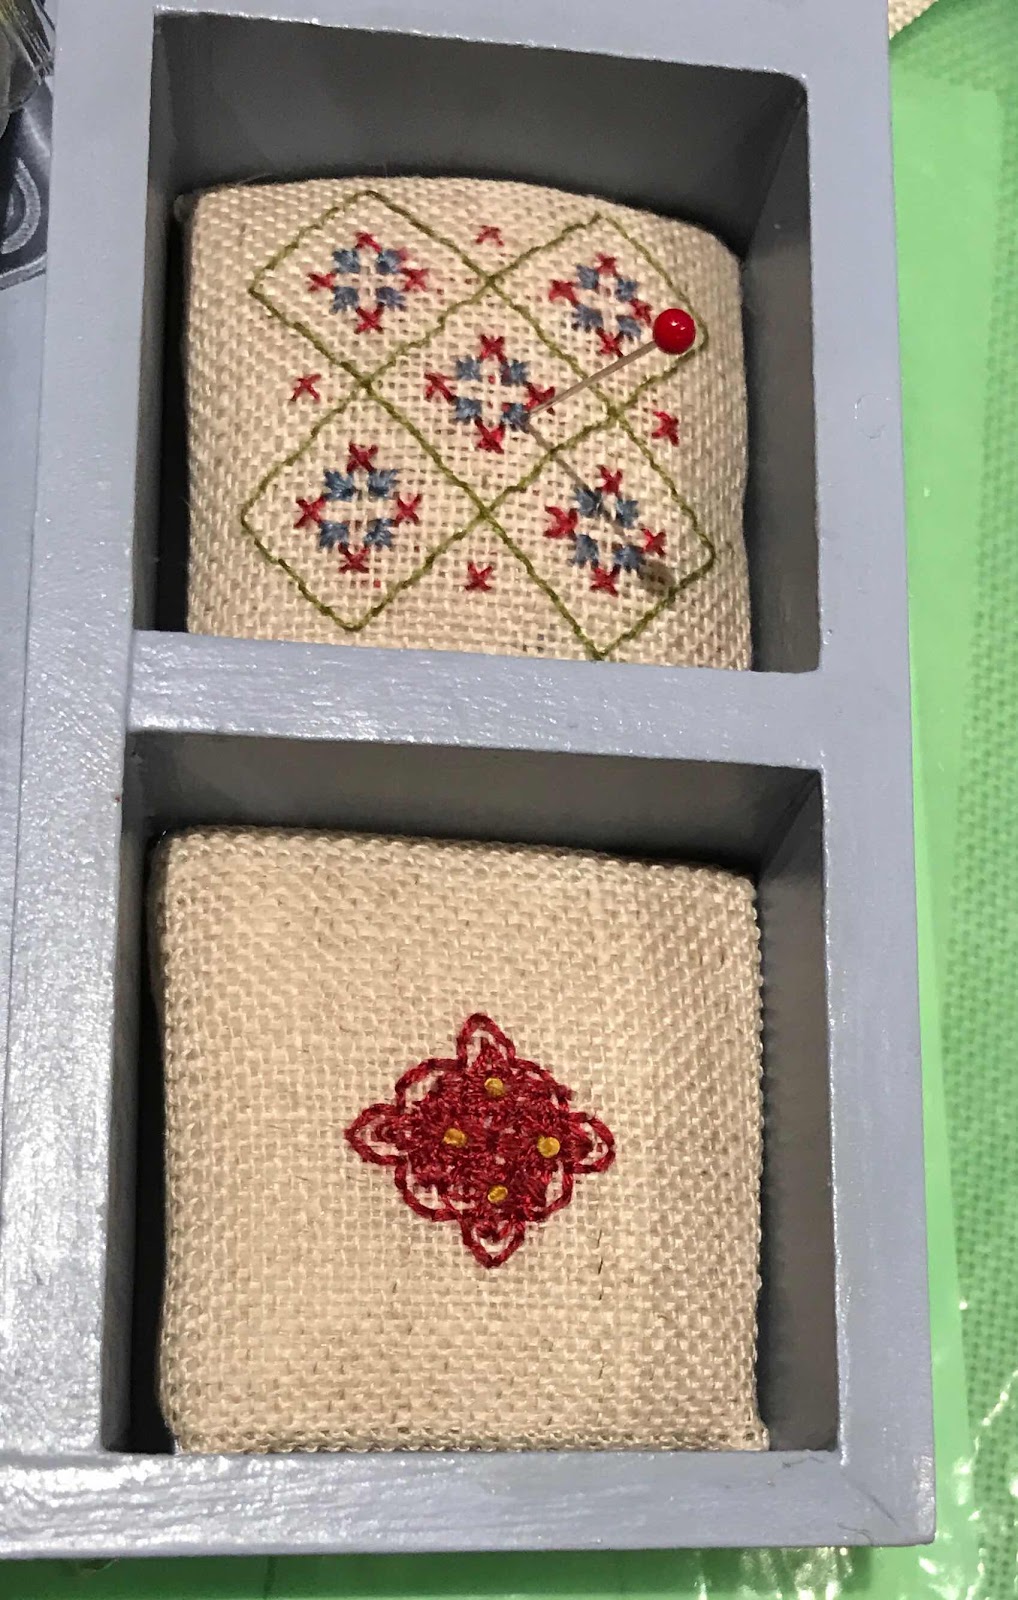
It took a little bit of adjustment to get the small pieces fitting snuggly as the spaces are not the same size - but it was not a drama.
The scissor keep is designed to fit Kelmscot Little Gems scissors.
 I found an online Australian supplier, StitchWOT and ordered both blue and red. In the end I used the red. I experimented with a few needle threaders and eventually added this little bird with a threader beak. It has the advantage of a hole that accommodates a cord. I reckon an unattached needle threader is not going to survive my use!
Altogether this has been a thoroughly enjoyable project. It had a few mild challenges, looks good and will be a tool set that does not leave my coffee table - so always there when I need it.
What more could I want?
Like a few others in the class, I played a bit with the designs. I altered the row of houses at the bottom of the needle book cover to a symmetrical design, so it would not matter which way the book was lying in the box. I'm going to use this, and I can see I won't be careful about how I place the book!
My strategy worked well. The kit came with a lovely piece of Liberty cotton for the lining of the needle book. Christine went through the construction steps and I was able to complete the construction fairly quickly after the class.The book is designed to hold needle packets. rather than loose needles. There are a few options, however, to accommodate both.


I opted to add little squares of doctor's flannel.
One of the other students embroidered quotes on the linen pockets.
I found some off-cuts of acid-free mounting board left over from a previous taskand used these to back the pin-cushion, scissor keep and holder for the needle threader.
The box made a handy holder for the bits required throughout the process!
Gay's quotations on the linen pockets gave me an idea when I realised that the back of the needle book was blank.
I embroidered a paraphrased version of Philippians 4:8. This is a principle I try to live by and a mantra that helps to keep depression at bay in the face of so much bad news. It will be reassuring to have it always there when I am stitching.
It took a little bit of adjustment to get the small pieces fitting snuggly as the spaces are not the same size - but it was not a drama.
The scissor keep is designed to fit Kelmscot Little Gems scissors.

Altogether this has been a thoroughly enjoyable project. It had a few mild challenges, looks good and will be a tool set that does not leave my coffee table - so always there when I need it.
What more could I want?
No comments:
Post a Comment