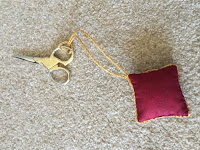
 Within hours of finishing my 'Anastasia' Japanese beading project, I had begun on the second project, Hana, from Inspirations 91. My Japanese beading learning had become an obsession. I was a woman on a mission. I needed to perfect the technique - and I needed scissor fobs.
 Hana was an easier project than Anastasia - largely because the basic pattern was a simple repeat of a flower motif. While the colour varied, the technique for each was the same, encouraging practice.
 This did not prevent me from making the most fundamental of errors - not reading the whole set of instructions through carefully before plunging in. I discovered, rather late in the piece, that the lower petals had fewer beads than the upper petals - which left me with a shortage of beads. This was exacerbated by the blue beads having holes too small for the beading needle provided. As I could barely thread the needle provided. I improvised by borrowing beads left over from Anastasia and living with the colour variation.
 The trickiest part of this project, in terms of manipulating beads, was getting the stems crossing over each other.
 To help hold the tension on the long string of edging beads I used the traditional Japanese wooden koma - which I had bought from Merrilyn Whittle. This is designed to tension your needle when laying a long line of beads. I found it a bit light for the task. For me, tensioning my needle in a heavy pincushion served me better. I hope, however, at some point (I've enrolled in a Margaret Lee Japanese Beading Class at Beating Around the Bush in October) to learn a bit more about this tool and improve my technique.
Although far from perfect, I was pleased with this piece. I like its stark simplicity.
Again, I constructed it without glue. Another pair of scissors with a fob!
An addendum to this post is that I began using these scissors with fob and inadvertently dropped them unloading my car at my daughter's home in Adelaide. By the time I realised what I had done, they had spent a night on the wet grass. They seem, however, to have recovered!


