Search This Blog

Monday, July 14, 2025

Schwarm Workshop for Guild Certificate Course

In May Carol Stacey took a Workshop on Schwalm, a technique I have never tried. While the monthly Certificate. Course workshops are for those enrolled in the course, any Guild member is allowed to attend. They run from 9.30am to 2.30pm on the last Saturday of the month, though time after lunch is often used to help individual students with general certificate course work. I don’t always go. I really like the chance to learn in this engaged group. It's my tribe. I don’t however, want to end up with more unfinished work. I’m not good at living with unfinished work, so I pick workshops for things I think I can finish.

I was curious about Schwalm and Carol is a good teacher - one who really encourages the application of technique rather than replication. While she had a number of precut templates for us to use, she also had sheets of template plastic and encouraged us to make our own shapes.
I took up this option, and attempted to design a flannel flower. We were working on roughly A4 pieces of linen so I made the template in one piece, about 8" high. I was aiming to give myself several areas to work in different stitches, naively thinking each flower petal could be different.

Once I had used the template to trace an outline on the linen, I began the lengthy process of working coral knots all around the outline. I didn't get far in the workshop. I was soon having trouble with both my eyes and my back. The Guild chairs are  not built for sitting at length for close work. I gave up, and left at lunchtime . I managed to score a copy of Christine Bishop's 1999 book on Schwalm - a really useful  primer of stitches in the context of shapes.

It was over a month before I got back to it. It took quite a few hours to complete the coral knot outline. I needed to work in a hoop to keep tension, which largely means stabbing rather than scooping. I used coton-a-broder 25 in ecru.
When I finished I took it out of the hoop to work the inner row of chain stitch.That was much faster, and surprisingly, was OK on my hands.
The hardest part was the removal of threads to create a stitching grid. I began with the easiest bit - the centre of the flower. I now know why Carol's templates were all simple, regular shapes.

I used a green coton-a-broder 16 to work the centre, using the Algerian Eye stitch filling from page 22 of Christine's book. Using colour is not part of the tradition, but the temptation to add the characteristic green centre of the flannel flower was too great for me to resist, especially since I had the perfect colour in my coton-a-broder collection.
I had realised by now that trying to work different stitches in each petal was a bad idea. The spaces were hardly big enough and I could see no way of dealing neatly with the intersections.
Removing threads from the flannel flower was tedious and slow. I needed to remove them from the whole flower in order to ensure consistency. It took patience, magnification, very sharp scissors and lost of clipping. I decided to use the single feather stitch motif on page 28 of the book. It proved a bit tricky but did allow me to keep  a few long lines moving.


It is a long way from perfect, but I'm OK with it. It does give a sense of consistency and texture.

Originally, the centre was the only part I planned for green, but I now got bold, and used the honeycomb stitch from p21 for the remaining leaves. I also added a touch of green to the stems, a single line of chain stitch. 

I'm pretty pleased with the result. here it is straight out of the hoop


Today I ironed it and found linen to back it and a cotton batik to line a bag of roughly the same dimensions as the Glazig bags.  I considered a cushion, or even hanging in a hoop, but thought it might get used as a bag.


I had been thinking of a silk lining, but didn't have any green, which I thought was needed to show through the gaps. Did I need to stitch with green thread? I stand by that decision.


The back linen is a bit darker than the embroidered piece, but I think that's OK. The zip is white. Ecru would have been better, but with different shades of linen, no colour would have been perfect. 


As it is, I'm happy with the result. It is a sampler of a kind, I've learnt a bit about Schwalm, and had a go. 
And there's a decent bag to show for it. My idea of success.


Monday, July 7, 2025

Another gift bag binge


In January I bought some remnants of Japanese fabric from KimoYes during a sale. In the last couple of  years my gift bag making has concentrated on cotton fabric, mostly with a Christmas theme. It's a long time since I added either Japanese or sari fabrics, both of which used to be a regular part of my gift bag making.
Last week, after a bit of a cleanup in my sewing room, I retrieved the remnants, cut them out and on Saturday I ironed, then machined them into 21 bags of varying sizes, mostly rather larger than A4 size.
Before I went to bed, I got out my container of ribbons and assigned an appropriate drawstring to each of them. Some were a bit rough and ready - a pair of shoestrings, several pieces of florist's ribbon and a pyjama cord amongst them. I really enjoy this process of reuse and appropriation.

One I used was a braid I remember from my childhood. My mother had a lot of it in a couple of colours. I think the other one was either yellow or green. I last used it, I think, on clothes for either my own children, or my grandchildren. There is still about 8" left after I added it as a draw cord for one of these bags.
On Sunday I added the cords, knotting the ends together where there was a double drawstring. Then began the hunt for things to act as stoppers on the single drawstrings, to ensure the cords don't retreat into the gusset. The shape of each piece of fabric determines whether it has a double or single drawstring. If the fabric folds with two side-seams it is easy to leave the top gusset with an opening on either side - so two drawstrings pulling in opposite directions. If the fabric folds with only one side seam it only has one drawstring.
The collection here shows a knotted pyjama cord, a ribbon ended with cowry shells, a single nylon(top left to right) ribbon ended with a wired flower from a hat. Bottom left to right is a dressing gown cord, shoelaces and a ribbon ended with a wooden bead. 
Here we have the 1950s braid, a simple double narrow black ribbon and a single black ribbon ended with a couple of gum nuts painted with gold glitter paint.


While I try to stick to natural fibres for most of my stitching and clothing, I am hugely admiring of Japanese fabric, most of which is synthetic. The colours and designs are fabulous, as is texture and polish. 
The average material cost of each bag is $3.40.     I expect they will be used several times over. Making them gives me great pleasure on many fronts.
 I think I'll look at the pile a bit longer before putting them away ready for when I need to wrap a present.

Saturday, July 5, 2025

16 ply slippers


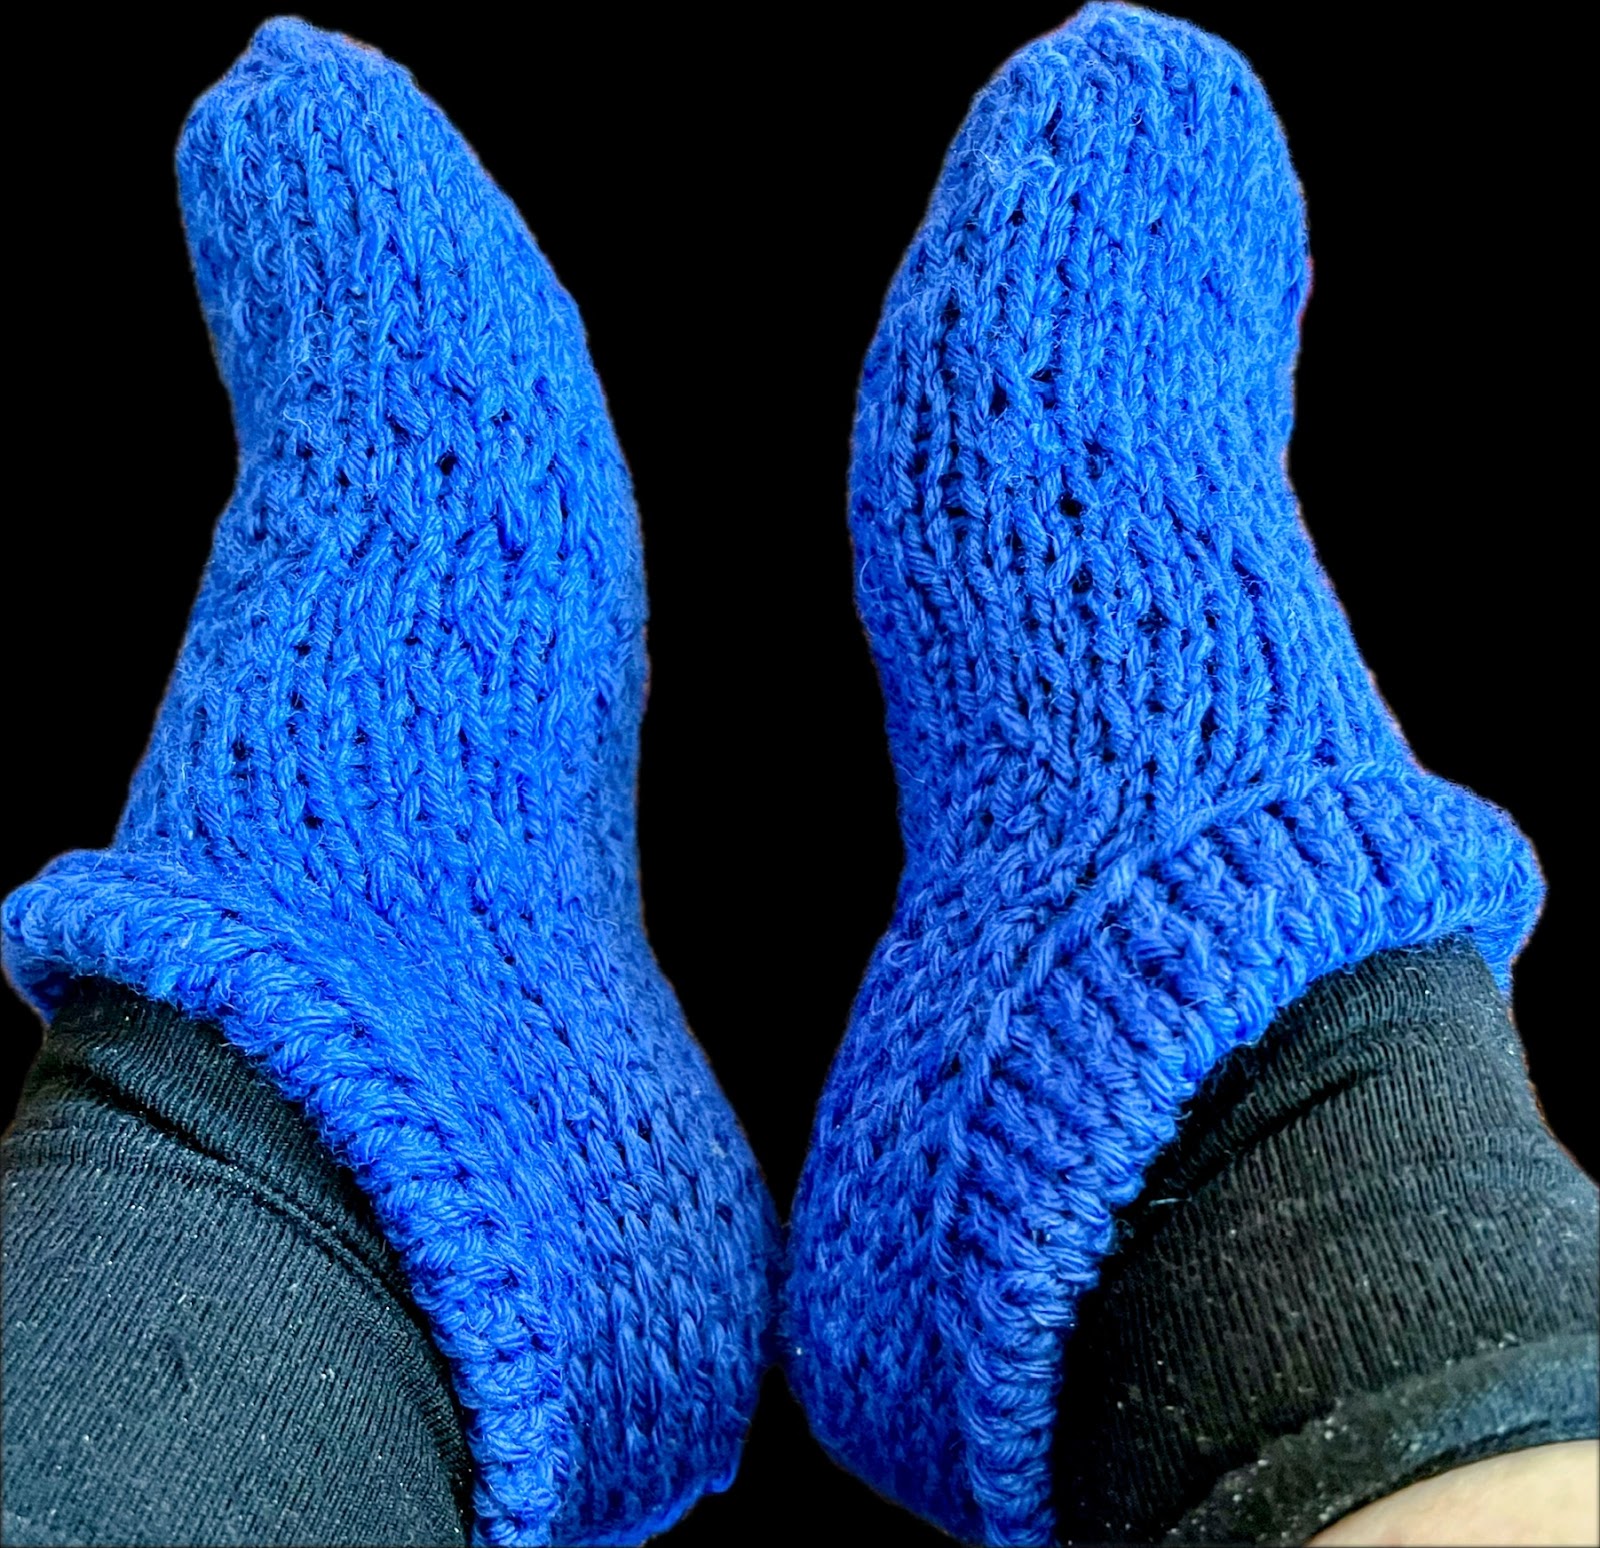
In May, when Bendigo Woollen Mills offered a 16ply yarn, made by recycling their leftover wool, bamboo, silk, cotton and alpaca, I bought three balls to experiment with. At the same time, I had bought a copy of Pauliina Kuunsola's Soothing Stitches: knits for a quiet mind,  which included a pattern for slippers - in 16 ply.

I gave up knitting slippers over ten years ago, when those I had been knitting in quantity kept slipping off the heel. This pattern  extended well over the ankle and invited me to try again.

My brother's birthday is in early May and I had not sent a present, so I took up my needles.
The pattern is relatively simple. You knit from the toe, in the round to the ankle, then flat to the heel, cast off and join the back seam. The pattern leaves the turnover loose, but I thought it better to stitch it down. Although I worked the largest of the three sizes given in the pattern, my brother. whose feet are average size for a man, reports them being a bit of a stretch.

I bought a pair of wooden sock blockers from the Yarn Trader. I'm sure, had I blocked my brother's pair, they would fit perfectly (when it's warmer, he can, of course wet them and wear them until dry!).  
My next pair, still knitting the largest size, was for a friend's July birthday. Her feet are, I'm sure, still smaller than mine, although it's decades since we compared. I tried them on the blockers, but didn't actually block them. The colours are not intended to indicate gender - just following what I thought the recipient would like. They are both of the colour intensity I like.
I've used up the remainder of these two balls for scales of justice on the beanies, but I am up to knitting more should these prove a hit. I love working in this Elixir 16 ply yarn
I can post this now that both pair are delivered to (notice I’ve avoided in the hands of, wouldn't want to invite puns) the intended recipients and hopefully doing their job in this winter weather.

Friday, July 4, 2025

Another Glazig bag


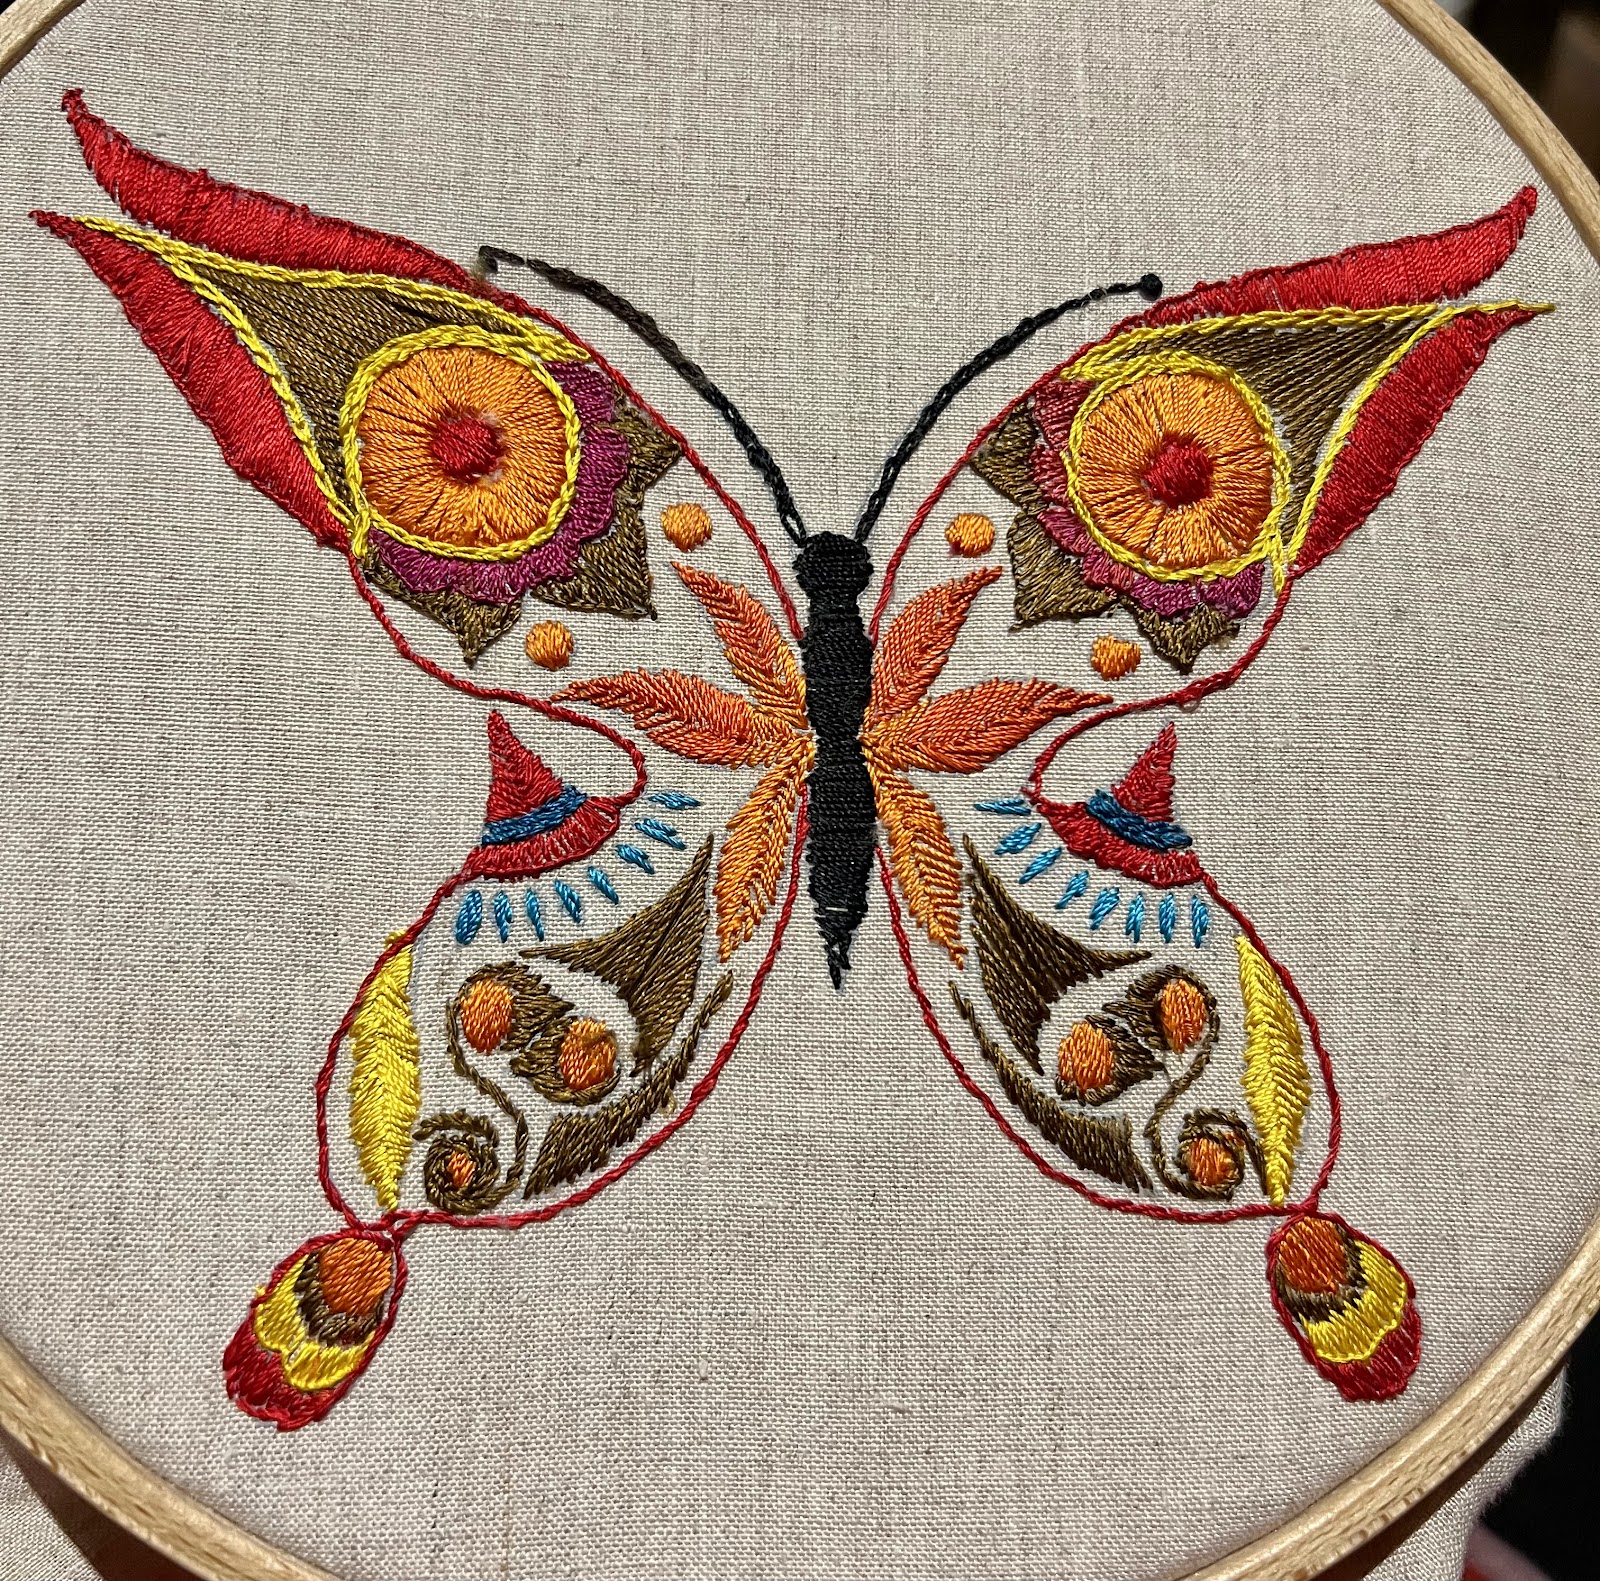
This design last featured here in March of last year, when I used it as part of a Certificate Workshop on Glazig Embroidery. As well as very small samplers for students to work, I had purchased a few printed linens of this design for interested students, and began working one, just to show recommended stitches. 
I dug it out this week, because I have been preparing a presentation on Celtic Embroidery for next week's WES meeting, and thought it timely to finish this as yet another example of the genre. It was still in the hoop (yes, with a solid indentation).
I worked with the required Au Ver a Soie silk perlee threads.The workshop had depleted my thread supply in a few colours, notably blue, so my palette was a bit limited, but not onerously so.

It is slow work, requiring a magnifier. I stuck to the more commonly known sitches used in Glazig - buttonhole, satin, stem and fly stitch. 
There is a larger void than in the previous examples I worked, but I rather like that.
The linen on which it was printed was a little wider than A4, so once again, I turned it into a zippered bag. The last one worked very well.
The cutting out, finding lining, constructing bag and strap all went well. I bombed, however, putting in the strap, forgetting that, with a zip, it needed to go on the outside of the bag! 

Once I had unpicked the (very secure) attachment and resecured on the outside, all was well.


I am pleased with the batik I found for the lining. It seems to blend well with the embroidery.

So I have another example to accompany my talk next week and a bag that someone will like and use.

I have three more of these printed Glazig linen butterflies which I will probably keep for teaching purposes, and one I haven't worked of a flamboyant bird.  I'm certainly not working that before next Wednesday, but maybe some rainy day......

Meanwhile, I've enjoyed this one - and dedicate it to Genevieve, who first introduced me to Glazig. Merci beaucoup!