Search This Blog

Thursday, January 5, 2023

10 Bag Days

After the success of my Christmas fabric bags, I remembered that I had also purchased 2 other tubs of fabric offcuts from the Guild trading table - one of green coloured fabric, and one of checks and tartans.

As the year drew to an end,  I   rolled my eyes and wondered if, on a bag roll, I could use the fabric up before 2023.  The attraction of one tub had been the pieces of gingham it contained. I enjoy embroidering gingham, so set those pieces aside - to maybe make gingham lace (chicken scratch) aprons, table cloths or, yes, bags. 

The remaining tartans, and the greens were of various sizes and shapes. I got to work with my scissors and cut all of them into bags - 125 of them. 

Madwoman.
Amongst the green collection was a  piece of patchwork (top left) just waiting to be turned into a bag. It also reminded me that I could turn any left-over strips of fabric into patchwork. The lower two photos are the result. The one on the right is quite large - around 40cmx60cm.

As the pieces were probably the remnants of quilting projects, a few were odd shapes.  Bags don't need to be standard.

Unlike the Christmas fabric, which was in significant lengths, these greens and tartans were smaller and more varied. Only a couple of the resulting bags are large. The majority are medium sized and there are probably around 25 that are quite small - jewellery size.
I worked them as a production line for one worker. I cut them all out into the most efficient sized bag . The next day I ironed them all - ironing in the seams and hems. It took several days to machine them into bags. I stitched about  15 bags in an hour to an hour and a  half. I worked them in batches of around that number.


Once I had about 50 bags, I spent an hour or so choosing drawstrings from my ribbon and cord stash. I was in danger of running out, but Katherine came to my rescue with her substantial ribbon stash, which is now severely depleted.
Before long I had a pile of bags waiting for stops to be put on the end of the cords, a pile waiting for the cords to be threaded and a pile waiting to be machined, giving me a choice of activity each day. 

This kept me busy for 10 days - with breaks for reading, shopping, washing, catching up with friends and family, or taking photos. 


I didn't quite make my 2022 finishing goal. I wasn't tempted to push the envelope. It's been a good holiday activity. I enjoy it - and the end was in sight. 

I put the final touches on today - and did a bit of reorganising to clear a big red storage tub, which now holds the 125 bags - quite a good supply. Except for the gingham. all the trading table fabric is used up. 

Now I need to resist the temptation to buy any further bargain fabric from the Guild's trading table. After all, I still have drawers of my own left-over fabrics, without buying someone else's! 

I enjoy making bags, I like recycling and family are very welcome to any bags I have in store.  

Now it's back to my knitting. Oh, and there's the gingham......


Tuesday, December 27, 2022

Back to being a bag lady

Late in October (I think!) I bought a bundle of Christmas fabric from the Embroiderers' Guild trading table. I wasn't sure what I'd do with it, but it was a bargain and bound to come in handy. Once I got it home and needing to find space to store it,  I was less sure. 

A week before Christmas, when I got to organise my Christmas presents, I realised I could do with a few more gift bags. For a couple of decades now I have been making fabric bags in lieu of paper wrapping. It gives me pleasure in the making and the bags are recycled numerous times.

I decided to use the Christmas fabric to make the bags I needed. That done, and my presents organised, I decided to use up all the Christmas fabric on bags. 

I figured if I didn't do it now the fabric would sit there for at least another year so I grabbed the scissors and cut the whole lot into bags. There was probably around 5 metres in various pieces, all crisp and new, so easily cut.


Most of my bags have been made with recycled fabric, sari scraps, kimono pieces, dressmaking left-overs, occasionally old clothing. I cut them as the piece dictates and zoom them up on my machine into drawstring bags in the easiest possible way, stitching on the inside. Having so much crisp new fabric presented opportunities - and challenges - for a more careful finish, something dressmaker and quilting friends had long suggested.

I took up the challenge and got out my iron - a rare occurrence in my bag making ventures.Where the piece was long, to be folded vertically, I turned under the sides and ironed them down, then folded over a hem at top and bottom.  After stitching down the two hems, I folded the piece to stitch the side seams on the outside giving a neat seam as well as a channel for the cord. 
I realise this is de rigueur for quilters. I am much more slapdash. This time, however, I ended up with a pile of cut and ironed fabric before I touched the machine. That worked a treat.


Next an evening, with my ribbon stash and bags spread all over the floor while I watched television (nothing more challenging than Midsomer Murders, Lewis or Vera), I found drawstrings for each bag. I nearly had enough ribbon, just 2 bags short, but they were large bags, requiring over 2 metres of ribbon per bag, so a trip to Spotlight was called for. I now have a future supply of ribbon.


My next session resulted in a bundle of 30 bags with ribbons, ready for the cords to be either tied together ( where double drawstrings were used) or have a stopper applied to the ends to stop the cords disappearing into the draw channel.
                                                                      

Now to raid my button and bead boxes for suitable ends. Once identified and allocated, these were attached in a final session in front of television.   
The bags were taken up quickly by family and used this Christmas. The Christmas fabric was very    popular. The bags will be recycled over several years.   I had fun, the fabric is put to good use, the Guild has benefitted and present wrapping was made easy and pleasant for busy people. 
    All wins for this bag lady.

Sunday, December 25, 2022

A Mad Hatter touch to Christmas.


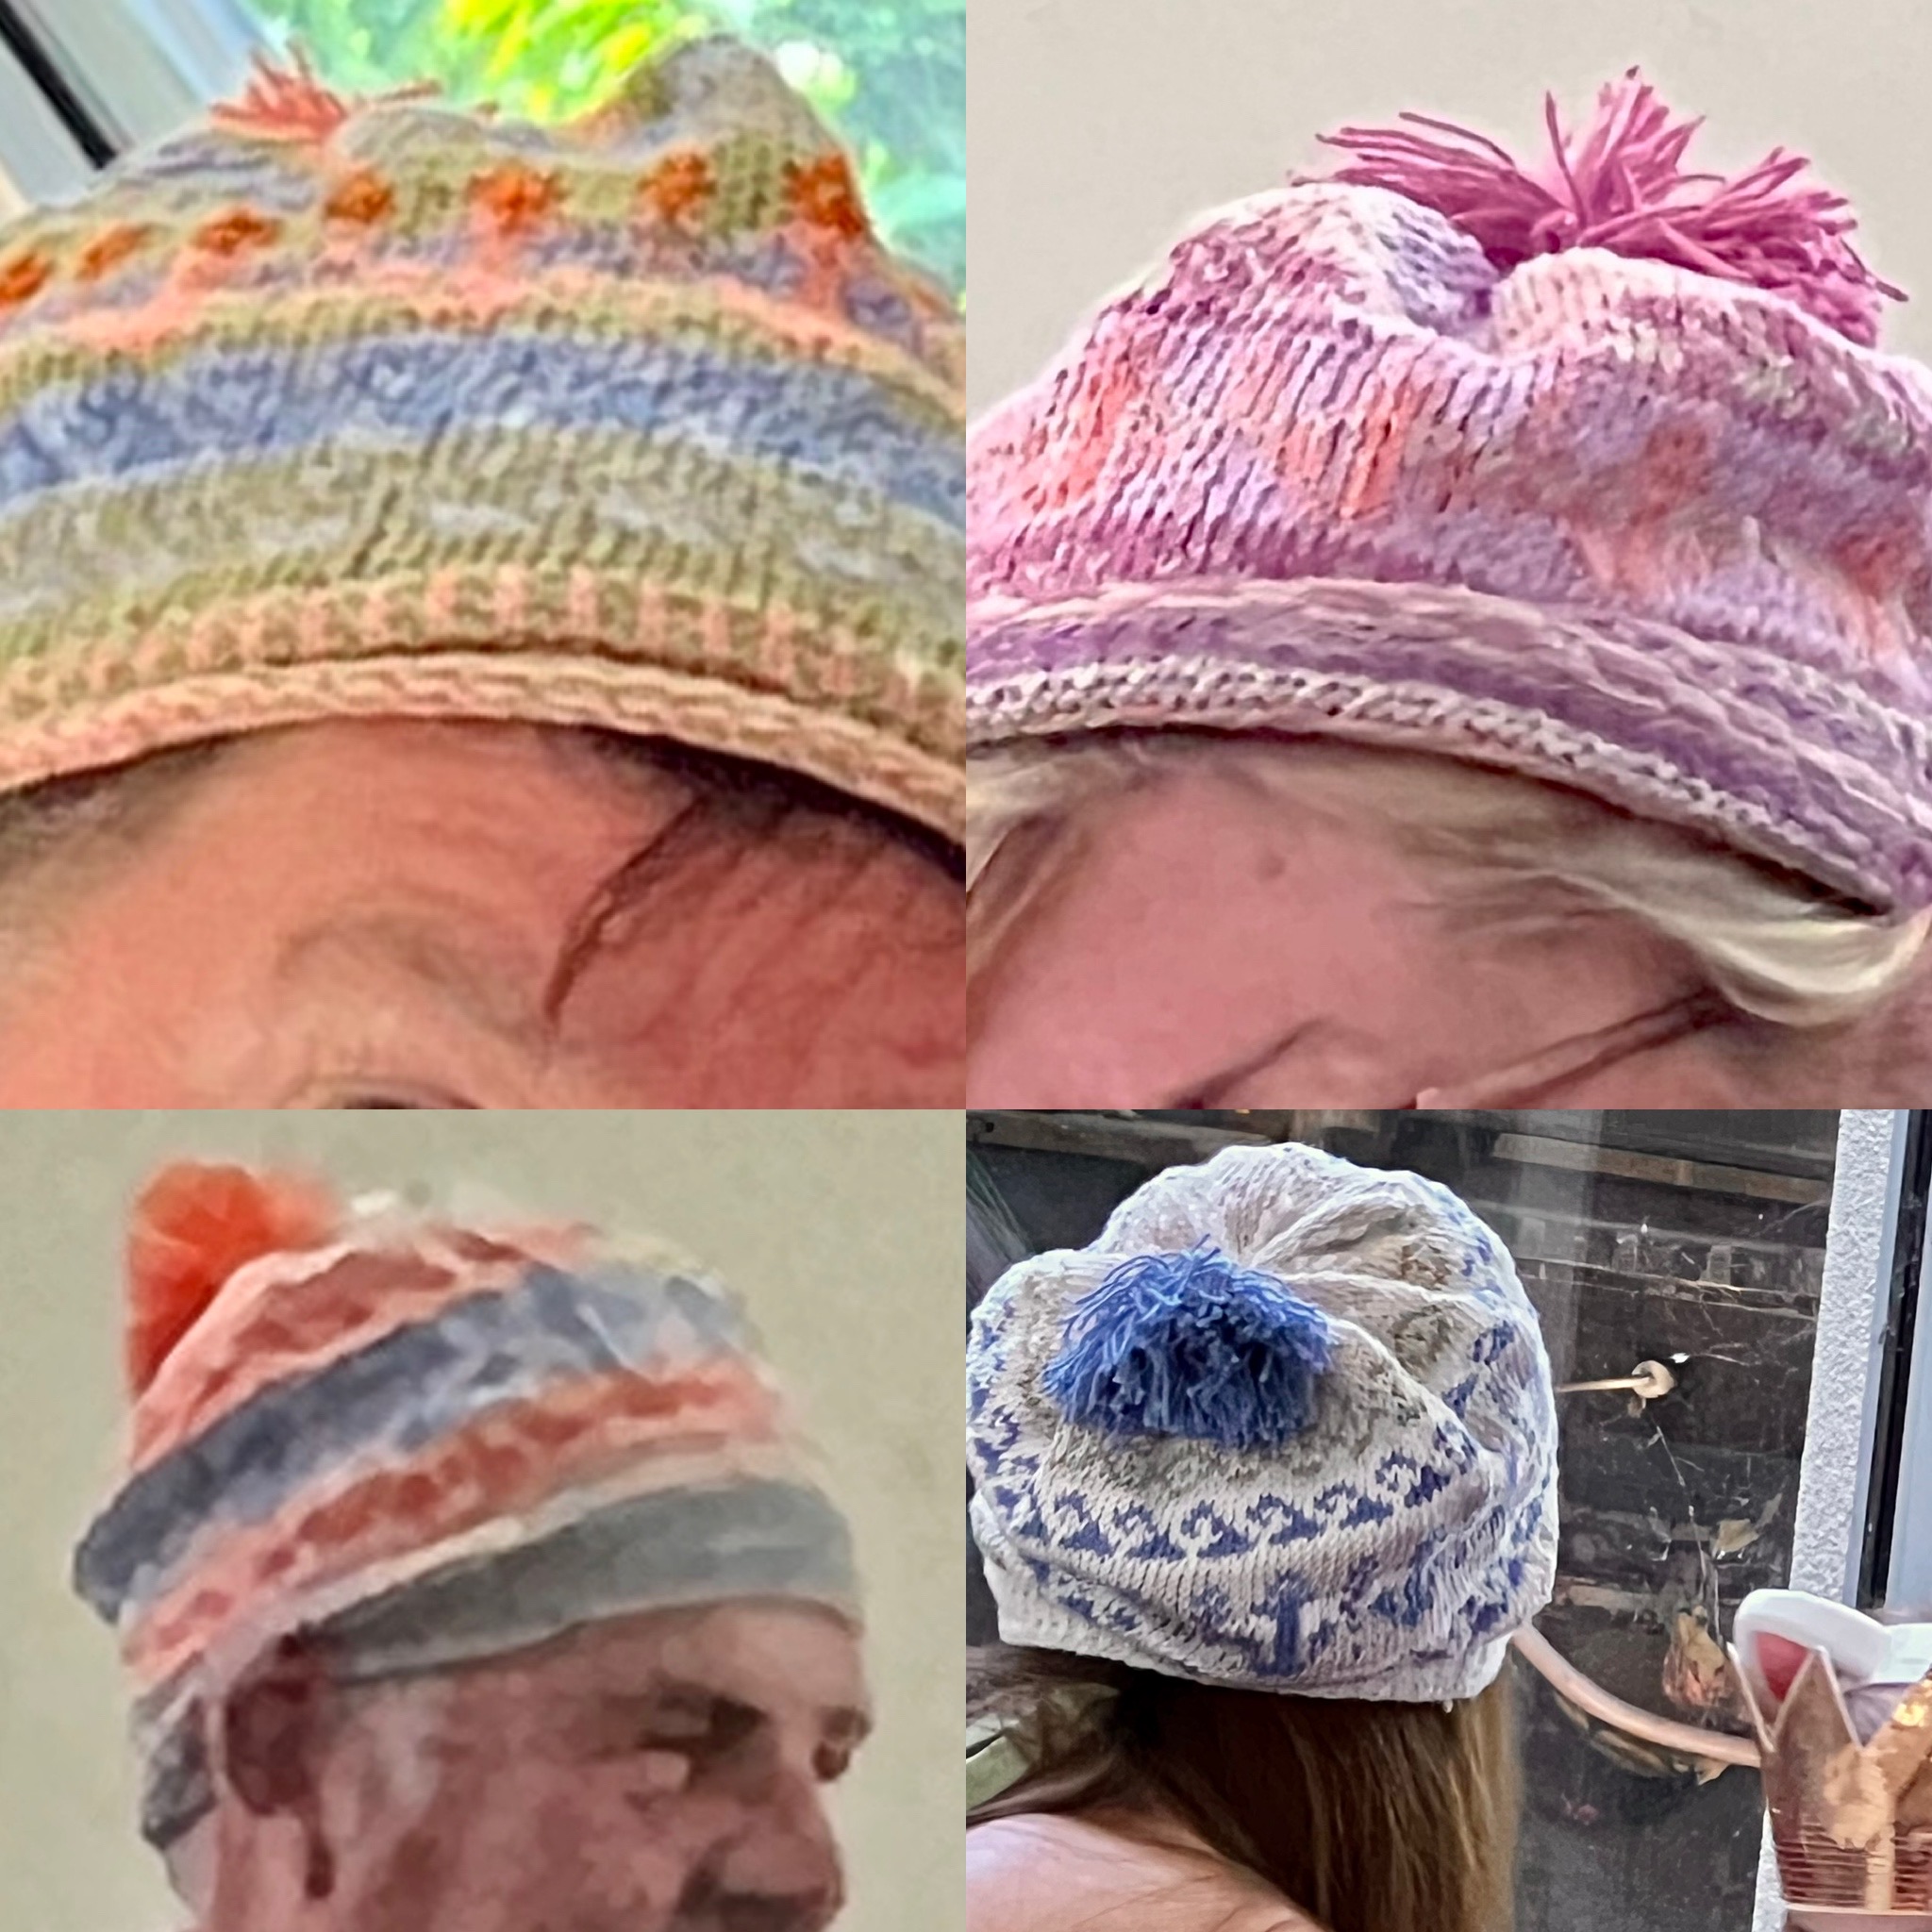
This year I tried my hand at the Shetland Wool Week Hat - The Bonnie Isle Hat by Linda Shearer. Each year, for Shetland Wool Week, there is a competition to design a knitted hat. The pattern for the winning entry is made available free, and woollen mills produce their own colourway for the design, which they offer as a kit. Photos of the many versions of the hat knitted around the world, are posted to the Shetland Wool Week site.

This is the first time I've tried it. I intended to use it with the left-over wool from several Marie Wallin projects but thought I'd try it first of all in 4ply cotton - of which I have rather a lot. 
The first one knitted so well I decided to keep going. The pattern came in 3 sizes (achieved by changing needle size, not the pattern). I knitted one of each and tried them on various family members. The middle size fitted everyone.

This was back in August. I got the idea to make enough for everyone at Christmas lunch. Last year I made reusable Christmas crackers. Rather than create more waste paper making hats for the crackers, I thought people could choose a knitted hat. They won't fit in the crackers - but people could choose.
I had the initial 3, and 10 different coloured 4ply cottons, most of them pale. I added in a cone of bright orange in a silk/cotton mix and began mixing and matching. I needed at least 8 for Christmas Day. 

I put it aside to knit a couple of vests, returning for  a marathon in early December.

Although the pattern had pompoms, I wasn't sure about them so I consulted Veronica, my fashion oracle, who thought no.  I agreed and proceeded, although others shook their heads and said 'pompoms'. 
However, on Christmas Eve I capitulated and decided to add pompoms. At this point, Veronica, in the Christmas vibe, also said yes. I got out my pompom maker and set to work. I've used it before, but not for a long time. 

I wasn't thrilled with my efforts, and reverted to a technologically cruder method. They still weren't plump, rounded pompoms, but the floppiness had a kind of charm (guests agreed). I think I need pompom practice!
In case there were pompom objectors I attached the pompoms on the inside with safety pins. No-one objected.

I finished the 9th on Christmas Eve, and the pompoms just after midnight. 

It turned out to be the right number, and, somewhat to my surprise, they were a hit.


Each one has five colours. I varied the pattern very slightly in a couple of places, but not by much.
A number of people wore theirs all afternoon - and I must say, they looked really good. It was a hot day, but cool inside. The cotton is comfortable to wear and shapes softly. 


I'm not promising to repeat the exercise every year, but it was a fun exercise for me, used up yarn, looked good, and gave pleasure. 

That's a happy result - and I wouldn't rule out repeating or extending it.

Successful family events don't just happen. Immense planning and effort by my daughter's family went into hosting the highly successful lunch. I'm glad I could contribute in a small way. 

If the Christmas hat fits, wear it!   
Much Joy at Christmas.

Monday, November 28, 2022

Certificate Workshop: Braiding

The last Certificate Course Workshop for the year was on braiding, with two methods being taught, first hairpin lace braiding with Arrienne Wynen and second, Kumihimo braiding with Margaret Adams. 
Hairpin lace braiding uses a simple U shaped loom and a crochet hook. It took a while to get the hang of it, but was fairly simple once I established a rhythm. It works a little like a lucet, which you rotate from one side to the other after passing one loop of thread over  another. In the case of lace braiding you use a crochet hook to pass the loop over as opposed to using your fingers with a lucet.

I was using a coarse thread, which allowed me to see what I was doing and looked good on the loom. The idea is to join lengths of the braid together, by linking the loops along the side. I had thought to make a string bag.

However, as my length of braid came off the loom I changed my mind.  I did not fancy unrolling the braid and keeping it flat to join it.

It will make a handle or strap for a bag!


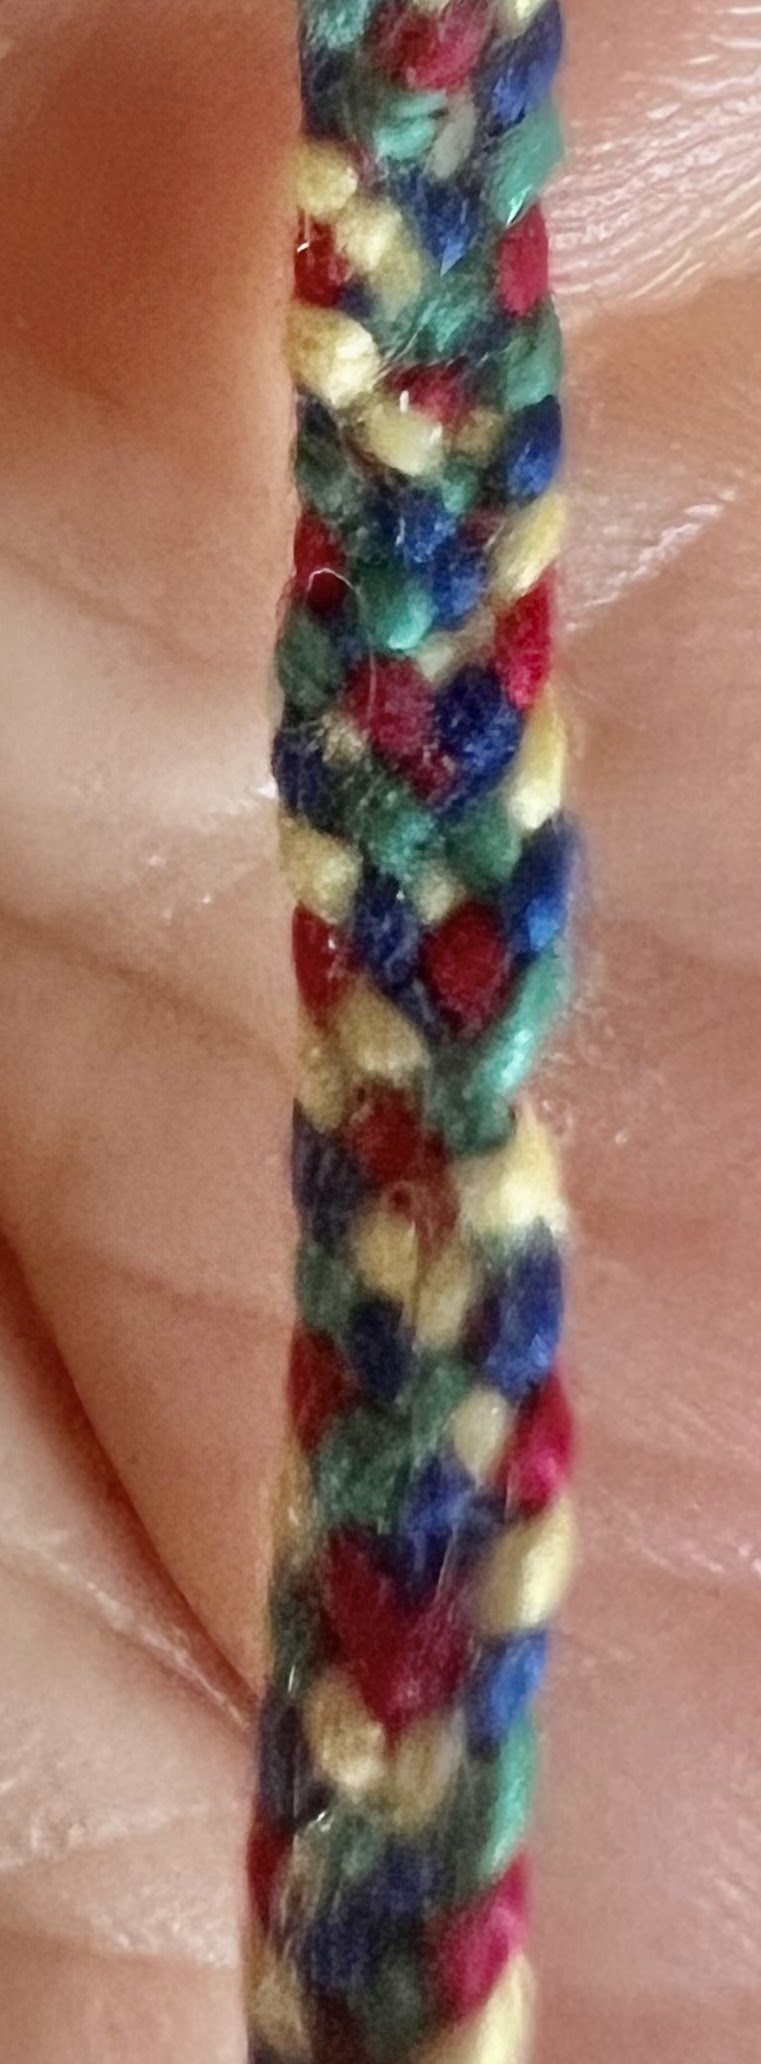
The Kumihimo took longer to set up and to establish a rhythm. The result was, however, a bit more attractive.


It is worked on a rather more complex loom, and the braider follows a sequence of moves of the threads, drawing the braid through to the other side 

The sequence and colour of the threads determines the pattern.

I made the mistake of working in single threads of perle 5, which I thought would be thick enough. In one sense it was. The resulting braid will make a good drawstring for a bag - but it is not thick enough to progress quickly and several hours of work went into producing 30 cm of braid, which has used about half my thread lengths. 

Our notes had clear descriptions of the 10 steps in each braiding sequence. It took quite a few times through before the rhythm caught and the steps became automatic, but now they are I can do it while talking or watching TV. 

It is the kind of task I can imagine a group doing together while chanting the steps - then developing songs or chants to facilitate the work, rather like the Buckinghamshire lace making schools did.

I am now braiding without chanting (aloud at least).  Although each round of the sequence only progresses my braid maybe 3mm,  it is, to me, a more attractive outcome than the hairpin lace. For lace effects I'll stick to knitting!
Over the next week or so I will use up the threads still on this piece of Kumihimo, giving me a braid around 55 cm in length - enough for a drawstring. I'll be proud to use it and to explain it's origin.

I will not, however, stop using either ribbons or twisted cords to secure bags in future!

I might though, have another go using much thicker threads.  I can see the interest that might develop in experimenting with different colour combinations and patterns.

I have a few Christmas projects to finish, none of which involve braiding!  I can see this working well in rehab or de-stressing settings. It develops a very soothing repetitive rhythm which is relaxing, addictive - and produces something attractive and useful.

I'm well satisfied with that - and again grateful for these workshops.

Wednesday, November 2, 2022

Rococo Pouch, scissor fob and, well, name tag!

This is the scissor fob I made in the recent class with  Christine Bishop at the Guild. It is part of a set - pouch, pincushion and fob. The stitches and basic design are the same for all pieces, so we could learn on the smallest piece.

It was a good exercise. I made simple mistakes on my initial rococo stitch (all in orientation) but had the hang of it by the time I'd worked the fob. 

Just as well, because there was a lot of rococo stitch!

I decided to vary the set a little. Originally, I intended to use the pouch to store jewellery, but changed my mind along the way. I added a few pins to the sides of the fob, to free up the pincushion for another purpose.

My granddaughter Niamh keeps me supplied with pincushions to prevent me using the arm of a lounge chair - so I didn't want to make another for myself.

I have a long saga of Guild name tags. Three of them are in safe places where I put them while travelling overseas in 2017, 2018 and 2019. I kept them pinned to the lining of my handbag, which I emptied before travelling. Each time I returned, I couldn't find the name tag and finally bought another. Twice the inevitable happened and the old ones turned up. The last time that didn't happen AND the pin on the new one was only attached by double sided tape and fell off. When superglue failed I abandoned it and haven't ordered another. 


As I didn't need a pincushion I formed the idea of making a name tag, bored holes in the corners of the plastic using a hot skewer and attached it. I had thought to alter the shape to a rectangle, but Christine suggested the diagonal.

I lined it and created a pocket.

For the moment I have found a packed of various size crewel needles to fit inside. I might, at a future date. add a couple of tapestries as well. The packet folds nicely to fit inside, with no sharp points exposed.


I then moved on to finish the pouch, which is lined in silk. I found a tiny blue button for closure.

This gives me a neat little set of scissors, pins, needles and name tag to take to the Guild - 


as long as I keep it in a safe place!

Wednesday, October 26, 2022

Embroidery in a Void - drawn thread work

 Last Saturday was another fabulous Certificate Course Workshop with Di Kirshner on drawn thread work where threads are removed altogether and the space filled with embroidery. I've done some of this before, but have much to learn, and Di is a very accomplished teacher.

I'm not going to give much detail. The class was very much the intellectual property of Di and I'm trying not to breach that. 


Much of the class time was taken up preparing the spaces in which to embroider. It is, I think, a really nice design, and simple enough to work as a sampler, in part or whole.

It took me a couple of days to finish at home and I was excited to find a way to make it up in an appropriate form.

I tested a couple of ideas out on Katherine, Niamh, Veronica and Anthony. Their views, while not unanimous were similar enough to guide me to a pouch, or pocket.


I found some dark green silk, which they all agreed was appropriate, so this is the result. I did think of a Christmas present that would fit into it!. I lined the piece completely with the silk, then folded it to form a long thin pouch, folding the corners in at one end and stitching up the other end.

I even ironed it very carefully


before stitching the back seam down using four-sided stitch and adding a Dorset button I had from some previous class.  I also stitched the lining down on the inside - not strictly necessary since it was firmly attached to the linen, but neater and less likely to catch on any contents.


I have every reason to be pleased with this result.

I'm really grateful for these classes. Many thanks to all who helped along the way.