Search This Blog

Tuesday, January 30, 2024

Mexican Embroidery sampler


I have been working a sampler of Mexican embroidery motifs and stitches for my presentation to the World Embroidery Study Group in February. I began with a free sampler design from the Victoria and Albert Museum, presented as a small bag. 

While the designs are good, I found the instructions less so. They suggested copying the design on to fabric. Since a number of motifs were cross-stitch, and we know much Mexican cross-stitch is counted, this didn't make much sense to me. While the downloadable pdf has grid marks, the hand-drawn cross-stitches don't conform to the grid.

I decided to choose some of the motifs and work them on even weave linen. To save my eyes I used 25 count. It took a bit of translation and adjustment, but I finished with three motifs and a border more or less in line with those on the V&A sampler.
 
I started with the border, then added the deer, and fitted the others around this.
Before working the lower border, I decided to work the back of the bag with an Otomi design, taken from a book of such. 

Otomi embroidery is distinctive, produced by artists in Tenango de Doria, Hildago, North East of Mexico City. It features bright colours, animals, birds and flowers, worked mainly in a one-sided satin stitch. It is a flourishing business.  

Otomi artists hand draw designs on to fabric for the embroiderers to work.   

I also purchased a blouse from ArteOtomi, one of the Tenango cottage industries. It is extraordinarily beautiful.  This is the main front section. As you can see, figures are designed and worked in narrow sections. 

The back of the embroidery is amazing, and the garment could probably be worn inside out!
I have ordered more!

My effort does not compare. To begin with, the style was not designed for even weave linen, especially not a loose even weave.  While I could never have reproduced the fine product of the Otomi, the linen was very limiting, and would not have been used by an Otomi artisan (or an embroiderer with any sense!).

I drew a design on by tracing roughly from the book and using 4 strands of stranded cotton in colours roughly matching the book. I had to work with the quite large holes in the linen.
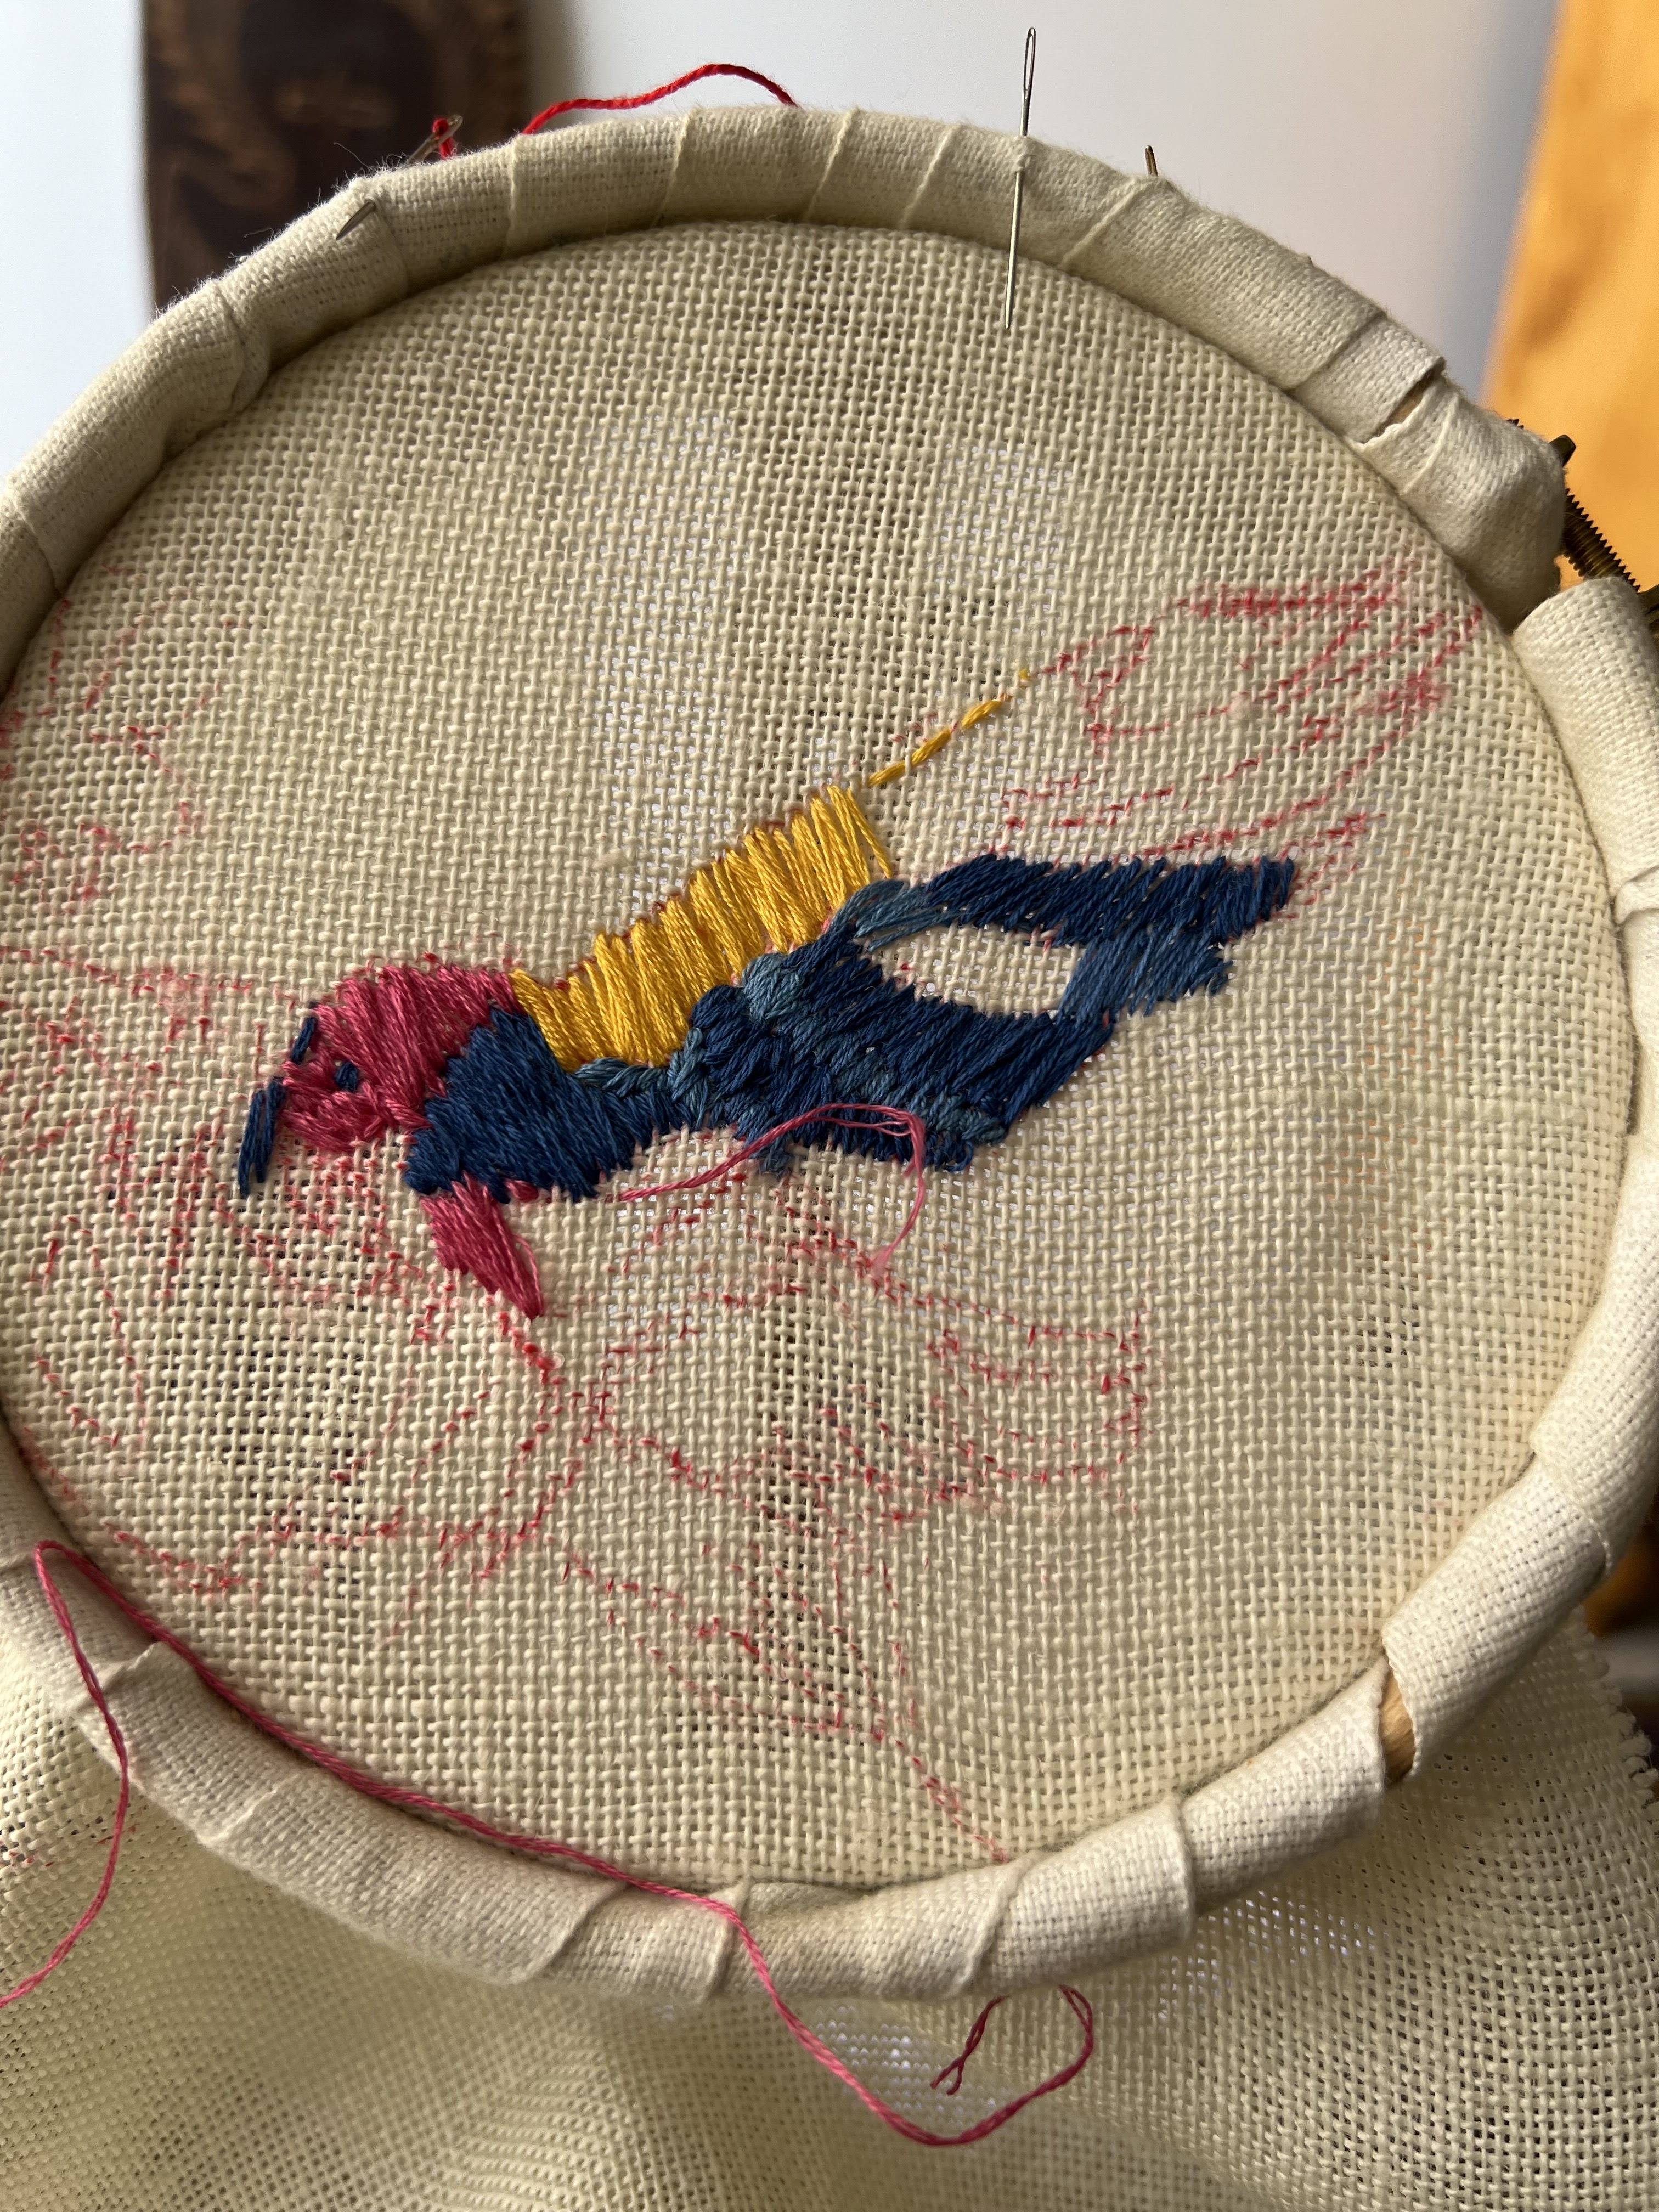
It took a couple of days, is crude, but does give the idea.

As a sample it provides a bit to talk about. I would probably have done better to work on cotton and appliqué it on, but it serves a purpose.        

The back of mine could definitely NOT be used - but it does show the technique.  


While I had worked the top border line by line, I worked the lower border by following the colour lines through. This is a more thread-efficient way to work, but has a greater chance of a counting error. I also ran out of three colours - I had forgotten how thread-hungry cross stitch can be when worked in dense geometric patterns. 
Fortunately, two of the colours were in a bundle of surplus threads a friend had given me, and I substituted for the third.  

As my mother would have said, it will pass with a push. 

I thought a fabric I recently bought from Batik Fabrics Online would go nicely as lining and yesterday I made the bag, using a narrow strip of the lining as a strap to carry it.

It will make a half-decent project bag. and will be of interest to the World Embroidery Study Group

It has certainly given me the beginnings of an understanding of the culture and diversity of Mexico,  and great respect for the  work of Mexican embroiderers, especially the Otomi.

Thursday, January 25, 2024

Green Prayer Shawl


I began this between Christmas and New Year, as a prayer shawl for a friend whose Christmas communication said she was due to have a major operation early in January. I like making prayer shawls, a way of thinking about health, healing and friendship and wrapping someone symbolically in care.  I was not far into this one, , using a 200gm ball of 8ply I had in my stash, when I had doubts about its appropriateness. I doubted my friend would like the colour, or would ever use a shawl, especially at this time of year where she lives. I continued knitting it. I’ve done this before with a prayer shawl, and just as I finished it, the right person turned up, loved it and used it on her healing journey. Trust the process.


It took about 4 weeks to knit, in between other projects. It has an 8 line pattern and after about 10 pattern repeats I could manage without the pattern - an ideal situation for a prayer shawl, freeing my mind to think about friendship and healing. 

I began using my favourite bamboo circular needles, knitting back and forth. Part of the way through I acquired some ebony needles as part of a Christmas gift. They are fabulous, so lovely to hold. I've ordered 2 sets and never want to use anything else!
I kept going until I reached the recommended length of 152cm and the end of a pattern. 

Unfortunately, the wool ran out 7 stitches before the end! (I marked the wool end with a circle). Fortunately I had another ball and could join the extra 15cm needed to finish!

It looked like this around my neck before blocking, about 24cmx152cm.   


The next day I blocked it, using blocking tiles and pin blocks, supplemented by blocking pins, laid out diagonally across my dining table. It blocked to 44cmx200cm.
Now, over the same dress, it looks like this.


It looks great, drapes nicely and can be worn various ways. Yes, there were a couple of ends to be woven in after I took the photo to the left. It's an easy pattern, once you get the hang of it and could be worked in a range of yarns and thicknesses.  

Sooner or later someone will claim it.  In the meantime, I have embroidery projects, and two Rowan knitting kits, awaiting my attention!

Sunday, January 21, 2024

Remakery

Last week I undertook a really interesting remaking project for a family member. It began with a treasured skirt. I didn’t take a photo of it, but it was short, A-line and gored, in a sturdy  Japanese print fabric, probably a cotton-silk blend. This is half the front, the other half a mirror image, including pocket.

I undid the side seams, and the front seam, leaving each of the two gores with the pocket intact, and undid the back seam. By turning upside down the two back panels and joining one to each pocket panel, I made two rectangles, which I could join together and shape into a tote. There was enough length to create a base; in fact, rather too much, so I stitched a tuck or two, which added to the strength of the base.

I found a Japanese cotton print for lining and cut it to fit using the crude method of cutting around the finished shape with allowances for hems. 
                              

The result is a sturdy bag, with a useful pocket on each side.                 

I hope it has a good home and plenty of use.    

Tuesday, January 16, 2024

Botanica Linen Bag


Early in December I bought a remnant of linen, Botanica in Earth  from Ink and Spindle. The remnant was 70x40cm, the perfect size for a tote bag. 

Although it was a single pattern piece, I was able to cut it fairly neatly into two to form the sides of a bag.

This is really beautiful linen, heavy weight, designed for upholstery, woven in Belgium, dyed and printed in Melbourne. The design is so lovely it seemed a shame to embroider it.
Eventually I decided to use one colour, one thread, and to embroider just one plant on each side of the bag. The colour choice was easy. The waratah, grevillea and gum blossom all come in reds. I used perle 8 in a couple of shades of red. 

I began with the Waratah, whose petals screamed bullion knots. Some embroiderers avoid them, but I'm OK with them. It took  thought and couching to get the shapes, and the final few required me to find a  long upholstery needle to manage the 30-40 wraps to get the length.  I got the texture I was after.

While I didn't want to embroider all the leaves, I felt the centre of the bloom needed a focus, so I tried green in between the printed lines, leaving the outlines. This didn't work at all, so in the end I filled green over the lines. It's far from perfect but has the visual impact I wanted, while reinforcing my belief I should not try to 'colour in' the print. This was enough highlight for one side.
On the other side I worked the grevillea with pistol stitch - again, the plant dictated the stitch.

This was an easier task. By the time I finished I had decided to add a second touch to this side. 

French knots on the gum blossoms seemed a no-brainer.

I did, however, stop there.

The length of the front and back gave me a couple of inches to fold in for the base, otherwise the bag would have been inconveniently deep. I found a couple of pieces of linen blend in a colour close enough for the handles to avoid cutting into another metre piece of the lining. These are secured with three layers of stitching, so shouldn’t give way under most weights (nor if they get caught in the door of a moving vehicle or an escalator, which may be less of a good thing).

Construction was easy (not often I say that!) because the fabric was heavy, straight and ironed (not often I say that either!). I had some matching plain linen, lighter weight but still firm and straight, for the sides and lining. No special treatment needed. 

I am very pleased with this result..I think lots of people will like this one and it has potential for a charity auction that is on this year’s calendar.    


Yes, it's true the bird (which Canberra bird-watching friends tell me is a Channel-billed Cuckoo) on the grevillea side lost its head in the hem,  but his mate on the other side came off  triumphant.     

Saturday, January 6, 2024

First project of 2024: Voices of Women bag

I enjoy making tote bags by embroidering linen. They are useful, a decent size to work on, and make good gifts. This Christmas I gave away the last of my  finished bags. I wanted to begin the new year with embroidery, rather than knitting, so I launched straight into this bag on New Year's Day.

I bought this linen from Tessuti months ago. It was their own single run and I could immediately see its potential for bags so grabbed some. I now began by cutting it to size and pencilling in some quotes in the spaces between the faces.

The linen was quite fine, so I added interfacing to the back. Although it had been iron-on interfacing, it didn't iron on (this could be age related, but I gather it is frequently a problem) so I used it without adherence. 

I chose fairly short quotes that I liked and didn't overcrowd my canvas - three quotes on one side, four on the other. The distribution enabled me to use a 6" hoop for the embroidery, which gave me maximum tension on the fabric.
As all the embroidery was of words, I used Quaker Stitch, for which good tension is essential. I thought at first I would use green and purple thread, the suffragette colours, but changed my mind in favour of red - a better contrast with the black and white fabric, and appropriately the traditional colour of the goddess in ancient embroideries. 
 Quaker stitch was designed for, and works best in, wool, but I managed to get this working reasonably well with a perle 8 cotton. I needed to pay close attention to the needle angle. Perle 5 would have been easier to work with, but the Perle 8 gave better definition on this fabric.


I worked the names of those quoted along the bottom of each side, or, in a couple of cases, close to the quote - wherever it seemed to fit.
I found black linen for the sides and lining and used the main fabric on the base. 

I'm satisfied with the first embroidery project, and the first bag, of 2024. Someone will want this.  I have fabric for at least 2 more, and there are plenty of words and names out there to use!