Search This Blog

Showing posts with label Glazig. Show all posts

Friday, July 4, 2025

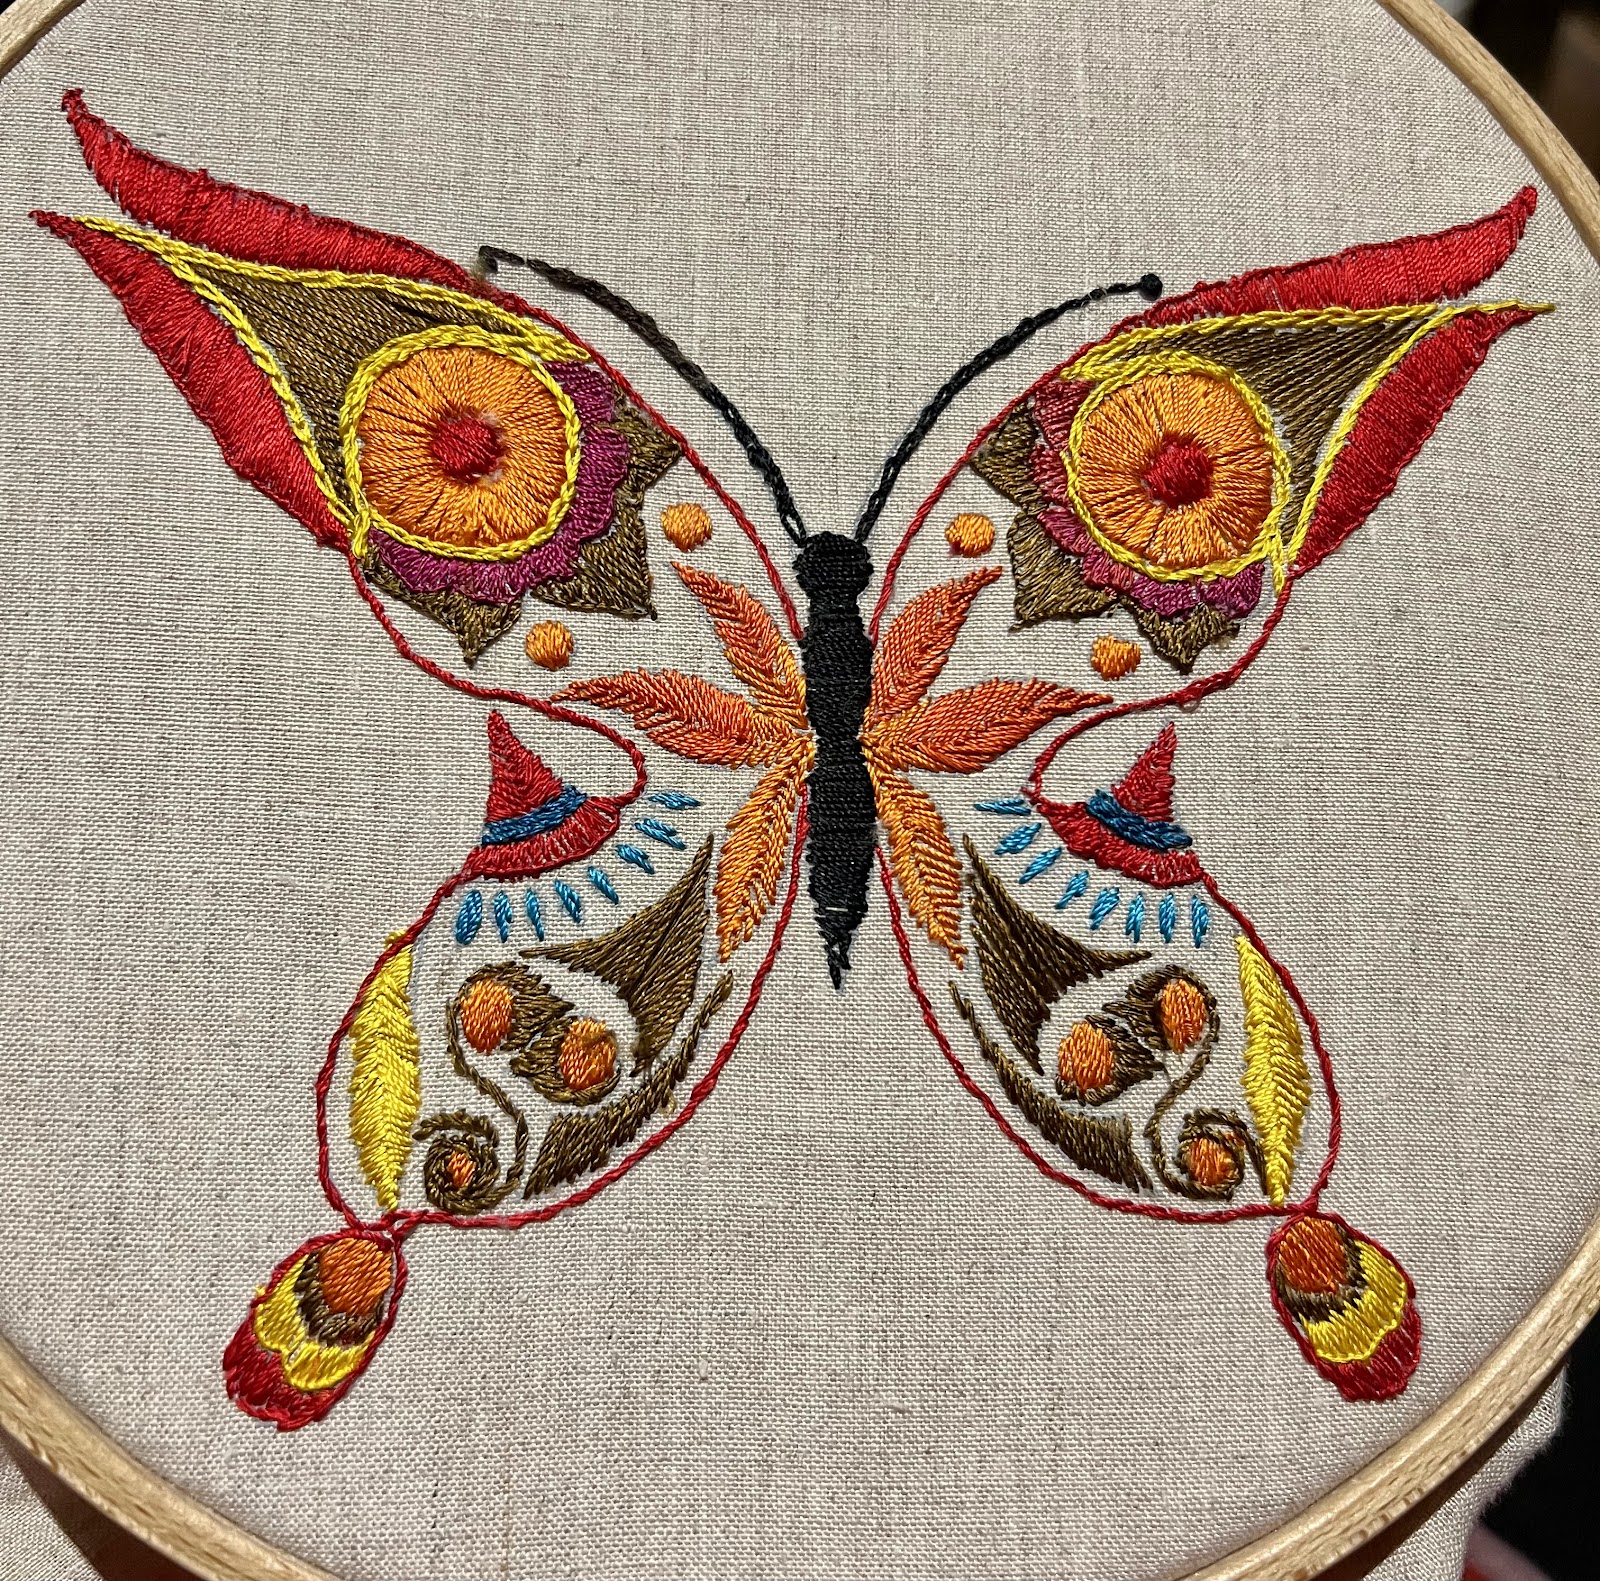
Another Glazig bag


This design last featured here in March of last year, when I used it as part of a Certificate Workshop on Glazig Embroidery. As well as very small samplers for students to work, I had purchased a few printed linens of this design for interested students, and began working one, just to show recommended stitches. 
I dug it out this week, because I have been preparing a presentation on Celtic Embroidery for next week's WES meeting, and thought it timely to finish this as yet another example of the genre. It was still in the hoop (yes, with a solid indentation).
I worked with the required Au Ver a Soie silk perlee threads.The workshop had depleted my thread supply in a few colours, notably blue, so my palette was a bit limited, but not onerously so.

It is slow work, requiring a magnifier. I stuck to the more commonly known sitches used in Glazig - buttonhole, satin, stem and fly stitch. 
There is a larger void than in the previous examples I worked, but I rather like that.
The linen on which it was printed was a little wider than A4, so once again, I turned it into a zippered bag. The last one worked very well.
The cutting out, finding lining, constructing bag and strap all went well. I bombed, however, putting in the strap, forgetting that, with a zip, it needed to go on the outside of the bag! 

Once I had unpicked the (very secure) attachment and resecured on the outside, all was well.


I am pleased with the batik I found for the lining. It seems to blend well with the embroidery.

So I have another example to accompany my talk next week and a bag that someone will like and use.

I have three more of these printed Glazig linen butterflies which I will probably keep for teaching purposes, and one I haven't worked of a flamboyant bird.  I'm certainly not working that before next Wednesday, but maybe some rainy day......

Meanwhile, I've enjoyed this one - and dedicate it to Genevieve, who first introduced me to Glazig. Merci beaucoup!

Saturday, March 30, 2024

More Glazig Workshop preparation

Over the Easter weekend I have made an effort to work the two samples I need for the Workshop I have to give later this month. I was hopeful this is the last of my preparation, following the printing of notes and linens earlier this month. 

The samples are about 2" square. While they are not overly ambitious, they each require 5 or so different stitches and the use of Au Ver a Soie Perlee thread - quite a bit to get used to.

I worked in a seated hoop stand. I needed both hands to maintain tension, as well as protecting my wrist.

I used the smallest piece of linen I had printed for the first one - figuring better for me to use than a student. I stitched it to a piece of old sheet to fit it into the hoop.

It was relatively straightforward until I came to the open chain border, which was very awkward to manage in the hoop, so I ended up taking it out and working it in hand. 

The green section is a feather stitch, the beige ones and the pink flower are buttonhole stitch (one close together, one further apart). The red flower and the yellow centre are eyelets, the purple corner is woven and there are three varieties of chain stitch.

It's a bit rough. I needed magnification. The silk is lovely to work with and largely holds its twist. 


The second sample was in most ways simpler. The leaves and dark berries are buttonhole stitch and the red flowers eyelets. There are three versions of chain stitch. 

The photo here shows my waste knots and the simple chain stitch border before embellishment.

The embellishment proved  a bit tricky. The stitch chart lists it as chainette surjetee. The diagram suggests a series of loops under each chain stitch without anchorage. Searches in Jacqueline Enthoven's The Stitches of Creative Embroidery produced no likely stitch. In the end, I came up with a version which gives the side loops indicated in chainette surjetee and is held in place by weaving under and over each individual chain.

It will be interesting to see what the Certificate Course students come up with.


I'm a bit concerned I may not have provided enough thread of any one colour for students, especially for the daisy flower in the first sample above. I intend, however, to give them the option of cutting another length from the spare reels I have. The colour choice isn't great, but this is expensive thread, and we are, after all, learning about it.

I did enjoy this second sample, perhaps because of the colours I was using. perhaps because the border, however puzzling, was neater and easier than the open chain of the first. 

I'm no expert in this area, and I'm looking forward to learning more from the workshop as we figure it out together.




Tuesday, March 5, 2024

April Certificate Course Glazig Workshop

Last week I realised I needed to get organised for my April Certificate Course Workshop on Glazig Embroidery. The notice, with information about student requirements, needs to go into the Guild's March newsletter. 

While I have books, a finished bag, a project in progress, along with a PowerPoint  already prepared from WES Group last year, I needed to prepare student notes, plan a student project and make sure the resources are accessible. This wasn’t a straightforward task, given the specific and contemporary nature of the topic. 

I can’t invent a design of my own, and I can’t breach copyright, so am working in narrow parameters. 

I settled on two small motifs available in the book 25 Years of Glazig Embroidery. Use for study purposes should be OK. Motifs are small, simple and have stitch charts. I have 5 books of official designs and students can use any of them. 

I cut squares of linen, discovered my iron-on transfer pen was defunct,  so decided I could use (some very old) dressmaker's carbon to transfer the designs to the squares. This enabled me, in between a  hairdressing appointment,  shopping  for  family dinner and weekend house guests,  to write the notes and newsletter notice. I emailed the notice to the Guild and the notes to Officeworks for printing.

After transferring about 5 motifs to linen using the carbon, I found time for a trip  to Spotlight  between picking up the printing and taking a granddaughter to JEMS on Saturday, to buy a new transfer pen.  It is medium thickness, and worked well.

The Au ver a Soie Perlee thread used in Glazig embroidery is so hard to get in Adelaide it is unreasonable to expect students to obtain it for the workshop. I have a supply I have acquired since diving down this rabbit hole, some of it from stock clearance sales. I figured I could cut some lengths of this to add to small kits.   

I used a punch to cut cardboard circles into which I punched 7 small holes, then cut lengths of 7 different coloured silk perlee threads and attached to the cards. If students need more thread they can cut a length in class from the remaining reels.

I now have 15 kits prepared, another 5 linens printed, 5 more sets of instructions and some spare cards, so I can quickly create additional kits if required, or support students who don't want kits. 

The notice has gone to the newsletter. I've amended the PowerPoint but will check it again before creating a USB closer to the workshop.

Phew! Panic averted!


Sunday, April 2, 2023

Glazig Embroidery: Yar Zour

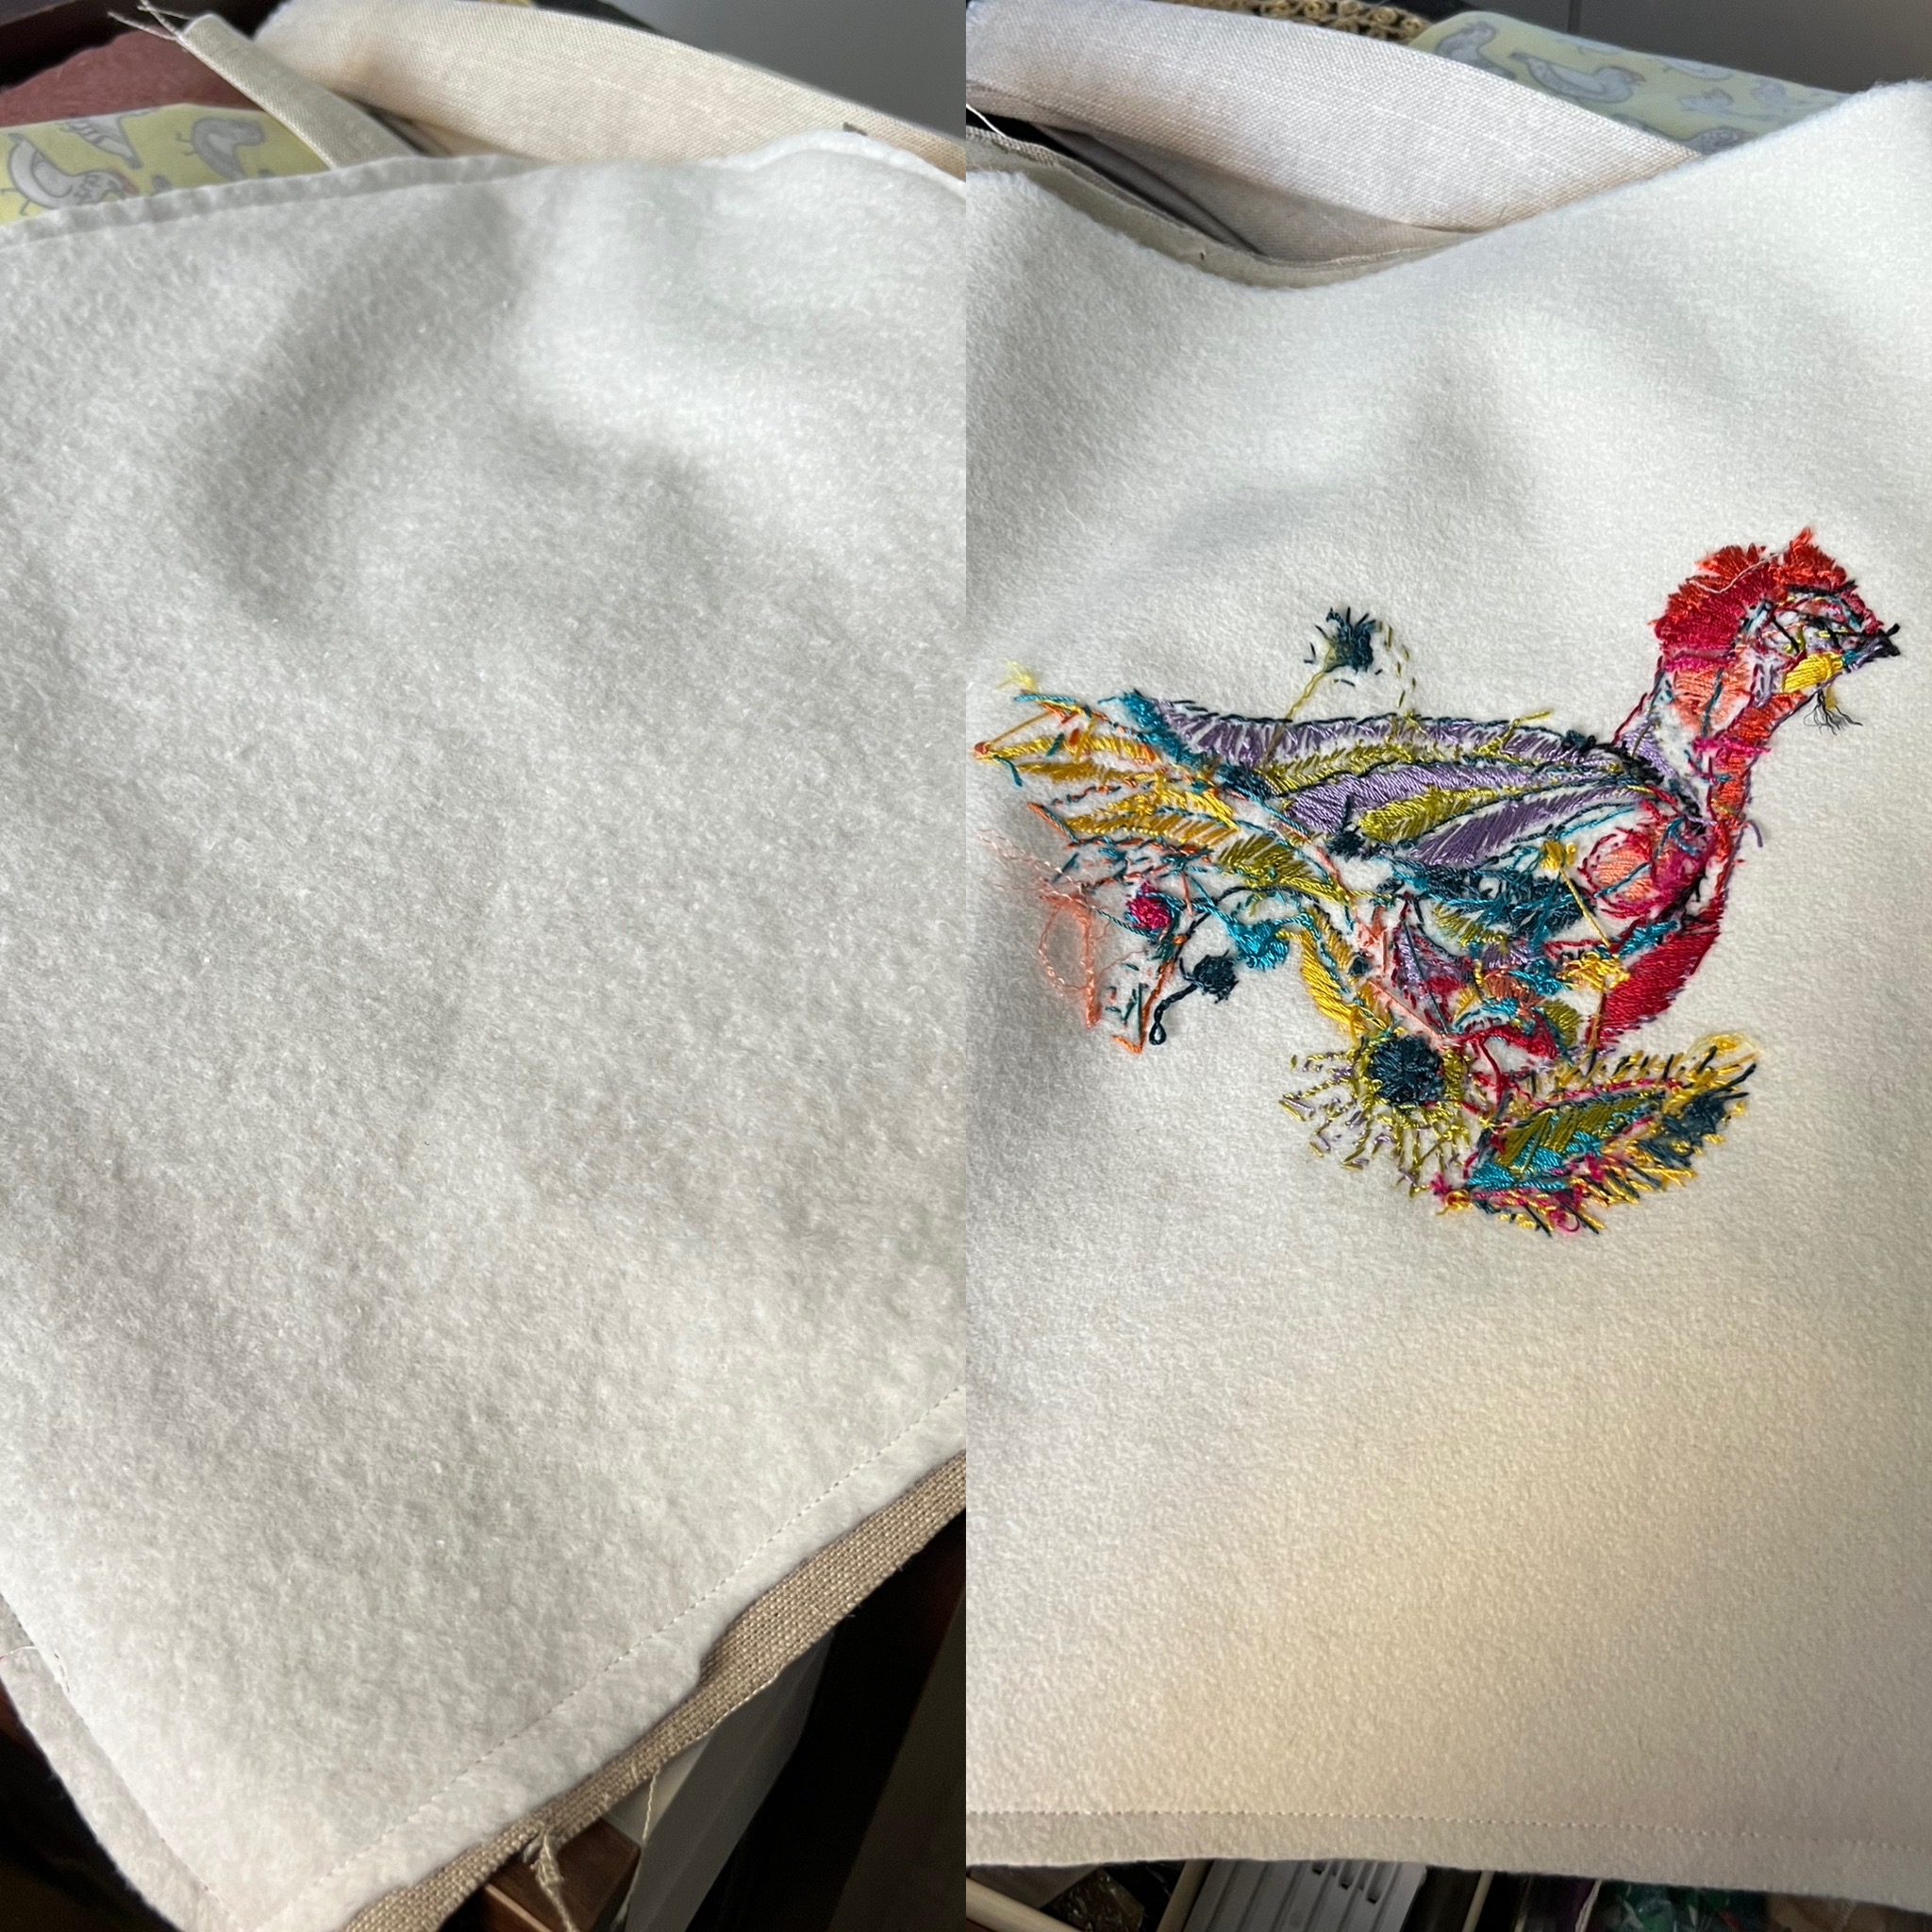
For the last couple of weeks I have been working on Yar Zhou,  a design from the studio of Pascal Jaouen, in the Quimper region of Brittany. Jaouen has developed a modern design and haute-couture style from historical embroidery of the region - in particular, Glazig (or 'little blue") embroidery popular on men's vests in the 18th century.  

The vests were woollen, or linen lined with wool, and embroidered in silk. Jaouen'skits are likewise worked on linen backed with wool and use au ver a soie twisted silk thread.

My kit was a gift from my Belgian friend Genevieve, who visited Quimper a couple of years ago. I hope I've done justice to her generosity.

 Yar Zour means Beautiful Chicken in Breton. 

The kit has linen printed with the design, the wool backing, the silk threads and a set of cards with the individual stitch instructions in French. There wasn't a stitch diagram but I was able to work that out from the photograph on the website.

The silk is lovely, a strong, twisted yarn in vibrant colours. Like all silk it catches on any roughness on hands or nails and the end will unravel and create a knot if you are not careful. Short lengths help. 

I worked in a hoop although chain stitch, very much in evidence on Yar Zour, might be faster if the fabric was held in the hand. My arthritis won't allow me to hold fabric for any length of time and ergonomically it is better to work in a hands-free frame.  The thickness of the wool backing would make a scooping action quite difficult so a stabbing action with two hands and a hoop is called for.

The first challenge was laying the twisted silk thread smoothly in the buttonhole stitch sections. When the thread untwisted, as it sometimes did, the result was smoother. The challenge was not so much laying the thread, as getting the stitches close enough to each other. It was like doing satin stitch with a perle cotton, as opposed to stranded cotton:the threads don't spread or bond. Nevertheless, the effect is there. 

The second, and much greater challenge came with the stitch Galon d'Elliant. I struggled to find an English translation or equivalent for this. The English translation on the website is 'Elliant Stripe'. The diagram provided on the stitch card looks more like a needlelace stitch, but it is, I think, intended as a knot stitch. 

My attempts were so terrible that I substituted a woven stitch in a couple of places. This gave me the effect the design is after.

I found a stitch in Jacqueline Enthoven's book, The Stitches of Creative Embroidery, that might have been close (Knotted Cable Chain, p160), and Braid, or Gordian Knot Stitch, on the RSN Stitch Bank seems a very likely candidate.
I did try Galon d'Elliant in a couple of places, but the result (bright blue left, apricot right)was not encouraging. Fortunately these are tiny parts of the whole. I have left them, as I am after exemplar and learning, rather than perfection. I will be interested to discuss this stitch at the Guild. The Gordian Knot on the RSN Stitch Bank makes sense to me. I have also since found a useful description of crested chain stitch as used in Glazig embroidery, which seems similar. It's an interesting challenge.
One of the joys of this kit is the variation of stitches in such a small space. Every tiny section adds a challenge and interest. I particularly liked the Kamm stitch - the red woven section on the leg and the green/blue oval at the bottom. I can see myself using these again.

So here is the finished figure - a blaze of colour and fitted shapes. 


Although my hoop was well bound, it did leave a mark on the linen.  When I couldn't steam it out with my iron this morning, I blocked it, avoiding wetting the embroidered section. I wasn't too keen on soaking the silk. It dried well and fairly smooth. 

Given the size of the linen piece, I inevitably decided to turn it into a bag. I found some linen and wool backing for the back of the bag

and some appropriate cotton for the lining. This is a limited run design from Missy Rose. Fortunately I grabbed it when it was advertised, knowing it would come in handy.

I had cut out the fabric with a small tote in mind. I cut a long shoulder strap and two short handles, planning to add both. As I constructed it, I thought it might be better sealed with a zip. I had a length of red zip and a red zip-pull that I thought might work.

It did.

The tricky bit was ensuring the pull couldn't slip off the end. I solved it by inserting a small button at the open end of the zip.

I set out to finish this kit as a sample for my presentation in May on Glazig Embroidery to the Guild's World Embroidery Study Group. I now have a quite delightful bag and a lot of learning to show for my efforts.

That's the joy of experimenting with embroidery - and of a network of friends who share the madness. Thank you so much, Genevieve for the gift of a kit, your friendship - and a whole new rabbit-hole to explore. 
Merci mille fois, mon amie.