Search This Blog

Monday, July 11, 2011

Tea cosy

A few months ago I had a request for a tea cosy for a small teapot. It's an easy thing to move on to from the cardigans and hats, while I am preparing for my next smocking project, so I dug out an old pattern book of my grandmother's - stored with other patterns in an old box commode in my study!


I made the house tea cosy from this book for a friend about 25 years ago. One of these days I just might get around to making the koala, but this time I thought the little frilly one might fit the bill.


It is meant to resemble a daffodil and I liked the idea of graded colour, but I went for shades of red to orange from bits of wool I had around about 4 ply.


I knitted a sample to get a sense of the size. Although the pattern said it was for a five cup pot, there were no dimensions. My sample was half size - and ended up tiny - about 6cm.


The full pattern, which I finally made, casts on 159 stitches, which seems huge.

However, the pattern starts with p3 k10 across the row, then reduces every  knit row to p3 k8, p3 k 6 etc so it is forming little tucks, and dramatically reducing the length.


This is the reduction after 9 rows.


After 20 rows there ar only 39 stitches left on the needle and the knitting width is reduced to about 12 cm. 

You then k3, cast on 10 all the way across and start again in a slightly lighter shade.


I used four shades to get the size I wanted.


Last night I finished it off - made the little leaves in the two of the base colours rather than introduce a green. Autumn leaves!


I had thought I might need to line it, but I think I'll give it a go as it is.


The teapot is squarish and the cosy stretches to fit.

I think almost all the teacosies I knew as a child must have been made from this pattern. It is very familiar to me. I picture it in dark greens and browns.


Wednesday, July 6, 2011

Rosie Hats

The hats to match the Rosie cardigans were relatively easy. I really like knitting shapes that decrease in the second half - so much more fun to be getting smaller than larger.


The Harmony yarn is lovely to knit with, very soft and smooth on the hands. It will be great to wear too.


The photos of the girls wearing them were taken in their car, after dark. Certainly not the greatest shots, but you get the idea - cold, wintery night, warm heads, happy girls!                                                                    

Monday, July 4, 2011

Rosie Cardigans

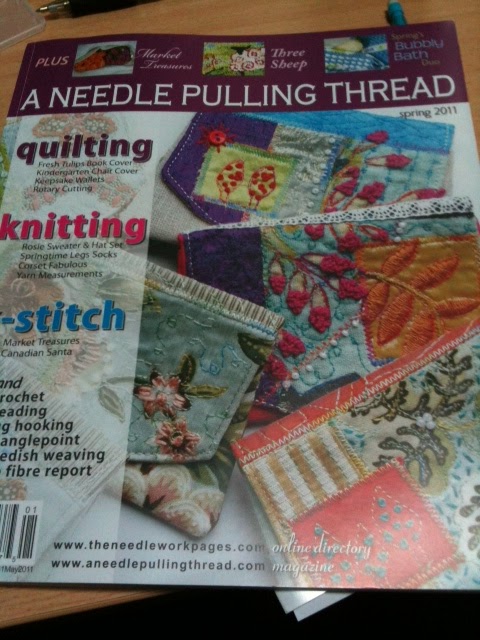
A few weeks ago I received the Spring issue of a gift subscription to the Canadian needlework journal, A Needle Pulling Thread.


A subscription takes about 13 weeks to come from Canada, but since the seasons are out of kilter with Australia's it doesn't much matter, except at Christmas time!


A Needle Pulling Thread covers a wide range of projects - including knitting, rug-hooking, quilting and contemporary fibre arts.

I have found the knitting projects of particular interest.


This issue includes a child's 'sweater' - that I am calling a cardigan - for up to 5 year-olds. It is designed for cotton, which is what I especially liked. I have decided to make one each for my twin granddaughters using some Bendigo Woollen Mill's Harmony yarn I have in my stash. It is a blend of cotton, wool and a little lycra.

I have the yarn in sufficient quantities in a green, a blue or a pinky-mauve. The girls chose (somewhat to my surprise!) the green and the blue.


This is what is is supposed to look like. Will mine look the same?


I decided to knit the two piece for piece,beginning with the backs. I began  with the blue, and found my purl rows were very loose. I undid it back to the flowers and redid it, looping my wool under the needle in purl rows instead of over the needle. Much improved.

I have also simplified the flowers - using only one shade of pink instead of two, mainly because I have three colours in this yarn. For the same reason, the leaves on the green cardigan are blue!


It has worked quite well. Knitting the two at the same time means it is a longer time until you have anything finished, but it means I can show the girls the progress and is preferable to finishing one, then having a whole repeat to do.


There are a couple of small errors in the pattern, so I had to concentrate the first time, but it became much easier on the repeats.


I am pleased with the result, and I think the girls are too! The hats are underway and hopefully will match up.

Saturday, June 18, 2011

Oya/Bibila at Ethnic Study Group Embroiderers' Guild of SA

Last Tuesday I managed to get to the monthly meeting of the Embroiderers' Guild Ethnic Studies Group at which Mary Gabb led a study on Bibila or Oya - a needlelace edging technique common to the Eastern Mediterranean.                                                                                      


 There is much argument about the terms "Oya" (current Turkish term, derived from Greek & meaning
'edging') and "Bibila"(current Greek term).


Pat Earnshaw's A Dictionary of Lace says it is  a needle-knotted lace using a special knot and made in Turkey, Syria, Armenia, and parts of Greece. It often takes the form of three dimensional decoration of brightly coloured silks, like a garland of flowers, said originally to have embellished the yashmaks of the harem women. It was revived in the second half of the nineteenth century as dentate borders to headscarves and handkerchieves, sometimes using cotton instead of silk.

Mary had a lot of examples, some from the Guild Museum, and some of her own, purchased on visits to the Eastern Mediteranean region.


 Some are raised and stiffened, using transparent thread, like fishing line, on the edges.


They are purchased in strings, taken off and added to an edging.


Others are flatter, and more like tatted or crocheted lace.


Very beautiful.


Some of us then had a go at making it, using some samples Mary had begun for us by creating the first row - rather like a button hole stitch along an edge.


The basis is a figure 8 knot.

You thread your needle and tie the needle end with a knot so it doesn't slip.


You put the needle through an existing loop and cross the end away from the needle over the top of the needle (the eye of the needle is under my thumb).


You then take the needle end of the thread under the needle and draw the needle through, making a knot that sits at the top of the loop in the row below. You pull the needle through at an angle to your right (if right-handed).


After a while you fall into a rhythm and tension becomes a bit more even, giving a very neat edging. I fiddled with mine at home for a bit, and finished it off to form little peaks - making it up as I went, just to see how it might finish.


Elena Dickson, of the SA Lacemakers' Guild, is an Oya/Bibila expert and has written a book on the subject. She is, according to Mary, going to write another book for the 2014 Lacemakers' Convention.


It was a companionable and informative session on, for me, an entirely new embroidery technique.


The example I will remember longest is a headscarf - quite a simple printed fabric with an uncomplicated added border of beautifully blended colours. Mind you, uncomplicated would still have taken hours of work, even for an experienced Oya embroiderer!


Monday, June 6, 2011

I love my jeans

Yesterday I sat down to patch a pair of jeans I really like - very soft denim. They had worn away at the inner leg - both seams and fabric.  I had intended to cut the legs off below the knee and use the cut-off to patch the worn parts. When I came to do it, even I had to admit that they were too far gone. To avoid saying goodbye to them altogether, and because they would be of no use to anyone else as they were, I turned them into - surprise, surprise - bags.

The bottoms of the legs, which were wide, made two quite reasonable size drawstring bags.


The cuffs were a bit frayed, so I turned that into a fringe at the top of one bag.                                                                                                                                                                  

On another I added some pale blue lace from my mother's stash.              


The back of the jeans turned into a carry bag with pockets on the outside.


A bit mad, I think, (rather like my grandmother turning her nightdress into pyjamas by stitching up the middle of the skirt) but it really pleases me.


The rest of the jeans made small bags of various sizes.

They will embroider quite well if I decide to have a go in between other projects. I have a few iron-on transfers that would go well. Even as they are, however, they are sturdy, soft bags.


I also patched the knee of the dragon jeans I embroidered for my grandson a couple of years ago. 

The dragon is the one on this blog header.

I keep a few iron-on patches on hand for mending knees but always stitch them down as they lift if only ironed. The dragon is now accompanied by a motor-bike.


Perhaps when these jeans fall apart the dragon will reappear as a  bag!

Thursday, June 2, 2011

smocked featherwale cord tunics

With twin granddaughters I couldn't resist the Top of the Class tunic in the hot pink and lime green featherwale corduroy in Australian Smocking and Embroidery 93. It is a great, simple shape with the big attraction of embroidered figures around the hem.

 About four weeks ago I did the smocking


and over the next weekend blocked them and cut out the other pieces.


It took me half a day to make up each dress. I did a bit of unpicking on the second one - until I set it aside for an hour or so: either tiredness or lack of focus was causing me to make every mistake possible.                


They were then ready for me to transfer the embroidery designs to the hemline. I was hoping  to do a pleated hem over the embroidery because (1) it is easier and (2) it allows me to leave a bigger hem allowance.                                                                                                                                                                          

I used a white gel pen to transfer the designs - the same motif of two girls holding hands at seven points around the hem. I worked one motif right through, then worked the chain stitch outline of the arms and dresses on the other six in case the markings faded. I figure I can improvise around the basic form.


Of course, having done that, I am finding the gel pen isn't fading!


I finished the green one completely before moving on to the embroidery on the pink one. After some deliberation I made a pleated hem that sits just above the figures. Although not in the pattern, it allows me a bit of extra length for growth (I figure I can put rows of featherstitch around any fade marks that appear if they need to be let down), avoids handstitching a hem on a plain fabric and gives body to the skirt.


I worked away from home last week, so marked out the figures to be embroidered on the pink dress and packed it as my project for the week - a perfect choice, given it is all in black thread and I have already done it on green.


 I  also managed to find some black tops and leggings.


I did the hem and buttonholes within a couple of hours of arriving home, washed out the gel pen the next morning and dropped the completed project in to the twins.


This morning we met up with the girls and their mother shopping in the Adelaide Central Market.


Now that's a satisfying project!.