Search This Blog

Showing posts with label apron. Show all posts

Tuesday, January 31, 2023

Reversible Apron for Exhibition


Back in early December, I got out some seersucker I had bought when Niamh and Veronica were much younger, with a view to making smocked nightdresses. I wanted seersucker because it doesn't require ironing, and stripes because I could use them to guide my smocking, instead of pleating. Unfortunately, the girls were less than enthusiastic at the time, so I abandoned the idea, leaving me with rather a lot of fabric.  

I revisited the fabric after our December WES session on smocking, and came up with the idea of an apron, using the stripes for embroidery rather than smocking.

I dug out an apron that I bought as a pattern - Japanese style wrap-around with wide cross-over straps at the back ( It had been easier and cheaper to buy an apron online than a pattern in Adelaide!) and cut it out. I cut out two, with a view to lining it and making it reversible. I figured the seersucker was a bit thin for an apron. If it is protecting clothes it's better that spills don't simply go through to the clothes below.

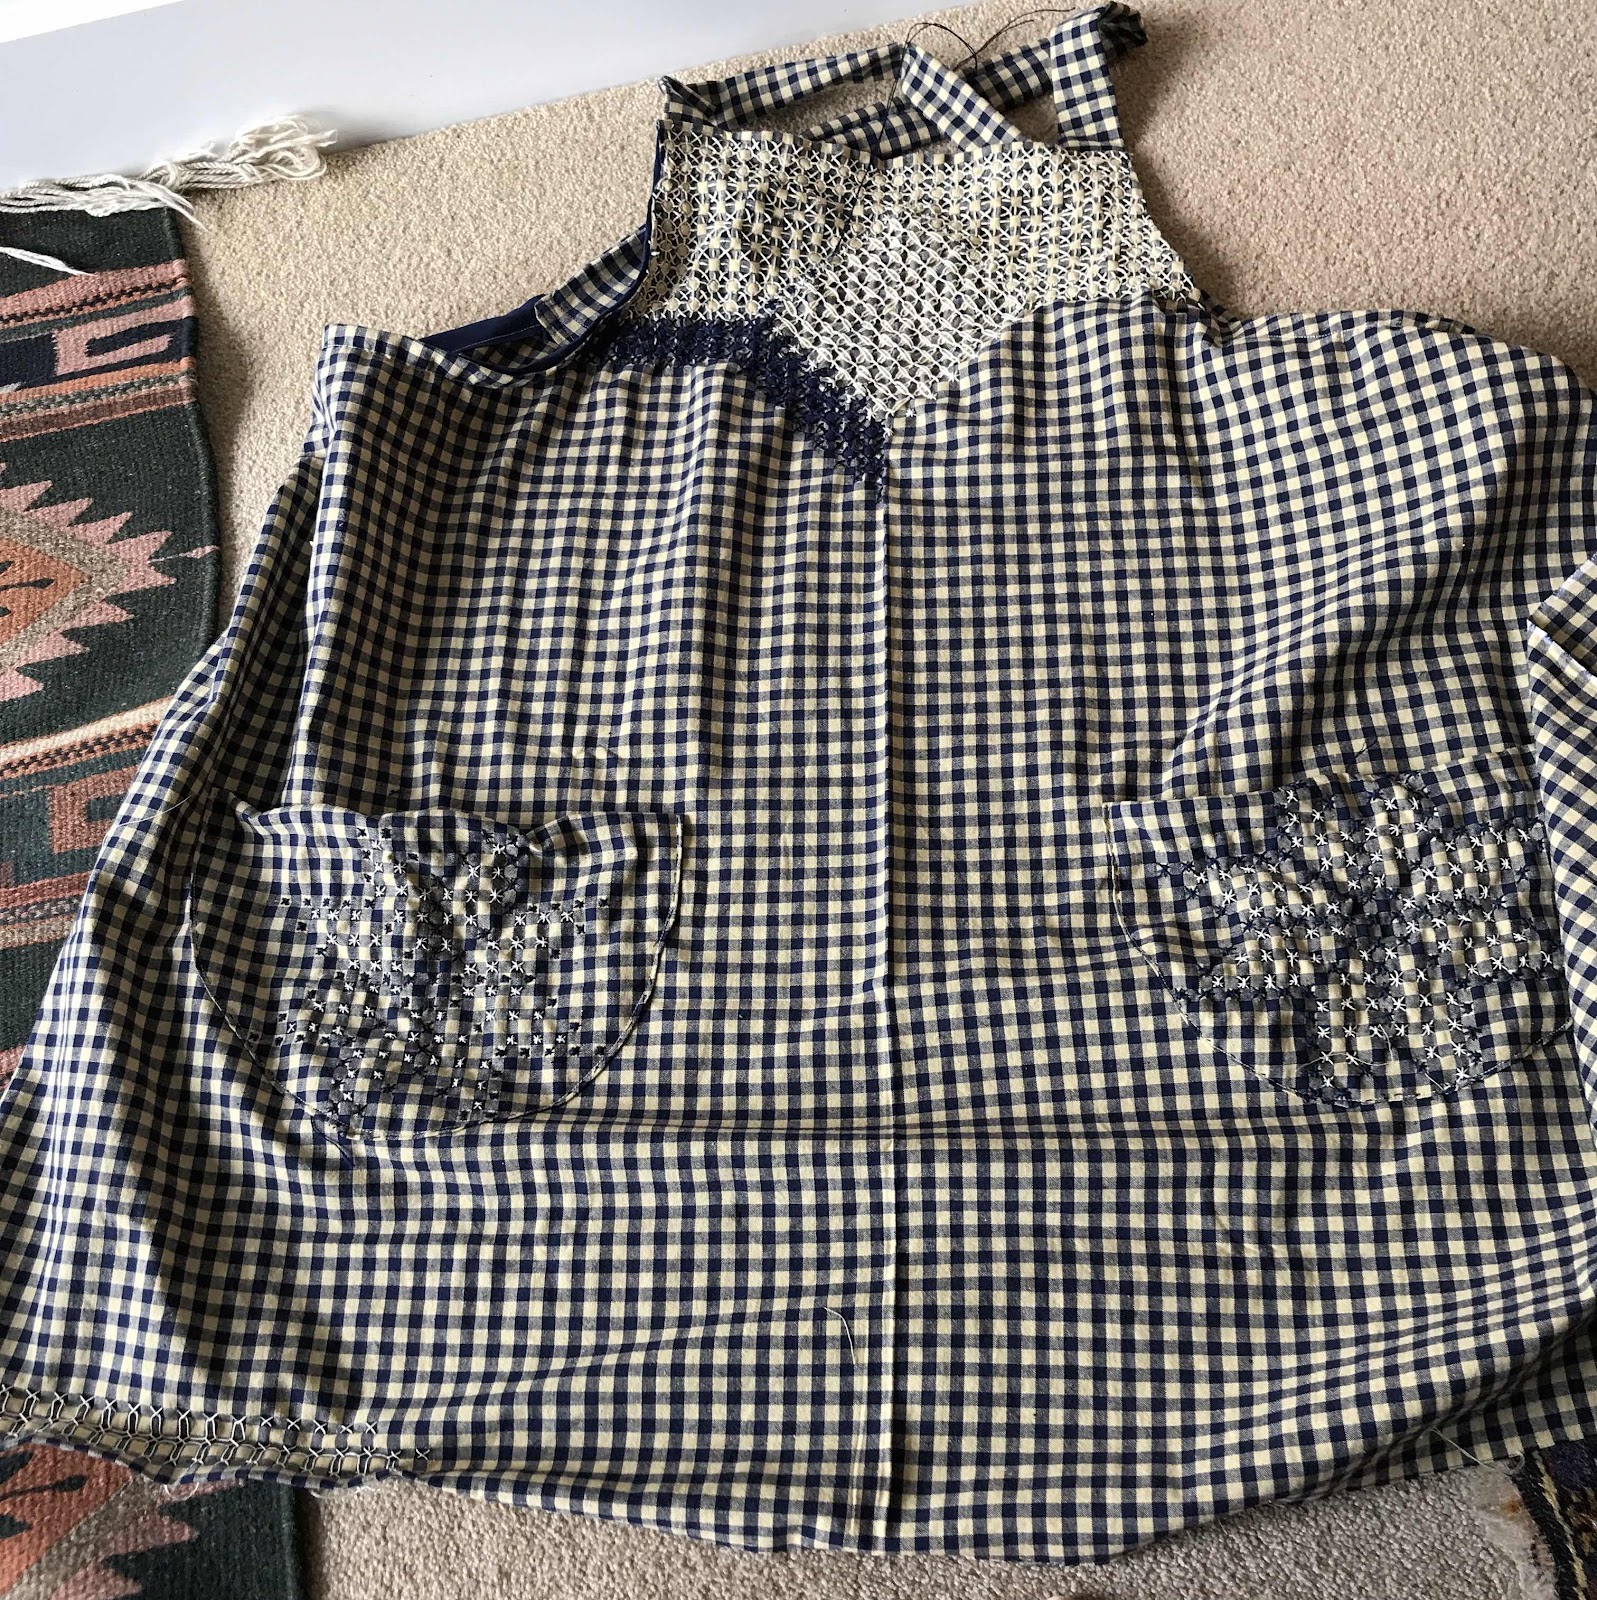
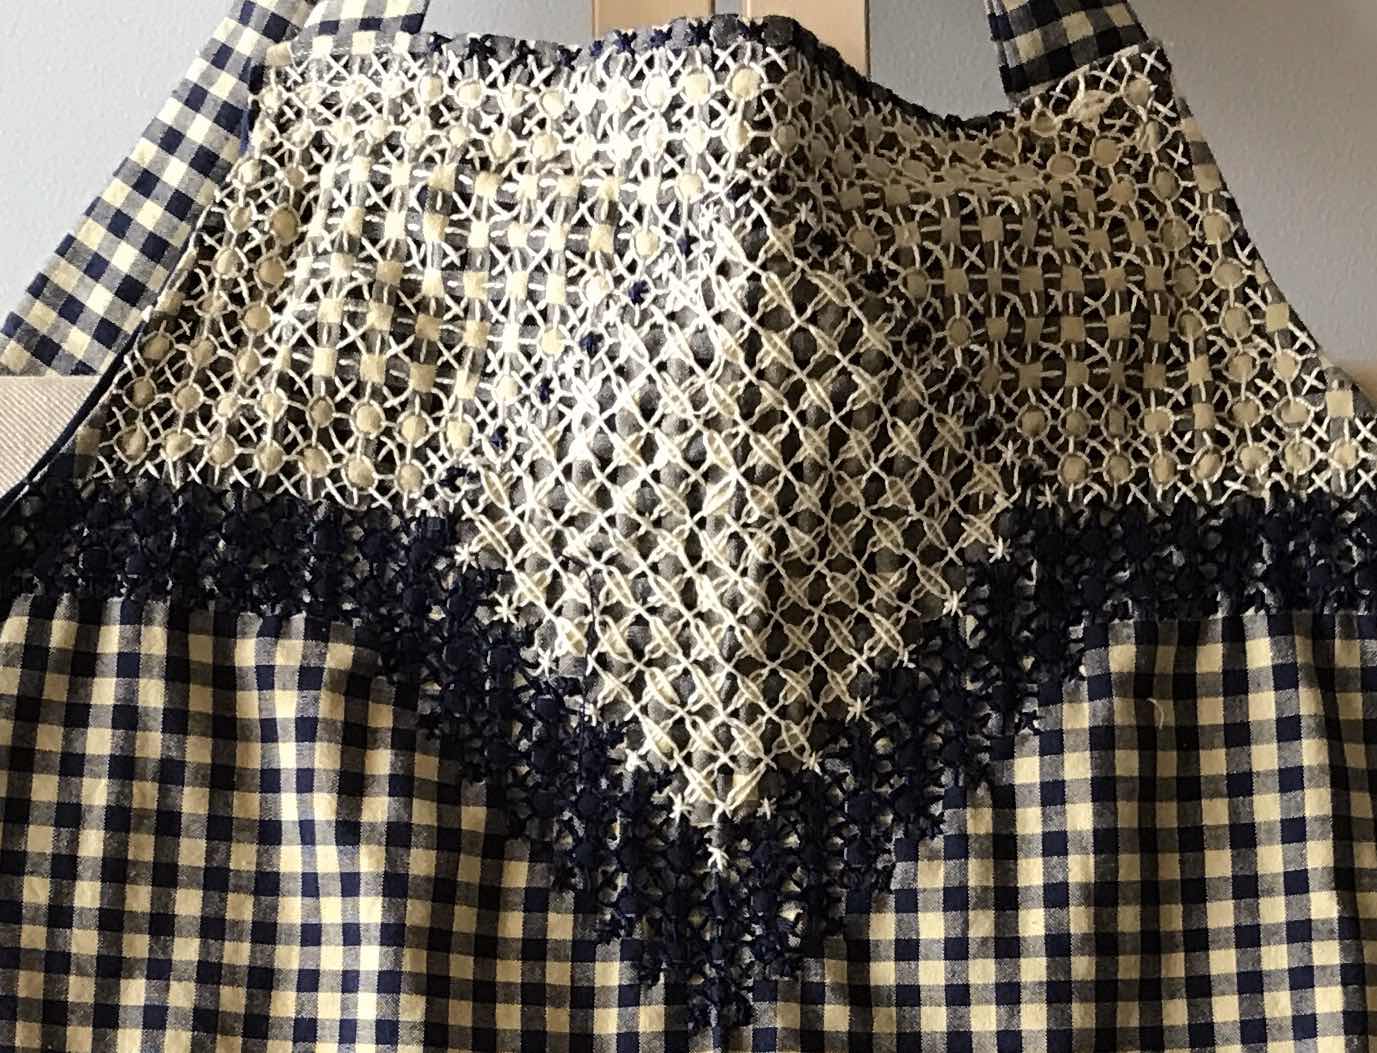
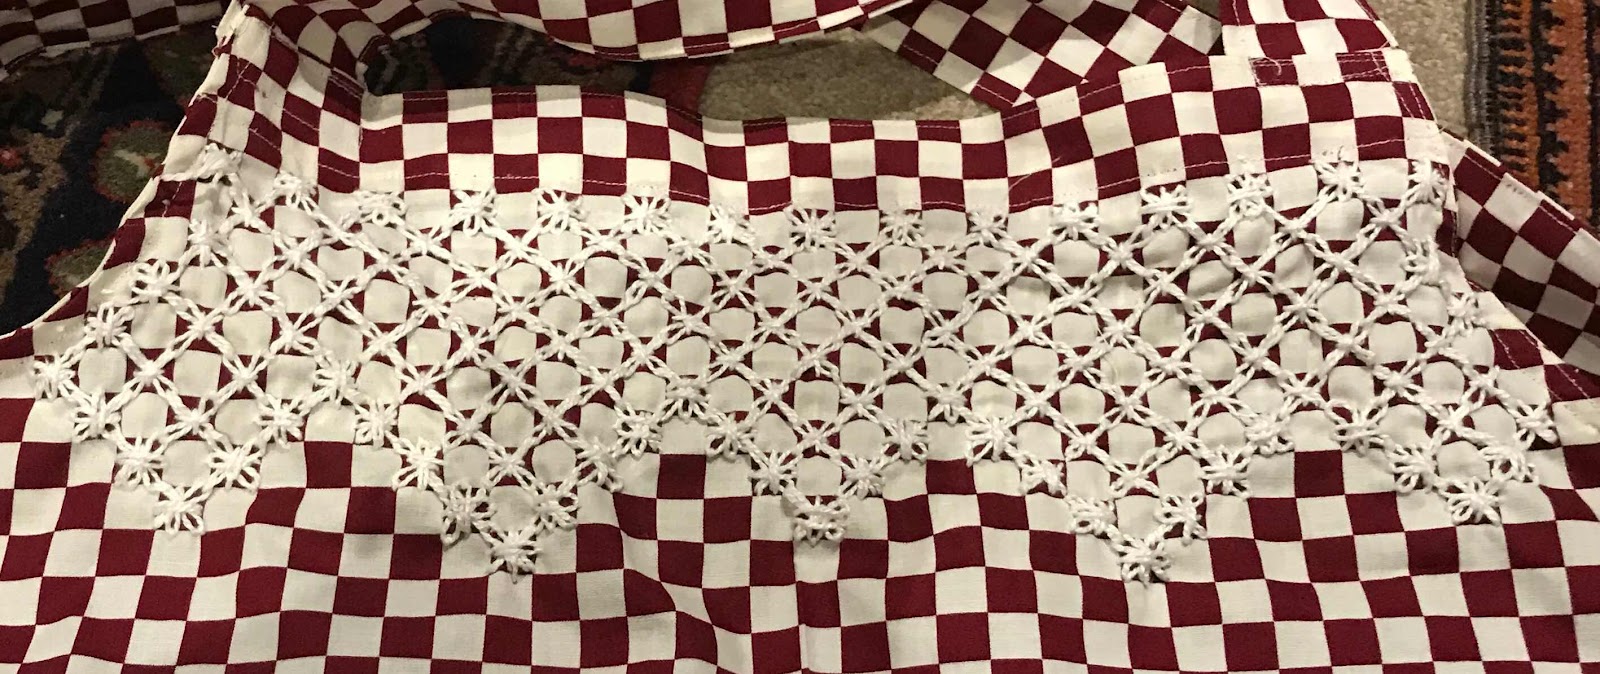
My idea was to work the front section like a sampler, using white thread only, to get a counter-change effect. I began in the centre and got most of the way across before I needed to look up some more stitches, for which I used Enthoven.

I created a very deep V, all the way to where I planned to put a pocket.

Then, of course, I had to mirror that on the other side - and be able to work out the stitches I had used!

I changed threads a bit, beginning with cotton-a-broder, but moving quickly to perle 5 cotton, then to a cordonnet when the cotton ran out. It was quite a thread-hungry exercise!

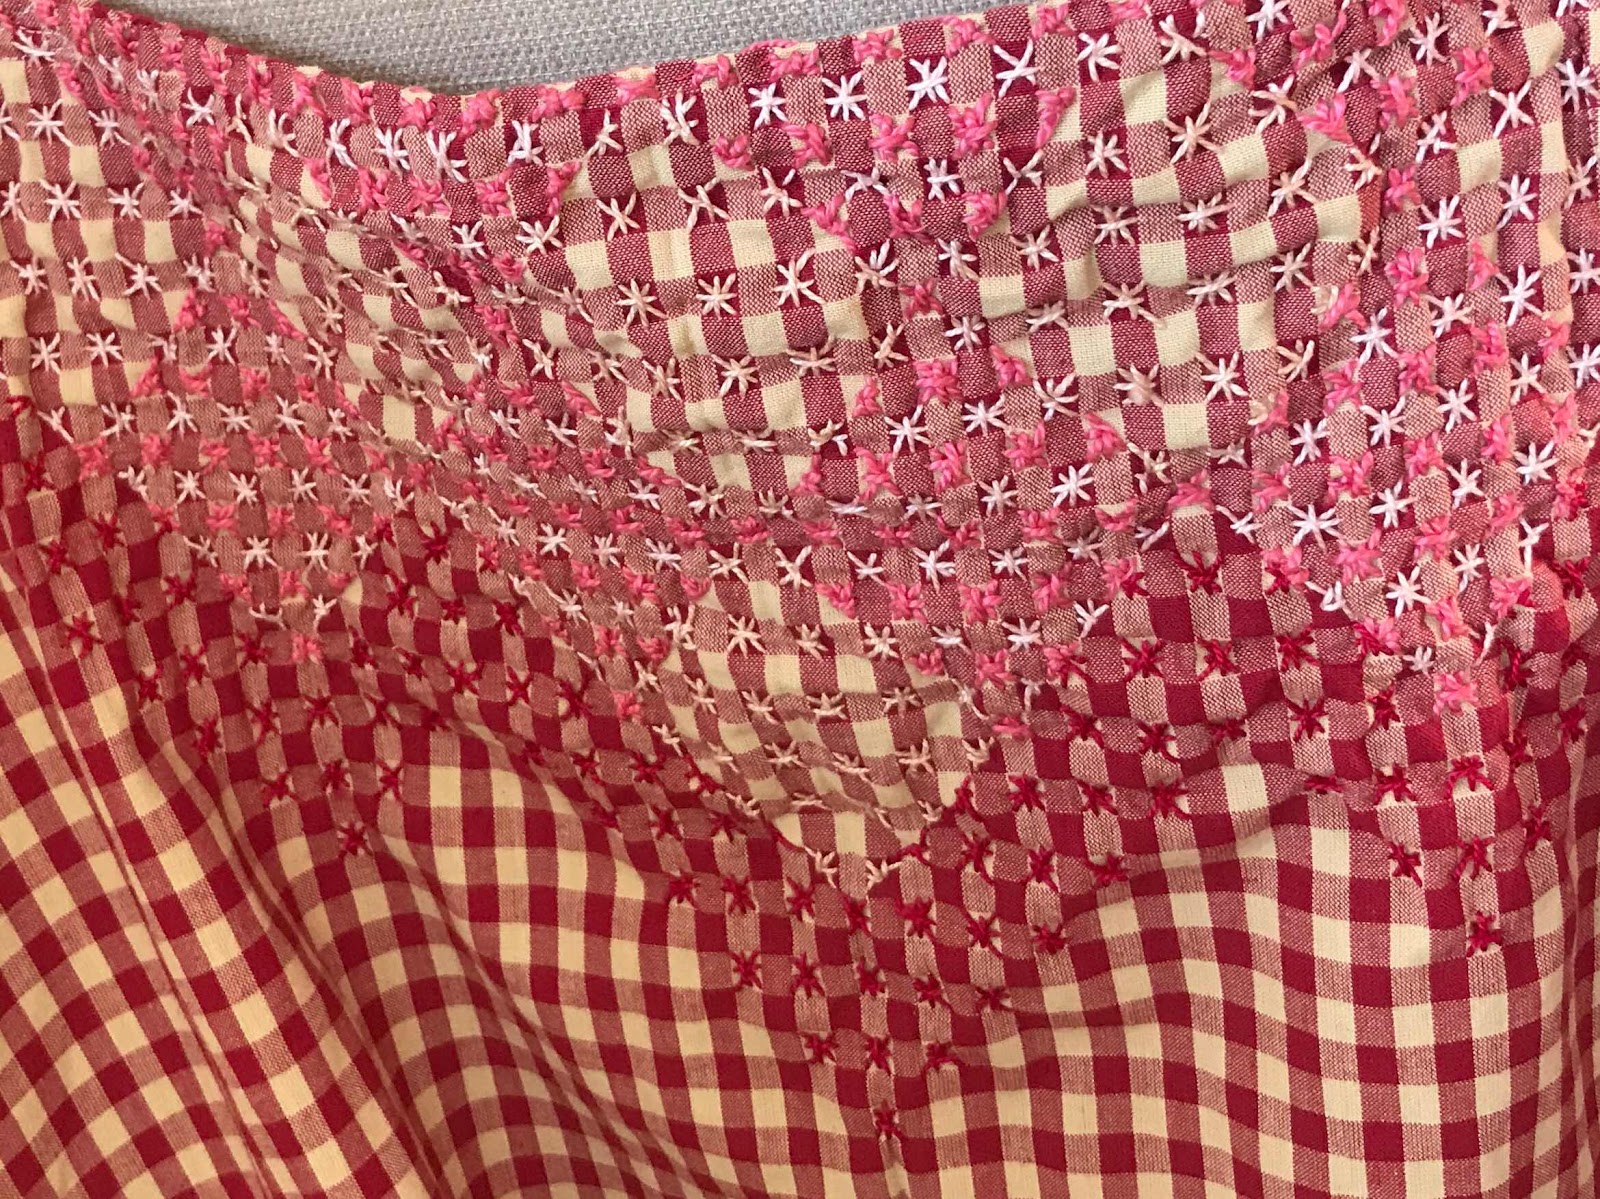
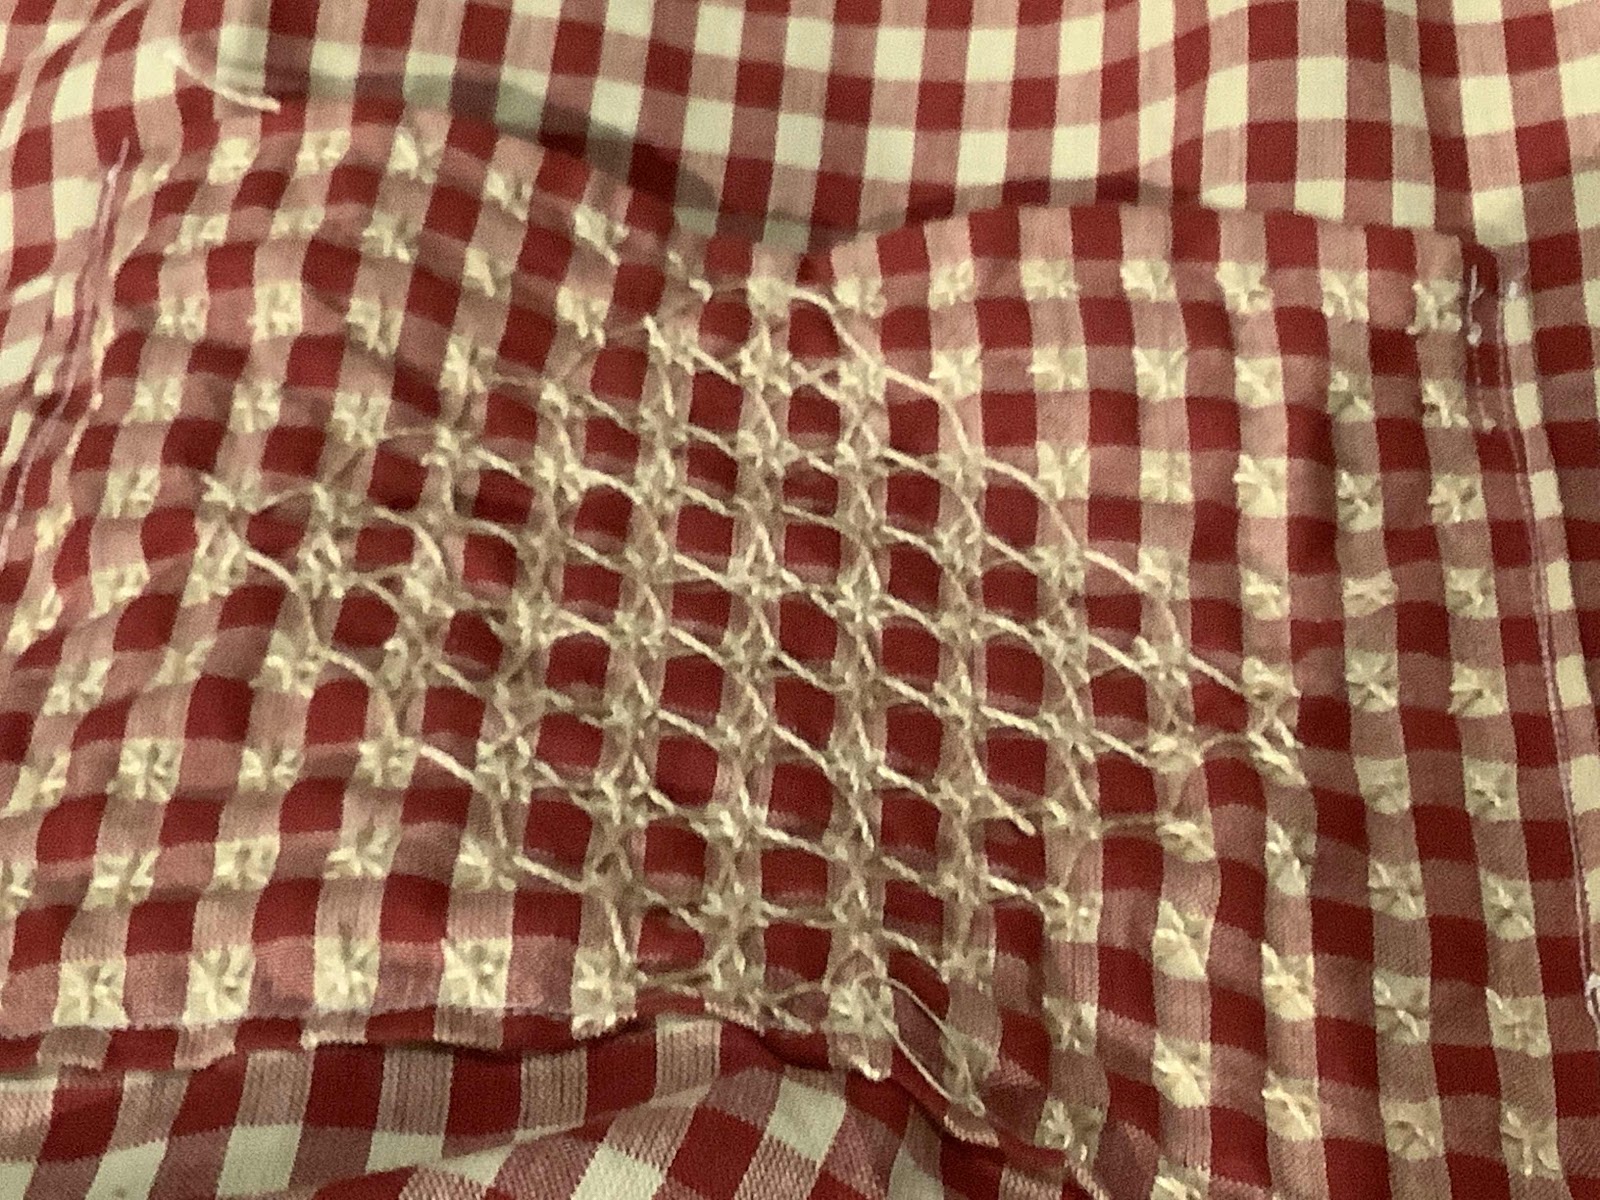
Originally I intended to only embroider one side, but decided to embroider the second side in pink to get the counterchange contrast. I didn't have an exact match for the pink. Before I set out to buy a matching thread, I tried a variegated perle I had, and thought it would make an interesting contrast. To avoid contrast overload, I settled on a single stitch - long-armed cross-stitch. I also made the columns of stitches less steep for a broader, more solid effect.

I am fascinated by the way the look of the fabric changes when one colour is covered with thread.

I worked matching pockets, reversing the shape direction.

Today I put it together. Adding the pockets was straightforward - stripes help with alignment. It took a bit of manipulating to put the two sides together to enable reversing.  I finally left one end of each strap loose  and inserted them at the end.

They are not very glamorous photos. I had to keep trying it on to ensure I had the construction right.  I haven't yet ironed it (since the point of seersucker was to avoid ironing it seems contradictory - but I will iron it before entering it in the Exhibition).

I acknowledge it won't be the easiest thing to hang in an exhibition.

I also admit it isn't setting me on fire as a design, but it will be a useful apron. I have plenty of aprons myself, so all I need now is someone who needs/wants it!

Sunday, April 19, 2020

Chicken scratch apron no.3


For the last 52 days I have been posting a daily blog at https://jillian-england2020.blogspot.com. It began as a travel blog, but continued when I arrived home on 19 March to 14 days self-isolation, and subsequent lockdown at home in the face of the Covid19 pandemic. Much of my daily blogging is about embroidery, which I have not  repeated here. The post below was written in January. I will certainly post to this blog again in the future, maybe some composites of finished projects while in lockdown, or, certainly, when the need for daily posts has past, returning here to my usual project-based posts.

In the meantime, here's a post I prepared in a less troubled time, three months ago!
----------------------------------
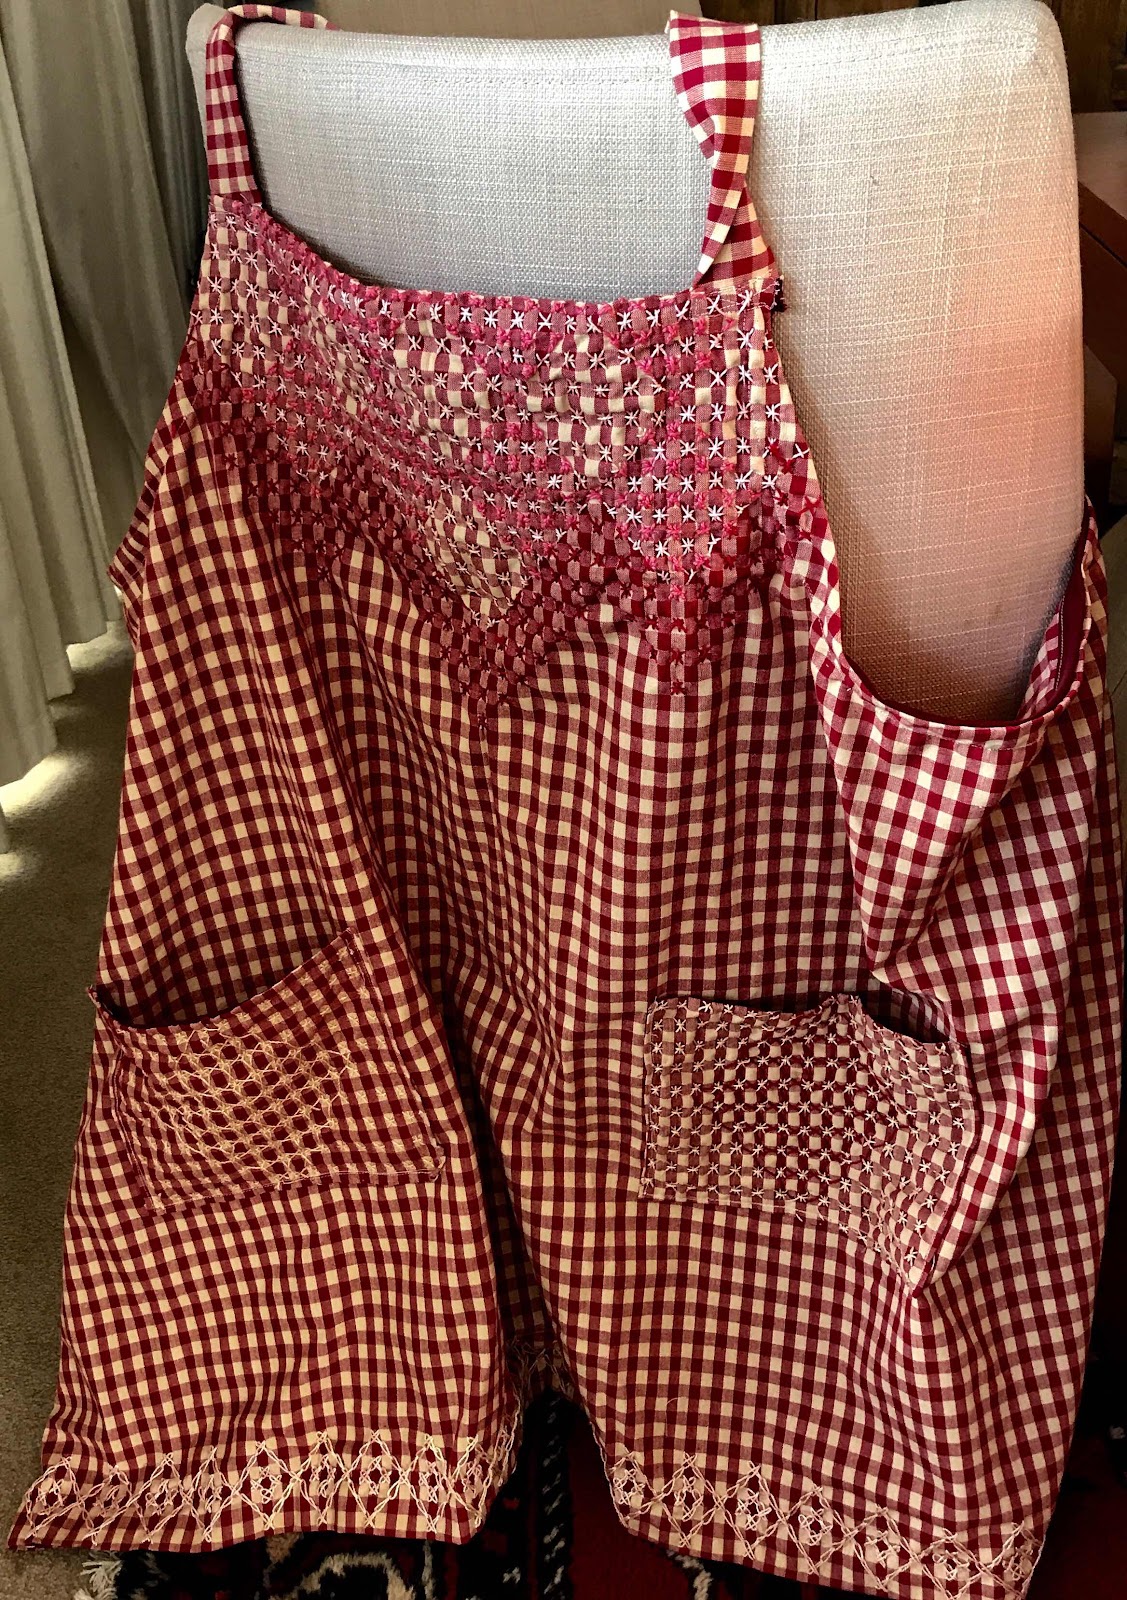
I was making this one over the holiday period between Christmas and early January, on the last piece of gingham I had bought more than a year ago to make aprons. It needed a heavy thread to get decent coverage. I had a good supply of ecru thread in perle 5, but not much red. 

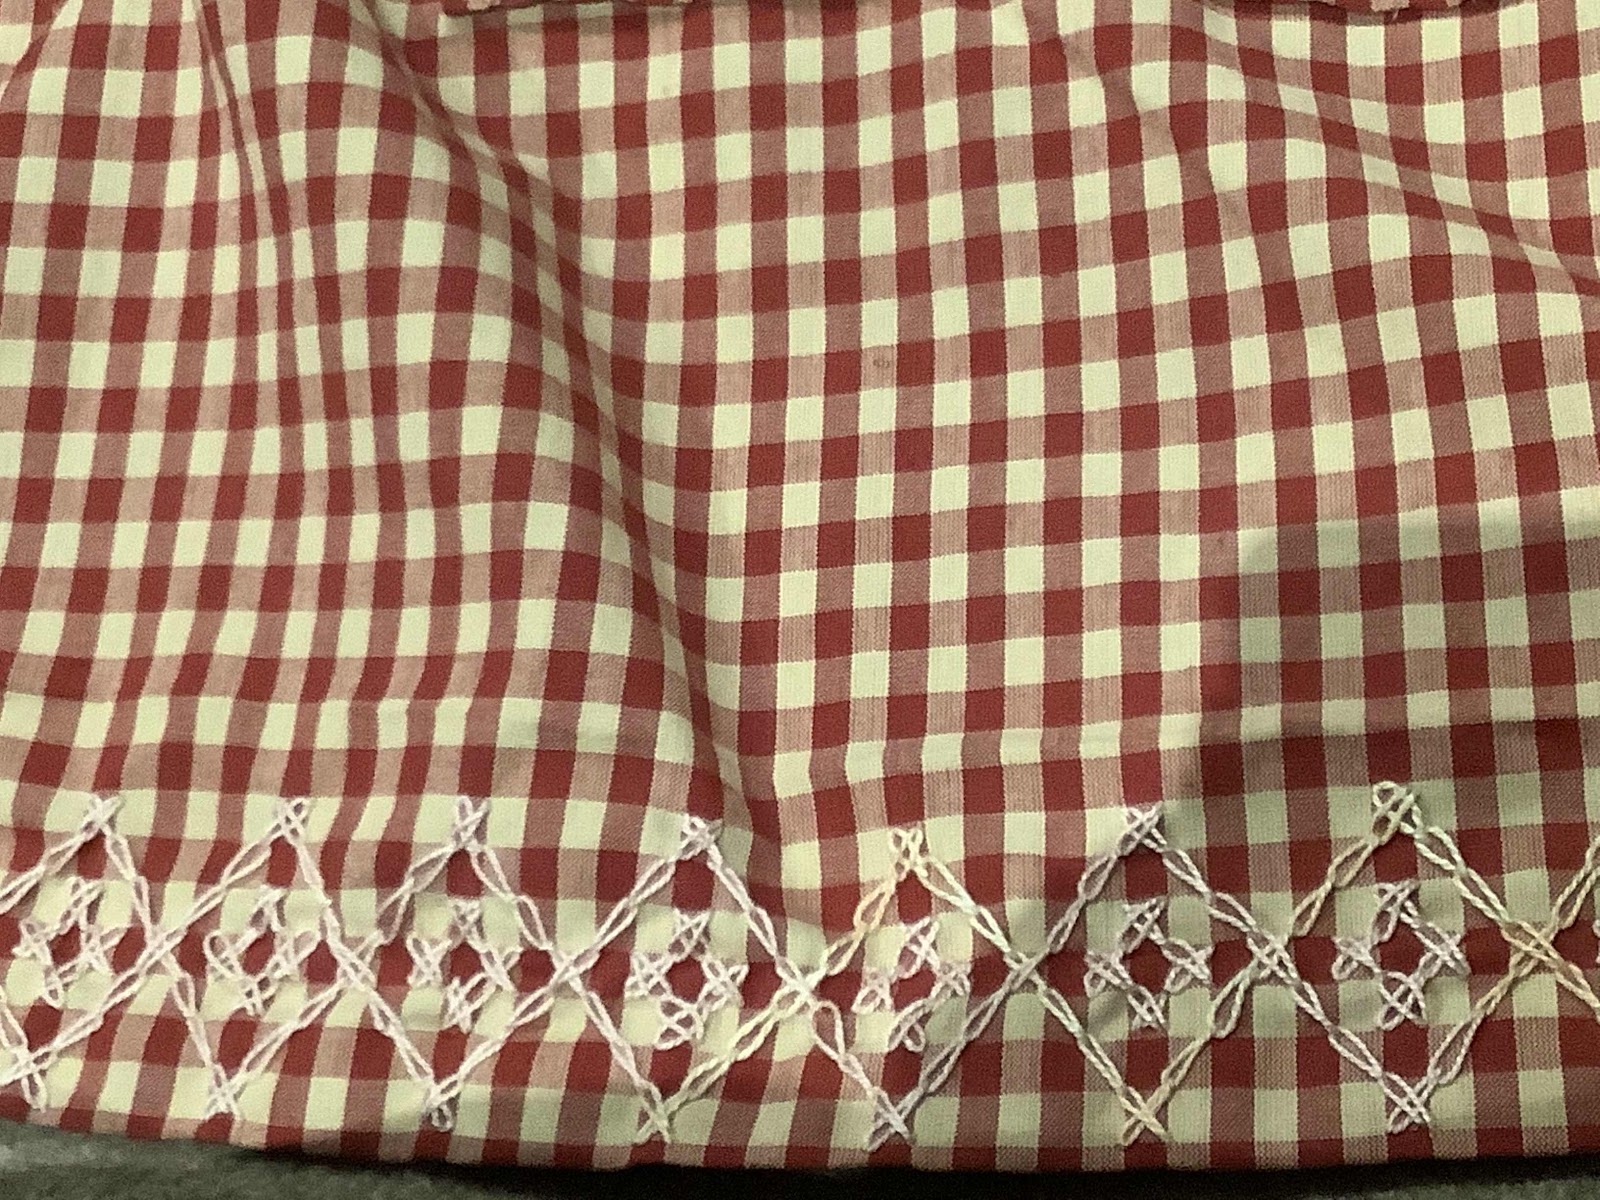
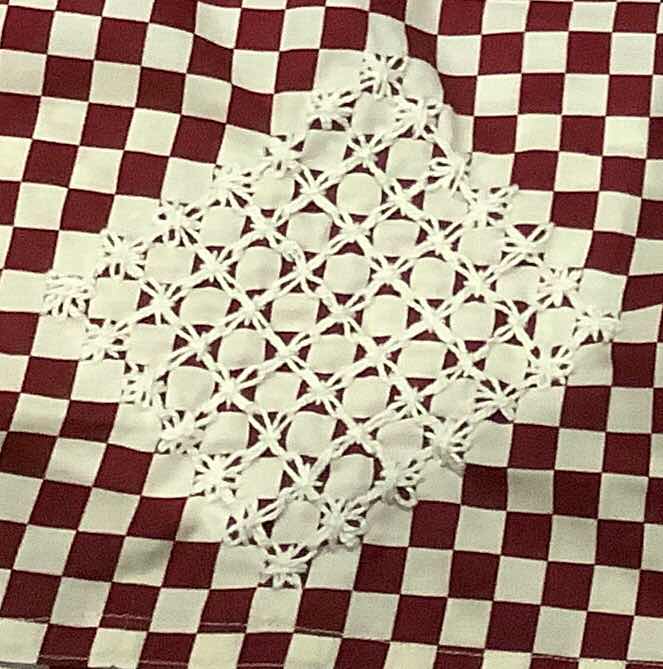
 I began on the pockets, using ecru thread and working crosses on all the ecru squares using running stitch up, down and across the diagonals, then whipping the diamond section.The second pocket I worked with similar technique but on the mixed red-ecru squares, leaving the whipping.


Along the bottom I worked a chain stitch diamond border.


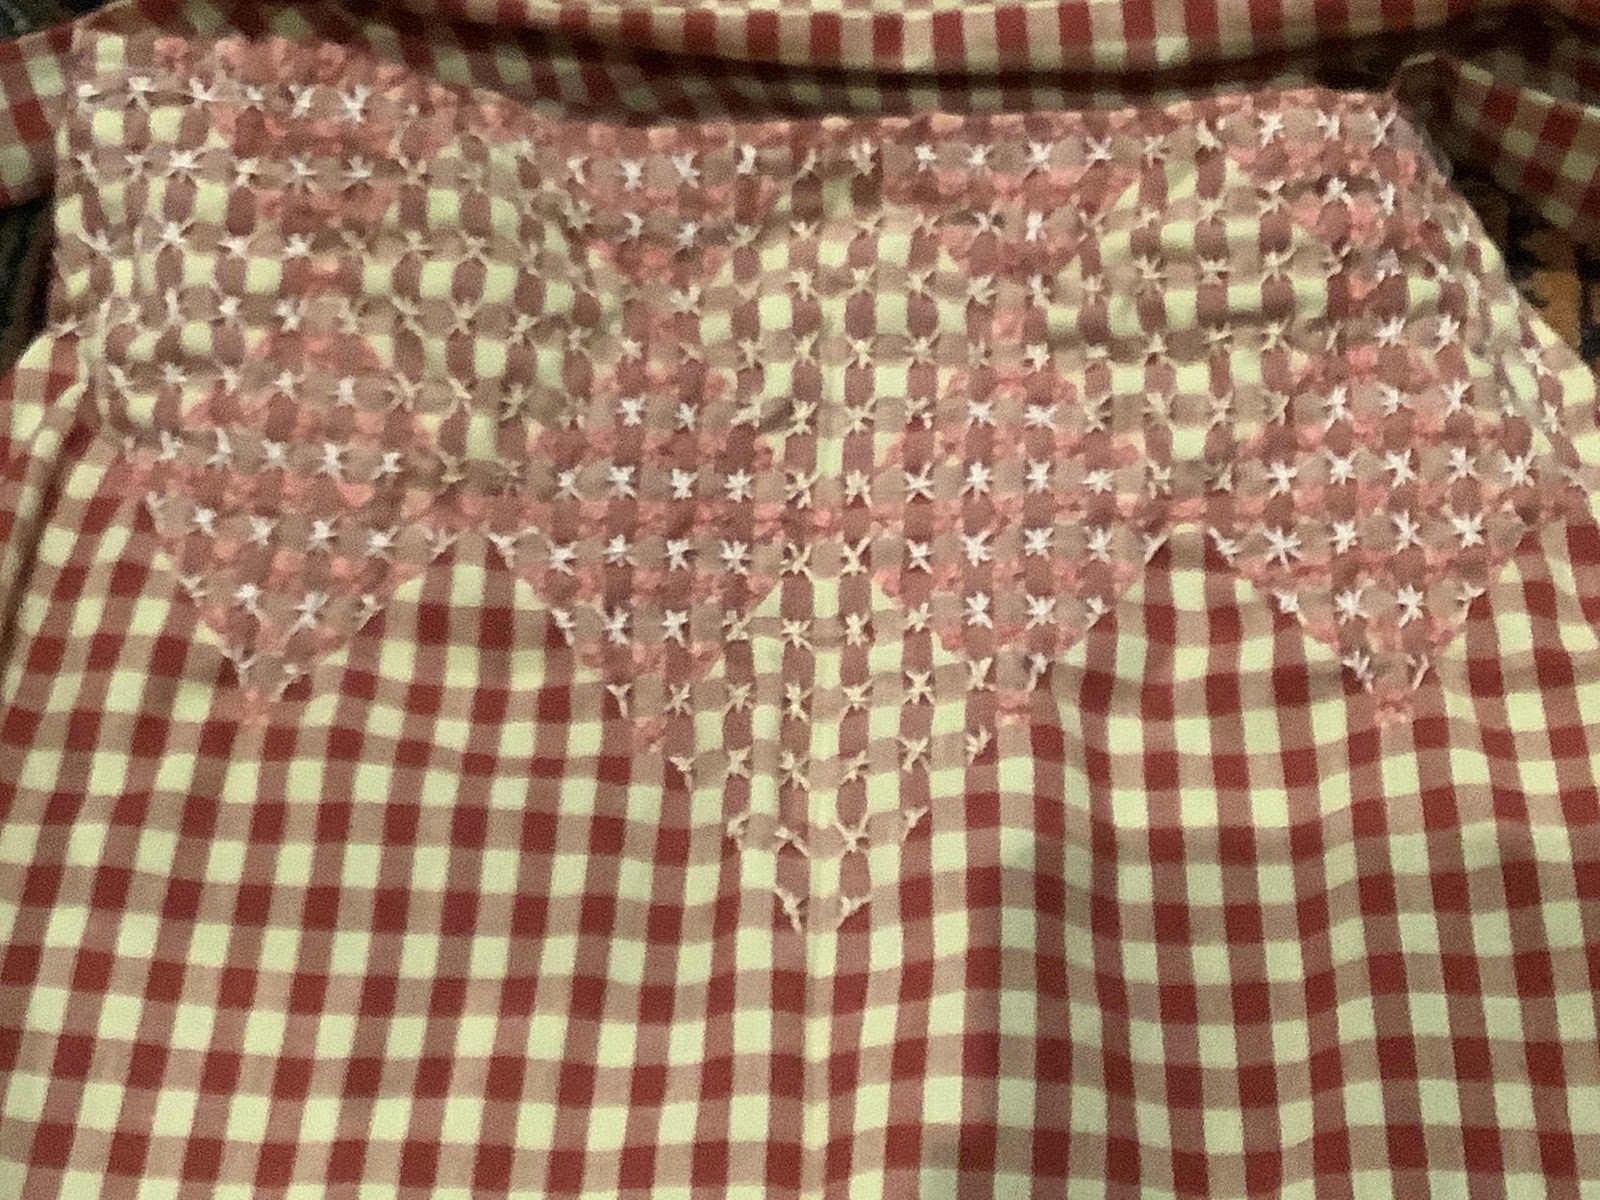
Introducing colour into the bodice, was, I think, a mistake when I didn't have red thread. The pink didn't quite pop, but I was not going to undo it.

When Create in Stitch opened again after the holiday break,  I made a bee-line and bought a supply of red perle 5.

I used it first to whip the diamond on the second pocket,


then to work an edge below the bodice.


It helped. The impact would have been stronger, I think, with red in place of the pink, but it does have its own charm. It is such a lot of fun experimenting with chicken scratch. The effects are pretty much limitless. 

Tuesday, February 11, 2020

Another chicken scratch apron

I was well and truly on a roll with chicken scratch aprons. The other two pieces of fabric I had were both ginghams - one in dark blue and one in a dark red. Both had an ecru rather than white contrast.

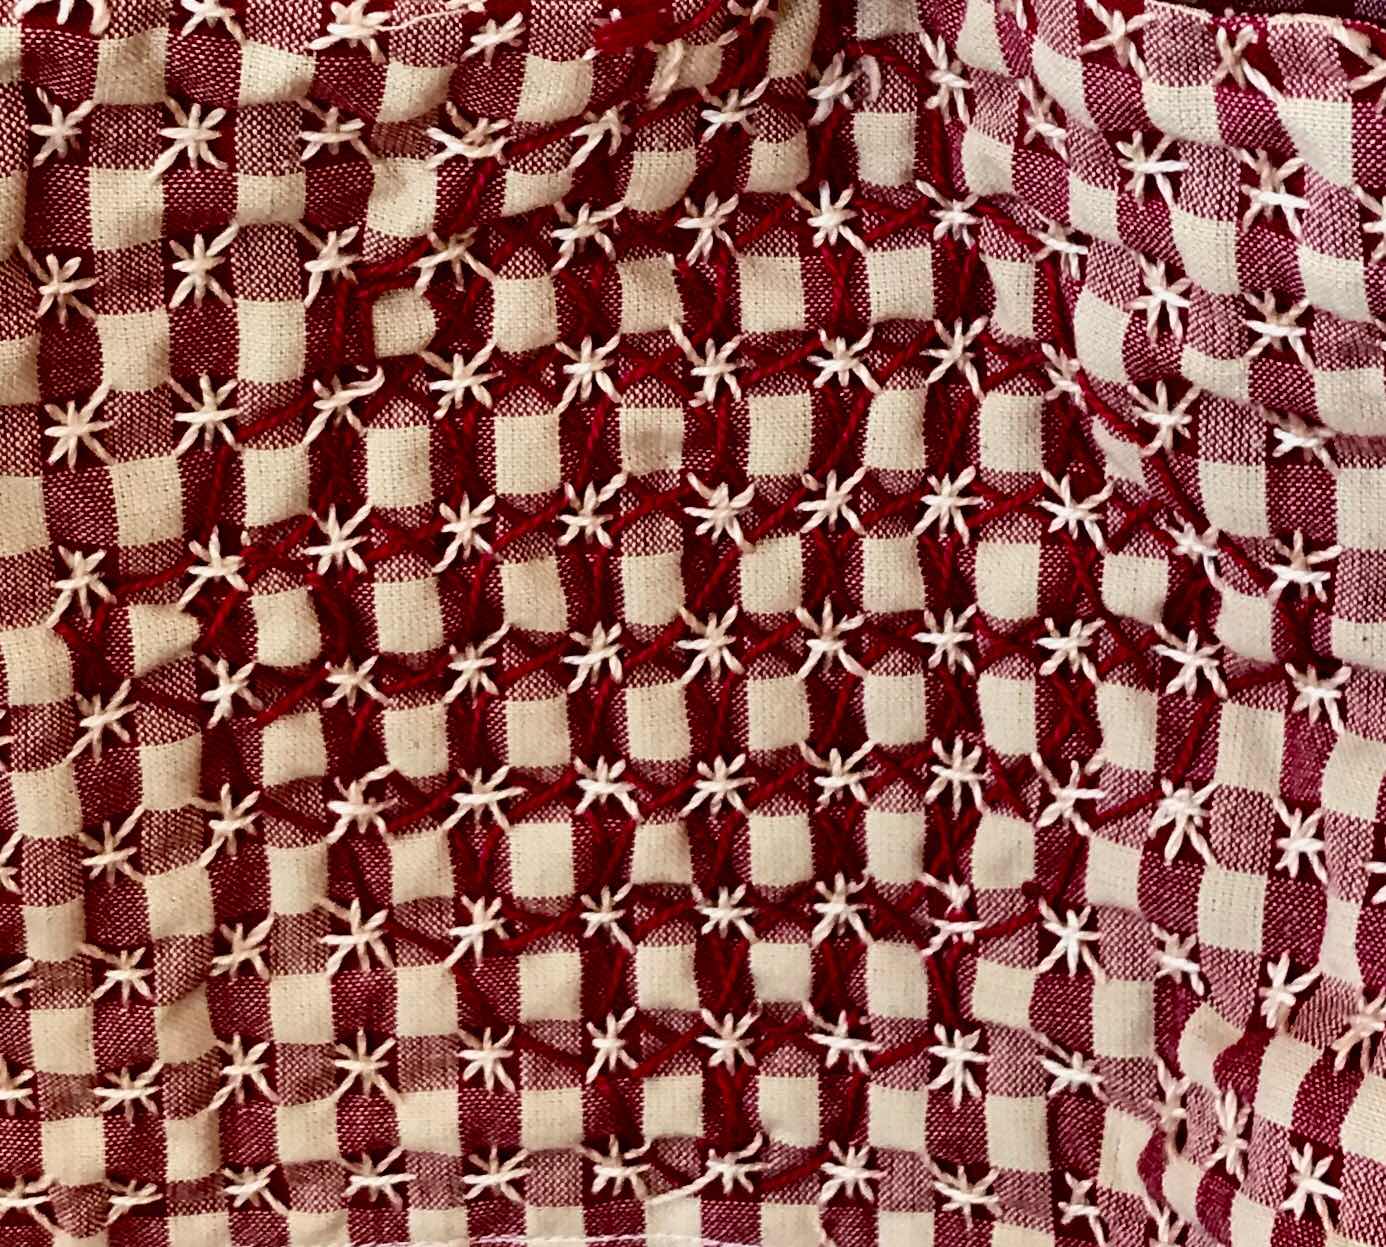
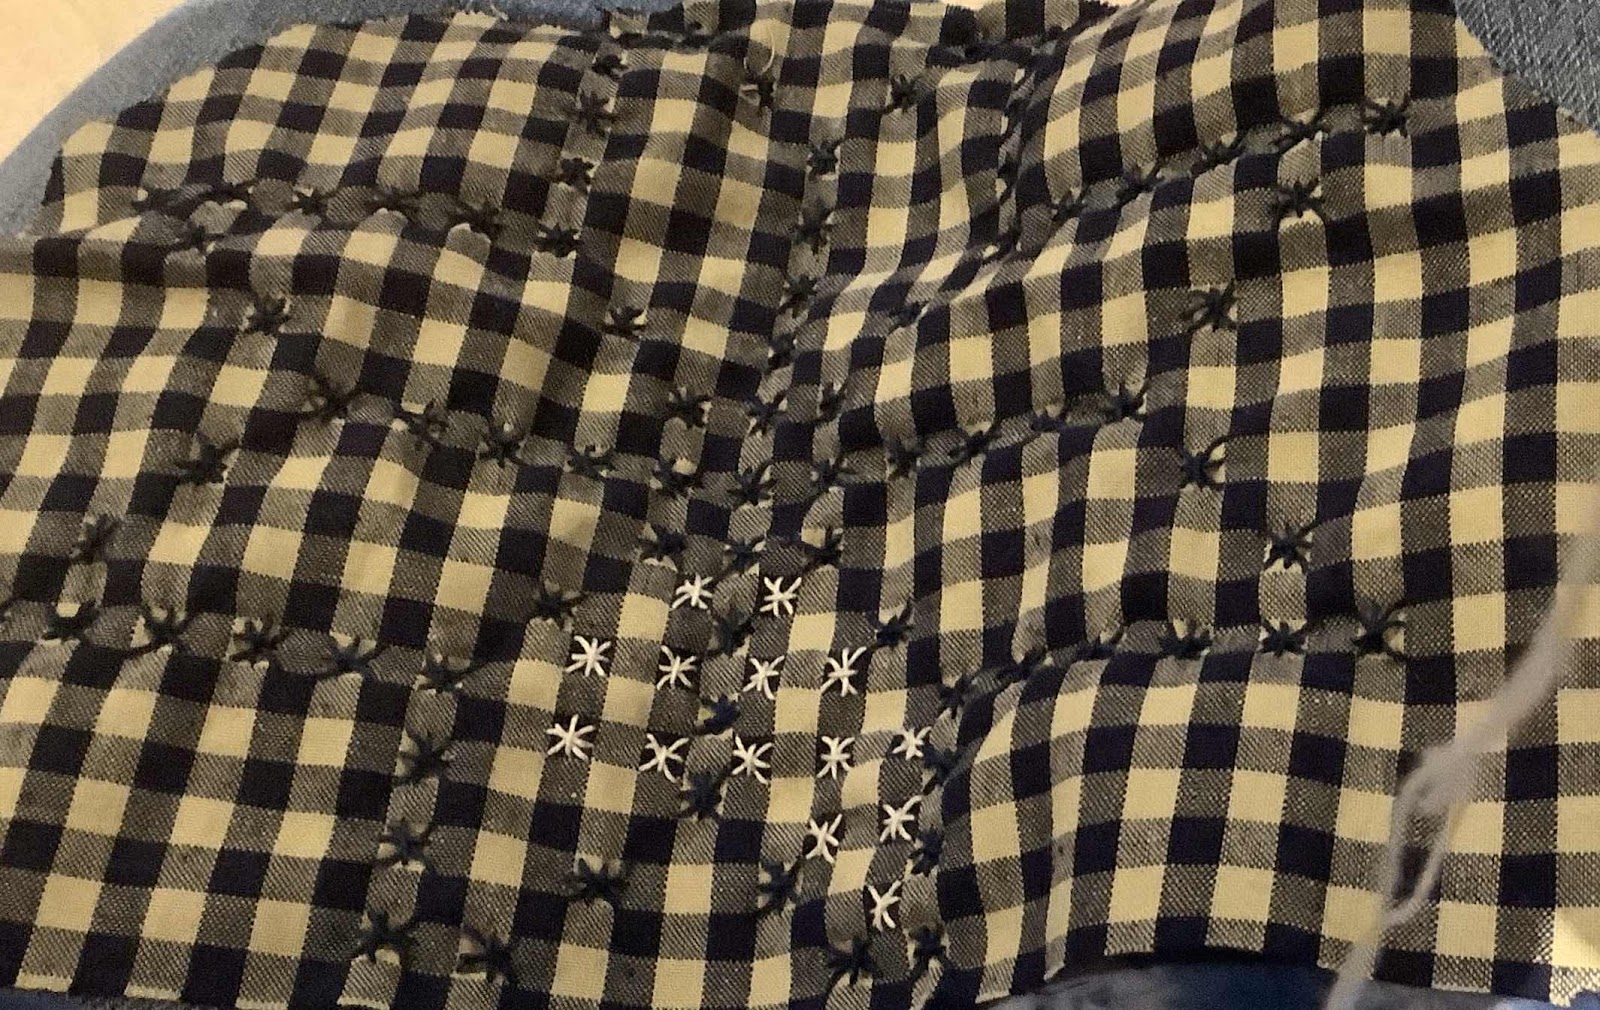
I cut both of them out to the same template as the previous one. I began stitching the blue pockets with stars, using perle 8 thread.


While I was pleased with the effect, I thought I needed more thread coverage on the edge and bodice to achieve a lacy look, so I switched to a perle 5 ecru thread.


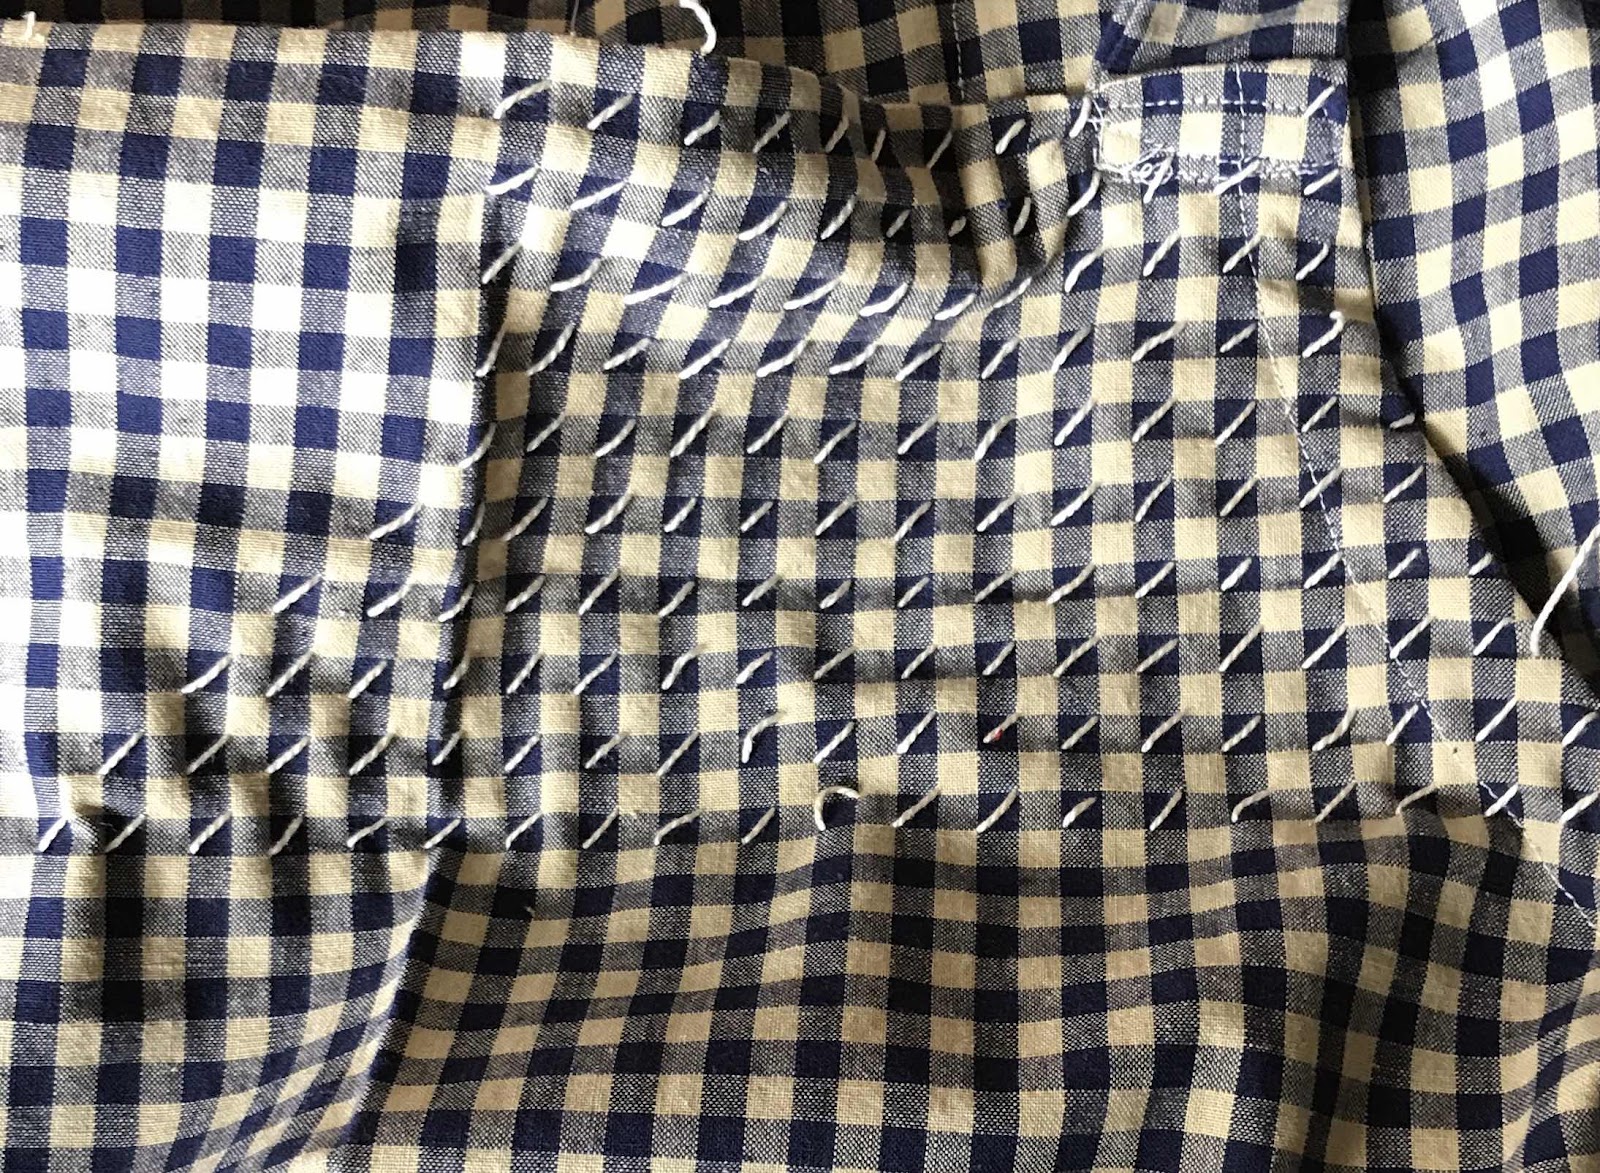
This gave me the coverage I was after and I could work it in rows of running stitch - first one diagonal, then the other, then verticals and horizontals.

It's rythmic and easy work, but you need to be very careful with tension.

I worked a dense pattern with an embedded  diamond shape on the bodice


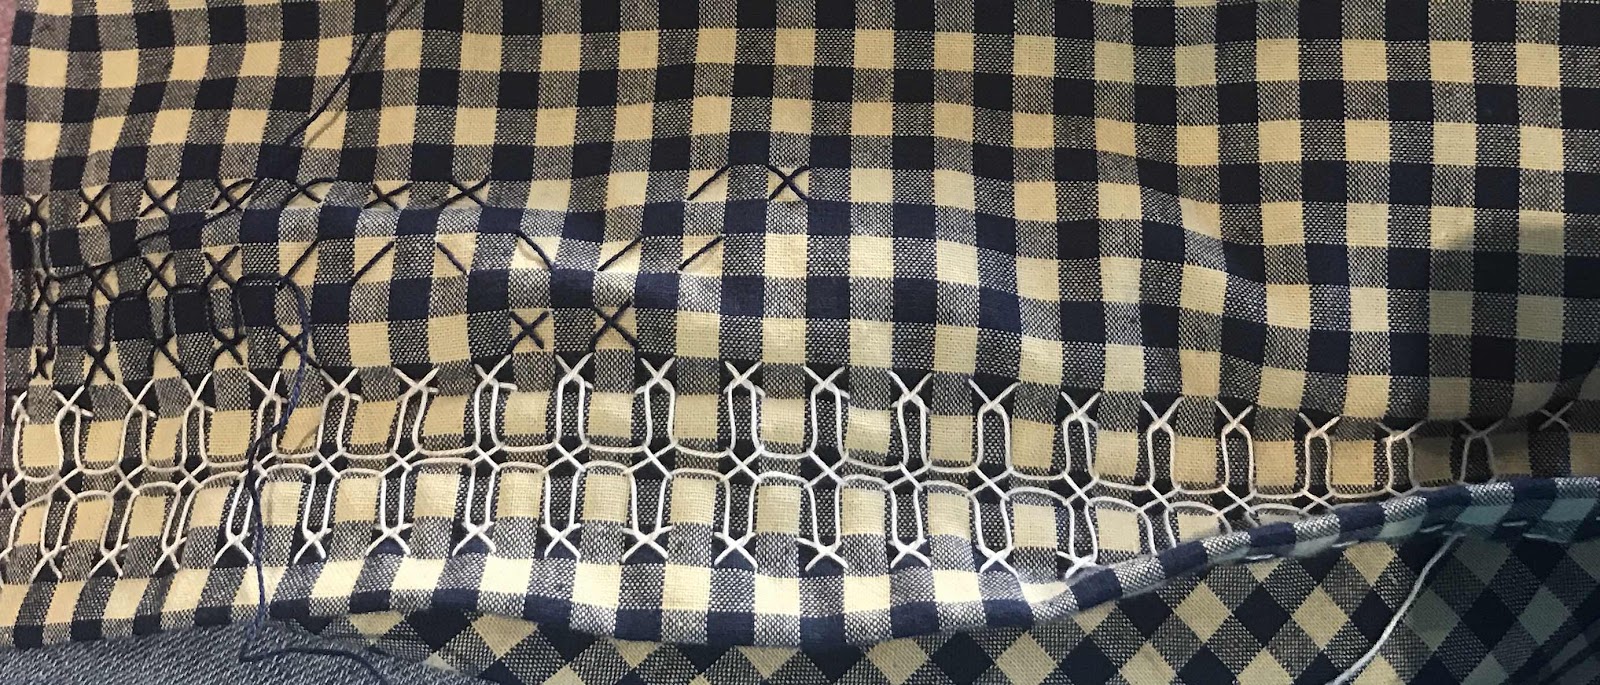
and an outline pattern around the hemline.


I then decided the bodice needed an outline in dark blue. I had no dark blue in perle 5, and all local shops that sold perle 5 were closed for Christmas-New Year, so I used the perle 8 in a close pattern.


I was very pleased with this result.


I had no particular recipient in mind, but one of my stitching buddies, who also loves cooking, fell in love with it, so I was delighted to give it to her.

She agreed to model it, provided I didn't show her face!


Friday, January 17, 2020

Chicken scratch apron


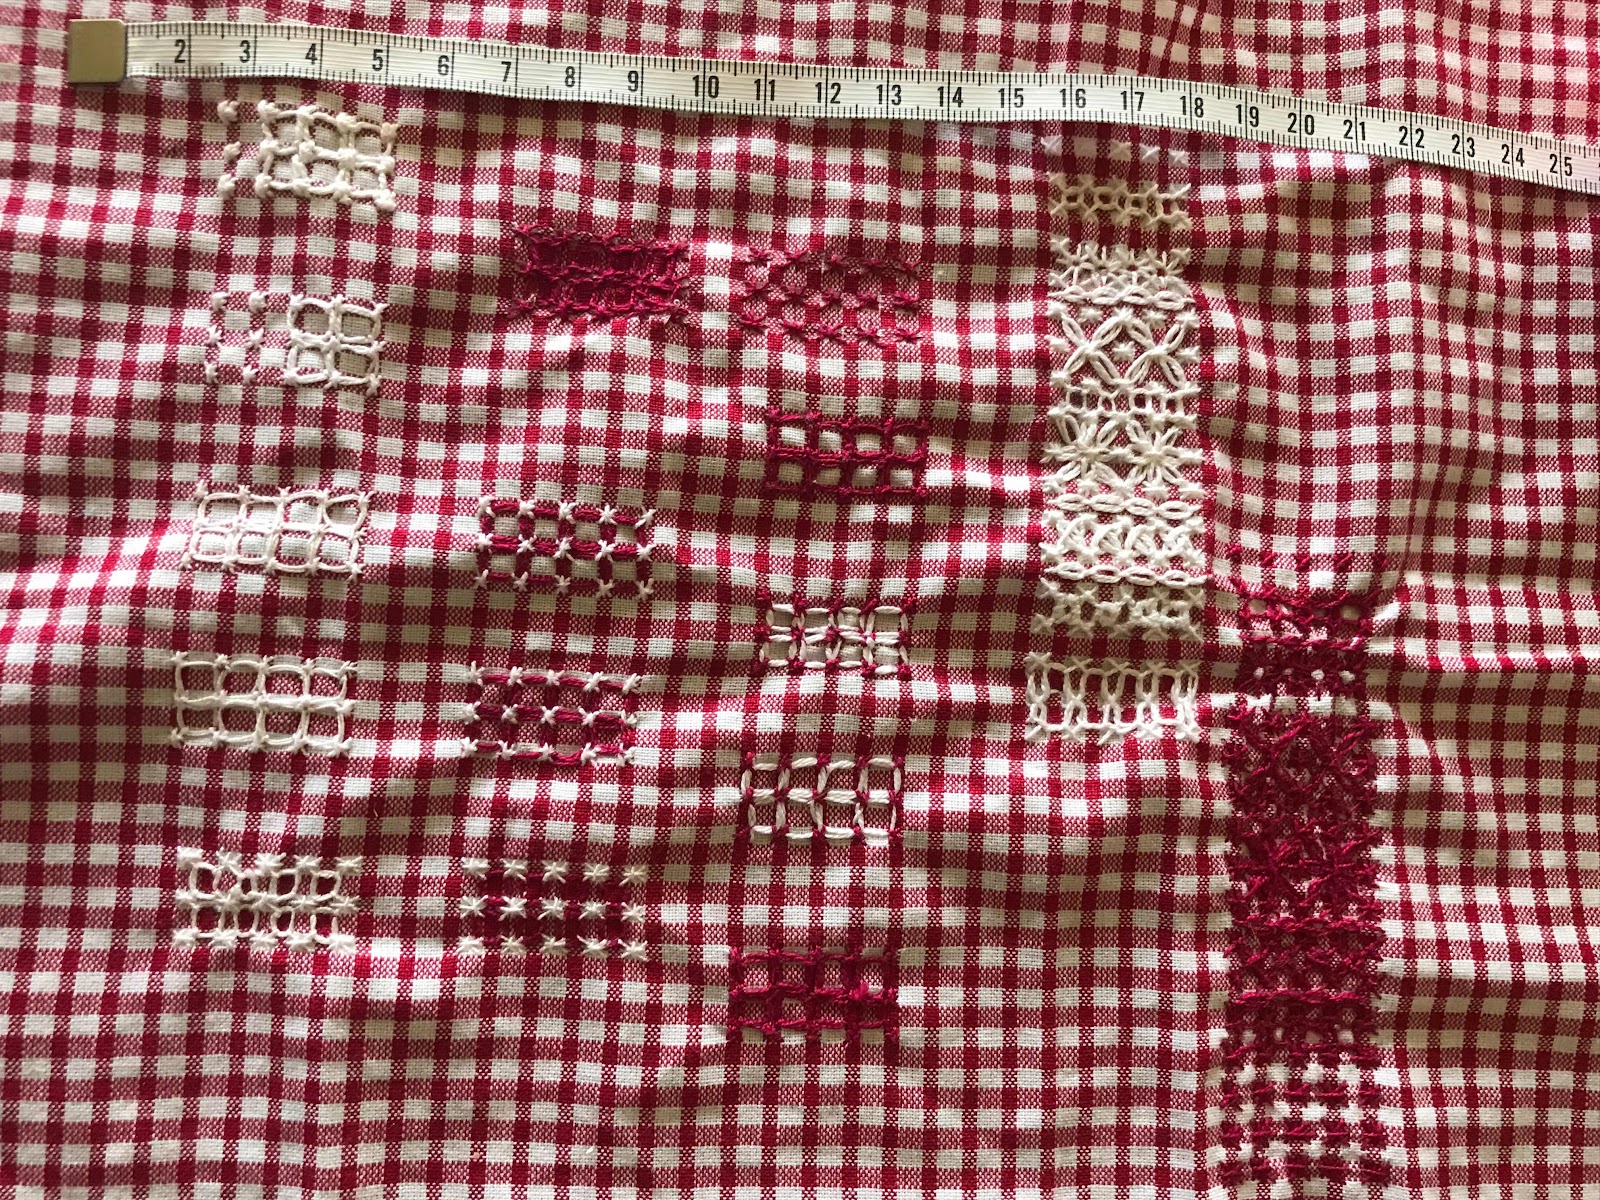
A year or so ago I did a workshop at the Embroiderers' Guild on Chicken Scratch, or Depression lace. We worked a little sampler, mine on a piece of small squared gingham that I happened to have left over from something.

I really loved the result. It was fascinating to see the different effects of using the red or the cream thread, and  from stitching on either the red or cream squares.

Others at the workshop had some striking fabrics they had bought from Trish's fabric shop in Adelaide. I visited after the class and bought three pieces with the intention of making aprons.

I also went hunting for patterns for cover-all aprons in the Japanese style. In the end I bought two aprons online to use as templates - cheaper and easier than patterns!

The time has never been quite right, but this Christmas, when I bought my eldest granddaughter a recipe book for Christmas, I thought it would be good to make an apron to go with it. I chose this piece pf fabric - a bold check rather than a gingham.

Because the squares were about half an inch, I needed quite a heavy thread to get coverage, and settled on this crochet cotton. It needed quite a large needle, but worked well.

I had bought a metre of the 140cm wide fabric. The length gave me the drop, less a strip for the cross-over straps,  and the width enabled me to cut the wrap-around apron without side seams. Using the pieces I cut out from the arm holes for pockets, I just had enough to patch together some bias strips to edge the curves.

I began the embroidery with the pockets, using detached chain crosses and edging it with double crosses.


Along the bottom I worked simple crosses on the red with cream thread. I really love playing with the different effects.


I kept referring back to my sampler.


The yolk presented the greatest challenge. I had a couple of adaptations before I was happy. It needed quite dense fill to achieve the lacy look.
I didn't have a model to photograph the finished piece, but I was delighted with it. It is sturdy, but looks quite delicate.


It made a good present to accompany the recipe book.

Having taken the plunge I made up the other two pieces I bought after the workshop. That's, however, for another post or two!


Saturday, May 13, 2017

Flour sack apron

Last year, as I was settling into my apartment, I made an effort to work some of the untouched kits and projects I had in my stash. This one I bought a few years ago when I thought aprons would make good presents. I was intrigued by this Herrschners kit that used serviettes and a simulated flour sack.                                                                                         The flour sack was simple a rectangle of cotton which I managed to lose in the process of moving my kits into their new storage space. I therefore cut a piece of calico to the right size (36"x24") and hemmed the sides and top.
The serviettes have their hems removed and are then cut into squares and rectangles of specified sizes.


The smaller squares are folded into triangles and stitched to the bottom hem - a bit like bunting.
The calico is pleated. The larger squares are stitched back to back and stitched on as pockets.
The long rectangles from the serviettes are joined together and attached to form a tie waist.                                                                                            Finally, a range of fruit is embroidered along the bottom, using iron-on transfers provided in the kit.                                                                                                                                                             
My younger granddaughters helped me cut out some of the pieces for this project. I thought it a bit big and wanted to make a smaller version, but Niamh liked it as it is and laid claim to it  - identifying it at once with Little House on the Prairie. 
Of course, that called for a second, quite different apron for Veronica. I thought I had taken more photos of this in the making - but the photo fairies seem to have made away with them. This is the best I can do!

Thursday, January 7, 2016

Chicken apron on the go

One of my projects while away this holiday season has been another printed cross stitch apron - the bright and cheery chicken one. I made one of these a couple of years ago and had another in my stash. I thought it time I stitched it.
The best things about the apron are the cheery colours and shape. The worst thing is, in my view, the cross stitch. 
Working cross stitch on printed crosses presents dilemmas. If you cover the printed crosses you have gaps between the rows. If you attempt to avoid that by aligning the crosses it is difficult to keep straight and you get more background showing through between the bars of the cross.


I tried to work the crosses touching each other but wasn't happy with the coverage, so went back later and filled n the white spaces by a combination of extra crosses and straight filling stitch. 

This gave me more solid colour.
I used the simple cross stitch on the grass squares on which the chicken walks.
I have been staying with friends in the Blue Mountains West of Sydney (where the weather has been cold and misty - a welcome break from Adelaide's 35C + heat). Both friends have lovely gardens - great to look out on in the misty weather.
On the lower edge of the apron I worked the border of squares using a random order of all the chicken colours rather than following the suggested pattern. Random squares made it easier to sit and talk and stitch - and was more enjoyable than constantly consulting a chart.
                                                                                                                                        This is very simple stitching - but satisfying in both execution and the result.


Monday, August 12, 2013

Kangaroo Island Apron Project

We flew to Kangaroo Island for our recent holiday, and hired a car there. This restricted our luggage to 15kg. I couldn't conceive of running out of stitching on a holiday, so I took a pre-printed cross-stitch apron of cups of coffee and an "It's a good day" motto, with back-up of cross-stitched Christmas gift bags and two shawl knitting projects - same pattern, same two-ply wool, different colours.

In retrospect, this was madness, but I was well within the luggage limit, no harm done - and what if we had been stranded there for some reason?

I did quite a lot of stitching - and almost finished the apron. I got nowhere near the rest.

I was attracted to this apron by the colours and its cheeriness.


While it requires reference to a chart and counting, the patterns are easy to grasp and improvisation possible, making it a good option when travelling or socialising.

The colour variation is enough to stave off boredom at what is, in fact, a colouring-in task.


I also found myself working this rather like a prayer shawl, thinking about friends who are, or have been, ill, and meditating on their recovery and wellbeing.

Here is the just finished product and the washed and ironed version. I think it will make a good gift - and I have another one in my stash to stitch next time I need a straightforward project, or a cheery gift.

I also visited a few art and craft galleries on KI - more on that next time.