The challenge in smocking a dress for Niamh this Christmas was to come up with both a pattern and a fabric that was summery, different to Veronica's but equally desirable. I chose a batiked cotton I bought in Indonesia several years ago in mauves and gold - figured it would go with her complexion in the same way as the black in Veronica's dress worked with hers.
The pattern was a bit harder to find, but I settled on a sundress called Summer Dreams, from AS&E 61. . While this has not the drama of the ribbon ties on Veronica's dress, it had some potential for spectacular buttons.
The smocking was straightforward but lengthy as it goes all the way around the skirt. You join the back and front skirts, then pleat and smock the whole piece.
Once the smocking is completed, the construction was fairly straightforward. I added some piping in mauve. I also settled for Velcro, rather than button closure. Since it fastens at the back, I figured a 7 year-old was better off without buttons.
The result is pleasing. While the dress is not dramatic as is Veronica's, Niamh looks fabulous in it. And likes it, which counts most.
A record of my stitching and related activity - mostly smocking and embroidery - and what I am learning along the way.
Search This Blog
Sunday, December 28, 2014
Monday, December 22, 2014
Smocked dress for Veronica
When Veronica was about 3 years old I bought a kit for a dress that I thought would one day really suit her. It was Poppy in AS&E 87. I bought the largest size - 7 - to give myself the maximum time to confirm my hunch that it had her name on it. When she turned 7 in September I did not have time to make dresses, so this Christmas really was my deadline.
The smocking on this dress took me several nights to complete. The pattern is on a yoke, and the bodice is back-smocked for about 3 inches, then smocked in black with two rows of very pale green and some white touches in the middle.
I initially made an error, and did the first trellis in white instead of pale green. I doubted it would make a difference - but it did, and I replaced it.
There are interesting touches - like a wave over a double cable, creating almost a running stitch effect.
It was a little tricky working in black, but a really interesting design to smock, with a harmonious result.
The basic construction was, as usual, fairly straightforward. The trickiest bit was the piping and bias strips cut from white pique.
It has a very interesting cross-over back, tied at the side with wide ribbon, threaded through buttonholes. It is a great design by Susan O'Connor, really well suited to the fabric.
For a range of reasons, we have celebrated Christmas with our extended family a little early this year - the only reason I can post this before Christmas and give you a peak at the wearer.
I have, of course, another dress to write about next time - but that will need to wait until next weekend. It can carry my New Year wishes.
This one seemed an appropriate one to post at this time and to use to wish us all a very Happy Christmas.
The smocking on this dress took me several nights to complete. The pattern is on a yoke, and the bodice is back-smocked for about 3 inches, then smocked in black with two rows of very pale green and some white touches in the middle.
I initially made an error, and did the first trellis in white instead of pale green. I doubted it would make a difference - but it did, and I replaced it.
There are interesting touches - like a wave over a double cable, creating almost a running stitch effect.
It was a little tricky working in black, but a really interesting design to smock, with a harmonious result.
The basic construction was, as usual, fairly straightforward. The trickiest bit was the piping and bias strips cut from white pique.
It has a very interesting cross-over back, tied at the side with wide ribbon, threaded through buttonholes. It is a great design by Susan O'Connor, really well suited to the fabric.
I have, of course, another dress to write about next time - but that will need to wait until next weekend. It can carry my New Year wishes.
This one seemed an appropriate one to post at this time and to use to wish us all a very Happy Christmas.
Friday, December 19, 2014
Italian Banner Progress
I managed to get the homework done for the second class of the Italian Banner sampler.
The most important preparation was the stitching of the background square for the Casalguidi initial.
The background was worked in Italian four sided stitch.
Mostly out of curiosity, I worked it around the square, rather than back and forth in rows. This gave the piece a mitred corner effect - probably not what was intended.
In the event, we didn't tackle the initial! The main stitch is, however, the same as that for the tongue of the Peruginan dragon - just a lot more of it!
We worked on our other piece of homework - the Sicilian cut and drawn dragon. In my last post on this sampler I commented that I had made an error in drawing the threads, but had fixed it. Ha! So much for smartness. In fixing it, I failed to take into account the need for absolute precision in the weave of the threads both drawn and remaining. I ended up, in both weft and warp, with two threads together with the same under-over pattern.
The idea with this style, is that you create an open grid by removing threads, then re-weave a picture or pattern into the spaces created. To create a smooth and perfect picture, you must weave under and over to match the weft and warp of the natural linen. In failing to retain the original unders and overs, I made it impossible to achieve this. So I spent quite a bit of time rectifying the grid threads.
In the end I got there - and I'm quite pleased with my dragon.
I will now put this aside. I might attempt a bit more of the Casalguidi initial - but the rest can wait until we have the additional class Christine Bishop generously offered us in January.
I am learning quite a lot through this sampler!
Sunday, December 14, 2014
Italian Double Running
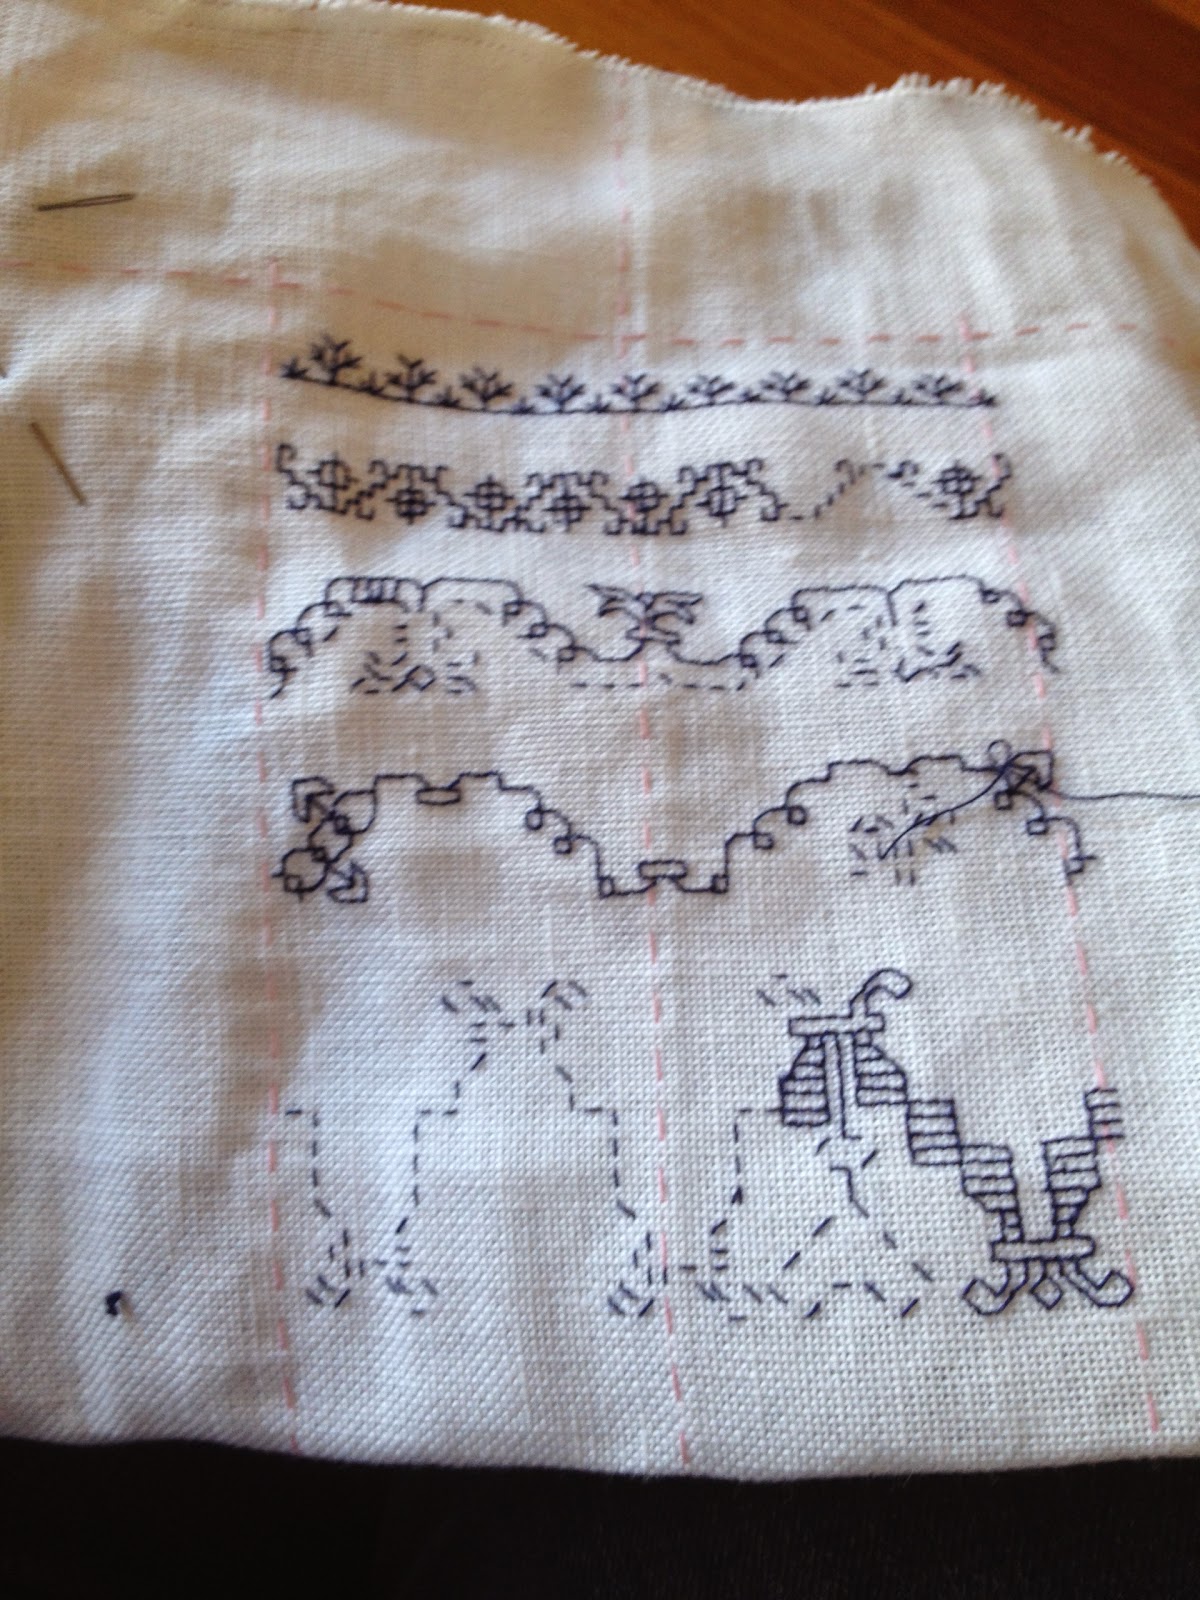
While I have read quite a bit about black work, and worked a border on dresses based on blackwork, I have not seriously stitched it. So when the Embroiderers' Guild of SA offered a 2 day workshop with Carol Mullan to construct a sampler in Italian Double Running stitch - a form of blackwork - I was very keen.
Carol, who also taught the lovely Hungarian Point bag, is a nurturing, knowledgeable teacher who encourages independence. The class ran over a weekend, 5 hours each day. The group was supportive and friendly. we had clear preparation instructions with a choice of project, so began with our linen marked up.
Although I have used double running stitch in any number of projects, it's application in blackwork is something else altogether. The principle is simple - you work a row of evenly spaced running stitch, then return along the same line with a second row that fills the gaps, producing a reversible unbroken line.
The aim of reversibility commits the stitcher to finding an uninterrupted path back from every line and deviation - a real challenge and tactical commitment. The skill lies more in thinking through how to get a baseline from which to work, then planning the detours from that line to fill in all the twists and turns of the pattern than in the stitching itself - although the accuracy of stitches ( in this case over two threads) and the angle of the needle on the return makes a big difference.
We worked the first sample completely, then enough of each of the next three to ensure we understood how to do it.
The fifth sample was the most difficult, so I spent much of the second day getting it outlined and checking I understood it.
It proved to be interesting - the geometric logic making it predictable once a small section had been completed.
I am finding this addictive. I kept picking it up when I needed to be completing the preparation for the final class of the Italian Banner Sampler and continued to pick it up when I needed to be working on my Christmas stitching!
This is how far I got before I bailed out, knowing I wouldn't finish my Christmas presents if I spent another minute on it!
I will be back to it as soon as possible after Christmas deadlines are met!
Carol, who also taught the lovely Hungarian Point bag, is a nurturing, knowledgeable teacher who encourages independence. The class ran over a weekend, 5 hours each day. The group was supportive and friendly. we had clear preparation instructions with a choice of project, so began with our linen marked up.
- I chose the simpler of the two designs provided by Carol. While I love the look of the complex one and might well work it was one day, for once I decided to keep it simple!
Although I have used double running stitch in any number of projects, it's application in blackwork is something else altogether. The principle is simple - you work a row of evenly spaced running stitch, then return along the same line with a second row that fills the gaps, producing a reversible unbroken line.
The aim of reversibility commits the stitcher to finding an uninterrupted path back from every line and deviation - a real challenge and tactical commitment. The skill lies more in thinking through how to get a baseline from which to work, then planning the detours from that line to fill in all the twists and turns of the pattern than in the stitching itself - although the accuracy of stitches ( in this case over two threads) and the angle of the needle on the return makes a big difference.
We worked the first sample completely, then enough of each of the next three to ensure we understood how to do it.
The fifth sample was the most difficult, so I spent much of the second day getting it outlined and checking I understood it.
It proved to be interesting - the geometric logic making it predictable once a small section had been completed.
I am finding this addictive. I kept picking it up when I needed to be completing the preparation for the final class of the Italian Banner Sampler and continued to pick it up when I needed to be working on my Christmas stitching!
This is how far I got before I bailed out, knowing I wouldn't finish my Christmas presents if I spent another minute on it!
I will be back to it as soon as possible after Christmas deadlines are met!
Monday, December 8, 2014
Back to Basics
For the last three months I have been attending the Embroiderer's Guild Back to Basics group which meets on the fourth Monday of the Month. A couple of women in the Hungarian Point class were members and I thought I'd enjoy their company and learn a bit, so went along.
It's a great group, run and organised by Gay Sanderson. There is a set program of work for the class, designed to teach basic construction methods as well as basic stitches. You have your work assessed for certification. Everyone works at their own pace and there is a huge range of levels being worked across the group. Those who have finished the course return as tutors, or just to stitch along.
I am on Project One, which is a pin cushion, worked in running stitch over two threads on 14 count Aida with three colours of stranded cotton. Instruction and fabric is supplied, yarn and needles supplied by us. One of my Hungarian Point colleagues is also working on the pincushion.
It is a lot of fun, and very supportive.
I began by missing the requirement to work over two threads. Fortunately, the bottom of the pincushion has no requirement, so this outline of whipped double running over one thread will become the bottom!
By my second session I was into the rhythm and had my head around the requirements, so played around with a variety of running stitch variations to produce the top of the pincushion.
At home I finished off the back with my initials, then stitched the back and front together at the third class.
I made the little calico lining bag by backstitching three sides.
I stuffed the inside bag very full and topstitched it, then closed the outer bag.
Here's the finished product, back and front.
The Back to Basic group does not meet again until February, when I move on to Project 2, a needlebook.
I'll have to wait until then for assessment - to see if my pincushion is up to scratch!
It is, however, packaged and ready to submit!
Subscribe to:
Posts (Atom)