I am trying to use up some of my stash of wool - and thought I should make something for my other grandchildren after the fox cowls. I found one and a half 200gm balls of Bendigo Woollen Mills' Harmony in a blue (Wisteria) that I thought my grandson would wear in a hat - especially if I knitted a matching one for his father.
I found a pattern in a very old book for a cossack hat - just the thing. The pattern uses straight needles but I adapted it for knitting in the round. It was very easy - a deep ribbed band.
I knitted the adult one first - since that was the pattern (sorry about the washed-out colour) then reduced the size slightly for Fionn's.
These were a bigger hit than I had anticipated. Fionn wore his all evening and then the next day when he came to hang out at our place. He reckons the hat reduces the sound of his sisters talking!
A record of my stitching and related activity - mostly smocking and embroidery - and what I am learning along the way.
Search This Blog
Thursday, May 30, 2013
Sunday, May 26, 2013
Failynn Fox Cowl
Some months ago I bought a Velvet Acorn knitting pattern for a cute fox cowl. It is knitted in super bulky yarn - not something I have in my stash, so when knitting yarns began to appear in local advertising, I set out to buy enough to make cowls for my 5 year-old twin granddaughters. I settled on Shiver - very soft Moda acrylic - it was the thickest yarn I could find locally in foxy sorts of colours, soft, very washable and nice to feel. I figure they are more likely to wear an acrylic hood than a woollen one in our climate anyway.
These were a joy to knit. The base is knitted in the round, then the hood is knitted back and forth and joined at the top. the ears are knitted separately, one piece for each ear. I could manage to finish one a day if I had some time in the day and knitted in front of TV for an evening.
I decided to use up the left-over wool making an adult-size stripey one - without the ears. At the very least it will be a warm head cover for a homeless person.
I'm not sure how much practical use these will be in an Adelaide Winter, but the girls certainly think they are a lot of fun.
Monday, May 20, 2013
Craft Room
The craft room is now in use! Originally our elder daughter's bedroom, this room became a spare bedroom/sewing room, then a spare bedroom/sewing room /toy room for our grandchildren. For six months of last year it held 28 storage boxes full of our kitchen while our extension was built - and served as a place to cook our meals on a sandwich press.
It has now been cleared and a huge wall-to-wall, floor-to-12ft ceiling wardrobe installed to take some of our off-season clothes and all my stitching gear. We cleared some bookshelf space by culling about 400 books and then stripped and painted the walls. All my craft books/magazines are now accessible on the bookshelf.
I didn't take photos of the room before this year. I did take a few of my old storage and the room packed up ready for the wardrobe to be installed. The wide-angle lens needed to fit in the whole wall (or nearly) distorts the shape.
It is even harder to take shots of the whole finished room, especially as the wardrobe has one mirrored door. The two below, taken from the doorway, and the corner opposite the door give an idea.
More than half the storage is for my craft.
I have divided my stash into large pieces of fabric, stacked on shelves, and smaller pieces - sorted into baskets or boxes and labelled. My embroidery frames fit on one shelf - except for my standing floor frame, which goes into the high section already made up.
One drawer holds my store of cards made from my photographs, three hold embroidery kits and three hold wool.
My threads go in the Japanese drawers on a shelf below the fabric.
I still have a large footstool filled with fabric - but that can gradually be absorbed.
It is a terrific, workable space and makes measuring, cutting out, finding things and machine stitching very easy and comfortable.
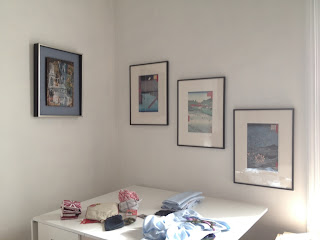
I love the light and cleanness of it - and some of my favourite paintings and Japanese prints.
I am already working on a number of projects that are made easier by the space.
I am really pleased and grateful.
More on the projects soon.
It has now been cleared and a huge wall-to-wall, floor-to-12ft ceiling wardrobe installed to take some of our off-season clothes and all my stitching gear. We cleared some bookshelf space by culling about 400 books and then stripped and painted the walls. All my craft books/magazines are now accessible on the bookshelf.
I didn't take photos of the room before this year. I did take a few of my old storage and the room packed up ready for the wardrobe to be installed. The wide-angle lens needed to fit in the whole wall (or nearly) distorts the shape.
It is even harder to take shots of the whole finished room, especially as the wardrobe has one mirrored door. The two below, taken from the doorway, and the corner opposite the door give an idea.
More than half the storage is for my craft.
I have divided my stash into large pieces of fabric, stacked on shelves, and smaller pieces - sorted into baskets or boxes and labelled. My embroidery frames fit on one shelf - except for my standing floor frame, which goes into the high section already made up.
One drawer holds my store of cards made from my photographs, three hold embroidery kits and three hold wool.
My threads go in the Japanese drawers on a shelf below the fabric.
I still have a large footstool filled with fabric - but that can gradually be absorbed.
It is a terrific, workable space and makes measuring, cutting out, finding things and machine stitching very easy and comfortable.
I love the light and cleanness of it - and some of my favourite paintings and Japanese prints.
I am already working on a number of projects that are made easier by the space.
I am really pleased and grateful.
More on the projects soon.
Friday, May 10, 2013
Winter Birds Finished
I have been very busy over the last few weeks, painting and reorganising my revamped sewing room ( a post on that soon) doing a bit of consultancy work and scanning and organising photos and documents for family history. I have, however, finished the Winter Birds table topper!
I tried two more stitch variations in finishing the project. Instead of simply couching down the pine needles as I did in the first quarter of the table topper, I tried coral stitch. This stitch is new to me, but I noticed it in a magazine and tried it out. Essentially, instead of a simple couching stitch, you work what amounts to a buttonhole stitch, taking the thread under the needle before taking it through to the back of the fabric.
It produces texture, which, for this project, I thought added a bit of interest, so I used coral stitch on two of the four sides (opposites) and couching on the other two sides.
My other variation involved the snow. Having pulled out the satin stitch and replaced it with split back stitch on the first two sides, I decided to try padding the satin stitch on the third side. I worked satin stitch in one direction, then over the top in the other direction. It gave a smooth finish and a bit of dimension. I was happy to leave it on side three ( a talking point) but reverted to the split back stitch on the fourth side.
This has been an uplifting, relaxed project to work on. The finished product will be useful, and a cheerful reminder of northern hemisphere winters.
Subscribe to:
Posts (Atom)