Search This Blog

Showing posts with label pouch. Show all posts

Sunday, September 3, 2023

Canvas Stitches on Linen Madness

On the last Saturday in August I attended a Guild Certificate Workshop on Canvas Stitches on Linen taken by Margaret Adams. I worked on some 22 count Permin, rather looser weave than the samples most worked on. I felt a bit regretful when I saw the quite delicate pincushion results of others. I had also picked dramatic rather than gentle colours.

Margaret provided heaps of information and samples. Her design left plenty of room for improvising and personalising.

I was having a fine time playing with the stitches and kept going when I got home. I found it hard to put it down.

It brought back to mind my High School Maths end of year activity - what our teacher called 'mathematical sewing'. We drew geometric shapes on card, marked the outlines in pinpricks every 1/8", then used a needle and thread to stitch from one hole to another - straight lines creating curves. This is essentially what we were doing here on linen. 

This is roughly according to Margaret's sample.


I checked out books I have on Bargello, canvas work and tapestry to fill in around the sample stitches.

I didn't need a pincushion, and this was getting too big and too textured. Obviously it needed to become a bag.

I added another border to make it easier to back. At the same time I hunted through my stash for lining and backing fabric, coming up with a shiny synthetic and a little bit of red velvet.


I couldn't decide between them, so took them along to the Junior Embroiderer' Group on Saturday and asked their opinion. They were really helpful - and quite clear. The velvet should be used for the back and it should be lined in shiny pink.
It took me a couple of hours of ironing, measuring and testing to get this done, but I got there. I had originally intended to close it with a zip, but changed my mind and designed a flap and looped fastener - using a good luck charm given to me by the monk Jim used to meet with to practice English and learn Buddhism.   

The pouch is for two of my red necklaces.

It's not perfect - but it's finished, I've learnt a lot, it uses thread, fabric and decorations with memories, I like it a lot and it has a use. My kind of result.

Thanks Margaret and JEMS.


Monday, March 20, 2023

Odd Bunch Pouch

In a hunt through my wool stash last week I came across a collection of gauge samples I have worked over the years, more in the past than recently as I now work much smaller, less complex samples, and often undo them once they've served their purpose.

As I was in the process of using things up, I put them aside to see what I could do with them. This is the result.

The first sample  was for a cardigan I made myself in the 1990s (and still wear).

The pink to the right was a jumper for my own daughters when they were children.
I don't remember the pink and green to the left. The multicolour one below was a jumper for Jim.
In addition there were three plain samples for which I have no memory.

I pieced these together by hand into a misshapen pouch, found a piece of jolly chicken fabric with which to line it and added a zip.
I'm not sure what I'll use the pouch for, but I'll find something for it one day. It isn't the sort of thing I could give as a gift to anyone! It reminds me of the vegetable Odd Bunches now available in supermarkets - a great idea.
In my view, perfection is over-rated.

Makes this madwoman happy!

Tuesday, August 2, 2022

Shisha Workshop at the Guild

Last Saturday was a Certificate Course Workshop on Shisha Mirror Embroidery taken by Christine Bishop. 

The project was a tiny purse - of the folded-in corners variety. The starting square was 10cm. Christine, who often goes for pastels, argued strongly that this should be in bright colours. I had brought along strong colours, but she kept advising me to go brighter. I adjusted a bit when I got home, but I'm satisfied. 
 
I've used shisha mirrors before on several projects, but I'm not convinced I got this one in absolutely securely. Time will tell!

To line it I found a piece of silk left from a dress I made in the 70s and a partial cowrie shell as a catch.


I  spent a few hours more on it at home and I'm happy with the result. I love this pouch design. It works regardless of the size of the pouch. This is about 7cm square.


It's a cute little pouch that will come in useful to hold a gift of jewellery. 


A good, fun workshop and end product.


Tuesday, June 14, 2022

Another phone pouch

This week I bought a new phone. I've kept my old one for over 5 years and it had begun to disconnect while charging. Over the long weekend, when it hadn't charged overnight, I decided I had to bite the bullet and replace it. I rely on my phone as an emergency connection to the world - as well as a regular connection and carry it at all times.  I've been contemplating it for some time. I am a heavy user of the camera on my phone, and have had my eye on the latest with a 4x zoom. I don't need all the other features, so it's an extravagance and I've been considering that. I could get a phone for half the price that would do everything I want, except the zoom. 

I bought the phone. 
It is only marginally larger than my old phone - maybe 5mm each way, but the tabbed pouch I made in 2016 to attach my phone to trousers without pockets  was a tight fit for my old phone, and won't fit the new. 

So today I made a new one.


I used wadding, and another square of the same fabric bundle I had used for the old one - from the Aboriginal Fabric Gallery. I needed a longer zip but otherwise it was a pretty much the same as the old.


I lined it with another square from the bundle.


The tabs need to go on the outside, so, as before, I tidied them up with a small patch of left over fabric - none at all left over now!

Finally, I quilted the fabric, wadding and lining together by hand with some running stitch around some of the pattern. It is hard to see on the pattern - but that's what I was aiming for!

These days I don't buy trousers, or even leggings (thanks to Ink and Spindle!) without pockets, but I can now be sure of having my phone on me while wearing any of the backlog of pocketless pants in my wardrobe!


Saturday, March 20, 2021

Another Turkmen Pouch

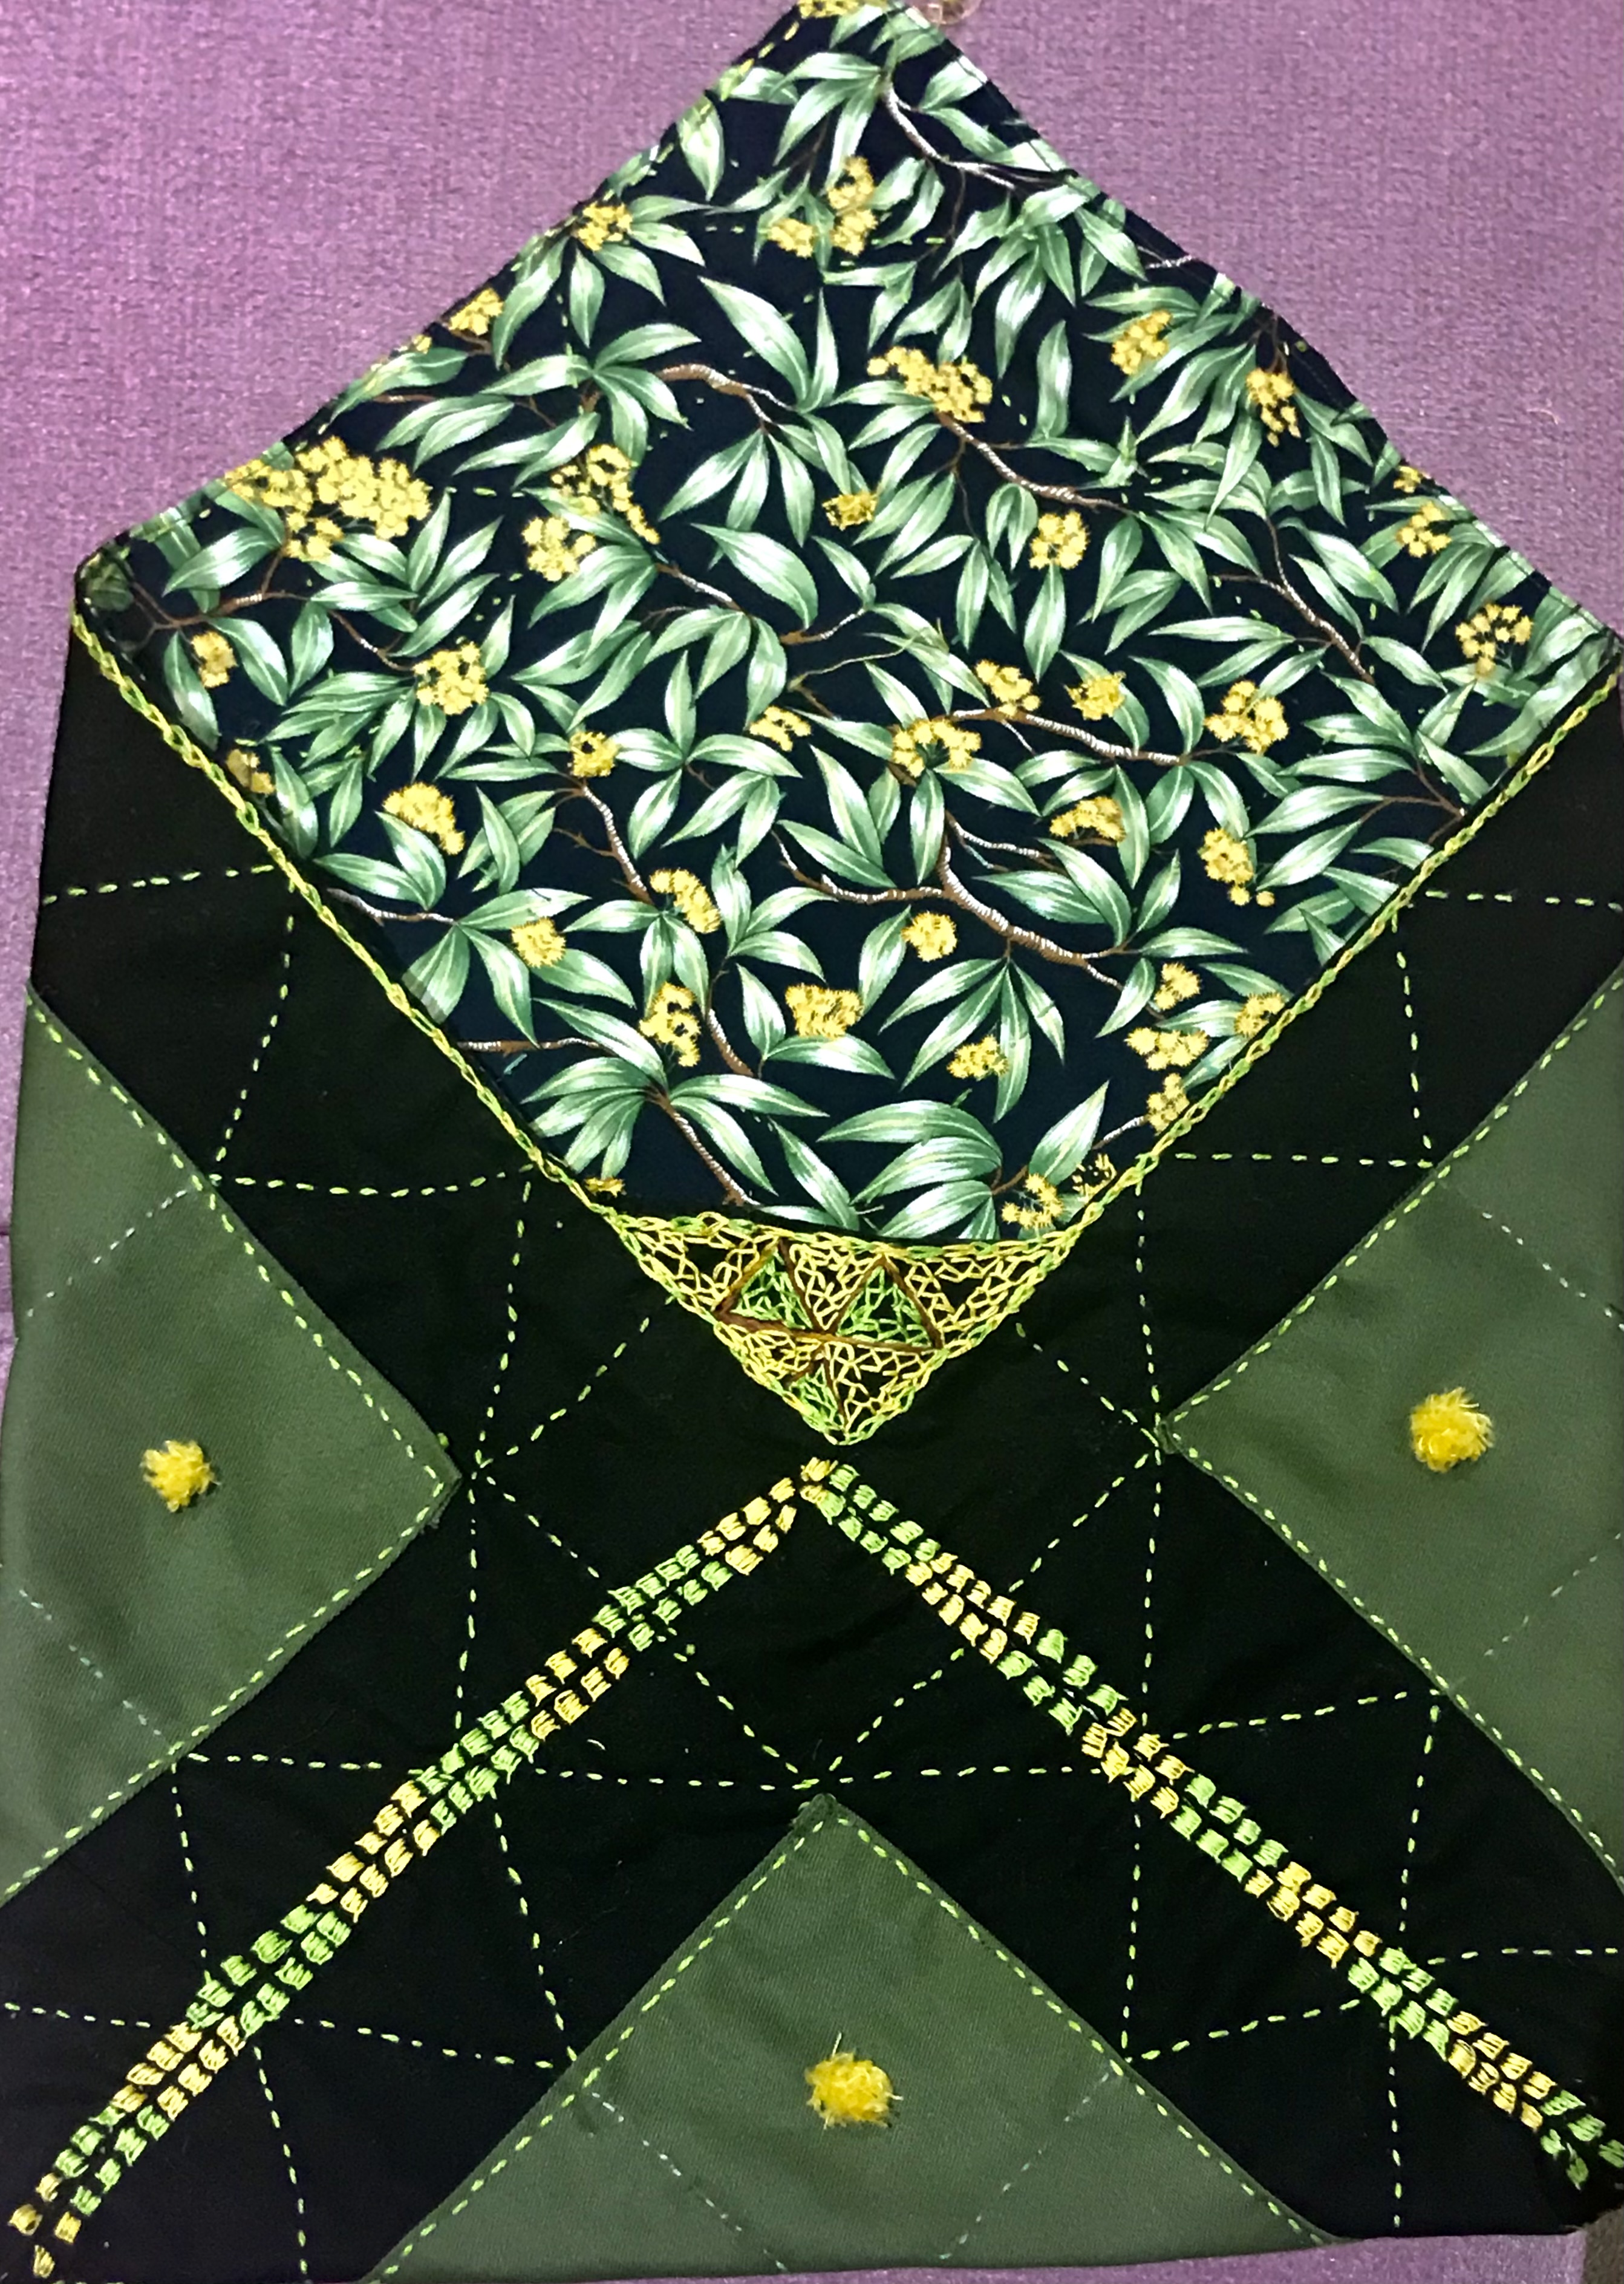
 I've been working on another of Alison Snepp's Turkmen Pouch (Inspirations 69, 2011). Back then I made one, and yes, the green fabric is the same. I've made many variations on this. The shape is versatile.  I cut this out a couple of years ago, when a friend wanted to make one. She finished hers long ago and my fabric stayed in the drawer, cut out but not assembled. The friend now has a craft group engaged in making them, and got me involved.


I had to remind myself of the processes for putting it together. Measuring - never my strong point - is crucial, because the design depends on a more-or-less perfect square. Given the dominance of the wattle lining fabric, I decided to limit myself to threads in the colours in that print - greens, yellow and a little bit of brown. There was already enough black!

The design calls for button-hole pinwheels in the squares of the grid. I don't much like stitching them and I decided it would be fitting to use Ghiordes knots to make little wattle blooms instead.I fluffed them up using my faithful boo-boo stick.  

I liked the result.


The edges are decorated simply, the piece folded and the joins ladder stitched. While this was easy stitching, the black fabric was a bit denser than is ideal for hand-stitching. I realised that the next steps were not going to be easy.                                

I tried several different needles and threads, but stitching along the edge was difficult through 4 layers of fabric, two of them dense. While the colours work, and it has an appropriate folksy look, the stitches are far from smooth and even.

Similarly, the triangular insert with it's turkmen stitch, gives the right effect, but isn't accurate.
The pouch did, however, join up nicely. and works together as it should.


The final challenge was the button and tassels. The button was easy. I have had this one from Tasmania for quite some time.  Made from a large gum nut, the clever artisan who made it inserted a piece of fine dowel to form a shaft. It was, I think, a gift from my daughter Alison after a trip to Hobart. It was easy to add a tassel and attach it to the point of the fold-over, then to make a loop on the back of the pouch
I gathered a few small gumnuts from a street tree and gilded them with acrylic paint, then tested them as a tassel. I decided against it. I thought they would make the pouch a bit fragile and involve too much glue. The gumnuts are too hard to pierce easily with a needle. 

The pouch needs to be used without fear of damaging part of it.


I opted instead for a tassel from variegated linen thread with one gumnut attached. I was able to pierce the gumnut with the point of a darning needle, then insert a fine needle through the small hole with machine thread attached. Once through, I attached a bead to one end of the the thread and tied it on with several knots, then pulled it into the gumnut as a stopper. The other end of the thread I stitched to the tassel. 

If the gumnut comes off in use not much is lost and the tassel still functions.
This is how it folds over for closure.
It can, of course, be easily used  without the closure.

I'm satisfied with this finish. 


The pouch will be useful, and act as an example to anyone wanting to make one in the future.

Monday, April 9, 2018

More zenbroidery

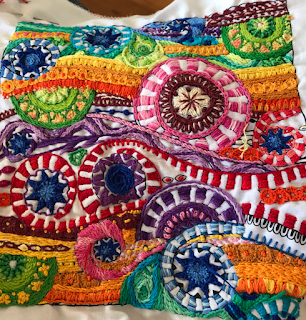
The zenbroidery piece I have been working on while travelling is the third piece I have worked. The first was a mandala. The second is the one below.

When I finished my Christmas cushions, I wanted a no-pressure project that I could pick up and put down over the Christmas period. I reached for another of the zenbroidery pieces in my stash - along with one of the cotton thread packs I had originally purchased from Herrschners ( more recently I have bought them in Australia through the Fox Collection).

This design presented more dilemmas than my previous mandala because there was potentially more white space. As the mandala was in quite narrow rings, there were fewer choices of whether to fill or not to fill.

I began roughly in the centre with some of the spirals, and left quite a lot of space.


These designs are  great for experimenting with stitches. The spirals lent themselves to running stitch in the Kantha style. I used star stitch on many of the centres and quite a bit of stem stitch.


I worked out colour as I went, once again, grading through the rainbow from the centre out. As I went, I experimented with leaving white and filling it in. By the end I had pretty much filled it all.


I find these great fun to stitch. I love making it up as I go along, trying things out, adjusting, adapting. It really IS colouring with thread - with the extra pleasure of playing with stitches.


Because I worked this on holidays over Christmas, mostly in my hand, with only the occasional use of a hoop for tricky stitches, it needed blocking. My intention was to turn it into a bag. I tried therefore to square it up by blocking.


This worked well, so I found a lining fabric and zip. I really like the look of this. The thread is from China and I enjoyed working with it. It is perle, soft and pleasant to work with- very little tangling, no shredding and wonderful colours.


I folded it in half, sewed up the sides and added a zip. It makes a lovely gift. I'm glad I filled in
most of the white background with colour and texture. The resulting pouch  is a useful size for a pencil case or small tools.


I have given it as a gift to a cousin. It's handy and not readily lost.

I've been working another, slightly larger, while travelling.


I like the thread, the colours, the patterns - and the leeway to make your own emphasis and colourways.


I can see myself making more of these.