Search This Blog

Tuesday, May 24, 2022

100 Year Climate Yarn Project

It's a rare day when I post twice on this blog - but there is no point in holding this one over for another day.

Today I visited Sandy Lepore's 100 Year Climate Yarn Project at the Adelaide City Library. I knew a bit about the project and had been following it's recent progress online. I had seen quite a few of Grant Hancock's excellent photographs but the reality is something else again.   

The sheer size and ambition of it was evident from the excellent publicity photos, but the texture less  so.  The evenness of the stitches, the raised dividing lines between years, the vibrancy of the colours and precision of the design just blew me away when face to face with the real thing. 


I was wearing a mask so have severely cropped my unflattering attempted selfie which does, at least, give a glimpse of the scale of the project.


The work is really well and accessibly displayed in the library with an excellent board of background and explanatory information. 

In addition to the huge impact of the month by month colour-coded temperature representation of 100 years of Adelaide temperatures, a band across the bottom of the piece shows year by year averages, almost like piano keys. 


As suggested in the display, as well as tracking temperature shifts across their whole life, visitors can trace the temperature on their life events. The circle on this photo, for example, marks my wedding day, which, surprisingly, was slightly below the mean in Adelaide. In Sydney, where we married, it was overcast, hot and humid, almost certainly above the Sydney mean. 

There are no end of  conversations, ideas and stories that can be generated from a visit.

Sandy, her climate expert Heather Smith, photographer Grant Hancock and the enabling library staff have done a brilliant job.  I really hope their plans for the exhibition to tour other parts of the country come to fruition so more of you can get to see it. 

Should you get the chance don't miss it.

Arabian Bag

One of my daughters bought me this kit several years ago. I had thought of finishing it while attending the Guild's Crewel Group but that group recessed throughout Covid and is only just recovering. Now I've finished my Crewel chair, I thought I'd work some stored kits. This one was next on my list.

The linen is printed with a line of buildings, arranged in 5 groups. 


There's a card with 5 corresponding groups of thread as well as some envelopes of embellishments. 

This is what it looks like at the finish. I found it difficult, at times, to recognise the intended thread from the names given. While their Appleton's numbers were also given in the instructions, I don't have an Appleton's colour chart to recognise them. 

I didn't let this bother me too much. I used the recommended colours where I could and used my judgement when I couldn't. 

The figures are very small - 1-3 cm high and arranged in five groups. 


Most are worked in long and short, stem or satin stitch. 


The construction was interesting.  The embroidery forms a pocket around the outside of a lined drawstring bag which is embellished with beads around the peaked top. Tassels hold the pocket at key points. 


Of greatest interest to me was the method of constructing the base - an insert constructed from two rectangles and containing a firm pellon. Very clever method.

Beads on the top peaks, tassels to hold the outside pocket firm, and a series of small wooden rings stitched to the outside to take a cord, finished off the construction. The tassels and rings are reinforced on the inside with small buttons - a thoughtful, if slowing, touch.

As well as adding a couple of skills to my repertoire, it's a satisfying and useful object to have made. 

Friday, May 6, 2022

Third and final Botanicals bag-from-jeans


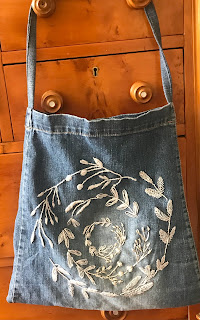
The third bag from my discarded and no-longer fitting jeans is finished. This one is made from the back of the jeans  - cut down the side seams and the top of the legs. 


As for the two previous bags, the motifs are taken from Beautiful Botanical Embroidery. This time, however the motifs are not joined into an overall landscape but simply arranged to fit the shape of the fabric. Both back pockets are included, although I cut off (quite crudely, without neatening) the flaps and buttons on the pockets. The holes left where the buttons were removed are each covered by an embroidered bee.
These are some of the motifs. I've changed the colours but mostly stuck to the recommended stitches.


Almost all embroidery is in DMC perle 5, which works really well on the soft denim. It gives texture and coverage without stiffness. It is now available (mine came from Create in Stitch) in a good range of colours. 
In a few places I used Zenbroidery thread, which is about the same thickness.


The purple is Coats Lotus No 8 - from the Guild trading table!
This is it before I folded it into the bag. At the end I added a few bees to fill empty spaces and create a unity ( evident on the photos at the top of this page).


I used a black and white Japanese cotton print of bamboo, with a few blue butterflies as lining. Seemed appropriate. The strap, as with the other two bags, is made from a strip of fabric from the front of the jeans.

I'm satisfied with my three bags. They will be useful for something and someone - and a reminder of those lost kilos.

Sunday, May 1, 2022

Second Botanicals Bag-from-jeans

 The second bag-from-jeans is also based on designs from Alice Makabe's Beautiful Botanicals Embroidery.  The first side is a simplified version of her 'night in the forest' on page 15. I removed all plants except the trees, and added a moon and two bats. It isn't as impactful as the first bag, but I am very happy with the effect. I've used perle 5 thread throughout.  I had just enough of the variegated thread for the leaves.


I began on the face of the owl with silk thread. I had a hank of silk that contained a range of colours I thought might work the whole owl, but I wasn't happy with the performance of the silk , so swapped back to perle 5 cotton in two shades of grey for the rest of the body. Heavier thread works better on this denim.

On the back I worked a version of the circular floral motif on page 12., where it is a small circular wreath repeated around 4 sides of a cloth. I enlarged it a little and worked it in the centre, Then enlarged and repeated it twice to form a series of concentric (more or less) circles, using a silvery-grey Perle 5 in deference to the colours in the owl.  Again, it blends rather than standing out as the white does on bag 1.

A remnant of upholstery fabric I bought from Nicola Jarvis 3-4 years ago makes quite a good lining.


I had to take great care stitching it into the bag. Because of a tear in the lining fabric, I had to juggle a little. The lining is non-stretch and it was a tight fit at the top - but I got there.


It has worked. The first bag certainly makes more of an impact, but this has charm, I think  

I am now working on the third bag - made from the back of the jeans with pockets, where smaller individual motifs are a reasonable fit with the more broken up spaces. Quite different.

Tuesday, April 19, 2022

First Beautiful Botanical Embroidery Bag-from-Jeans


I have lost 22 kg over the last 9 months. Mostly I am wearing the same clothes, in some cases modified. One pair of 3/4 length jeans reached a point where they fell down, and a belt didn't work well. I considered giving them to a charity, but decided I'd rather recycle them another way. 

I cut the legs off as tubes and then the body part along the side seams. Folding the back in half along the back seam will give me a bag with pockets, using the waist band as the bag top. The front is then cut into strips to form handles.

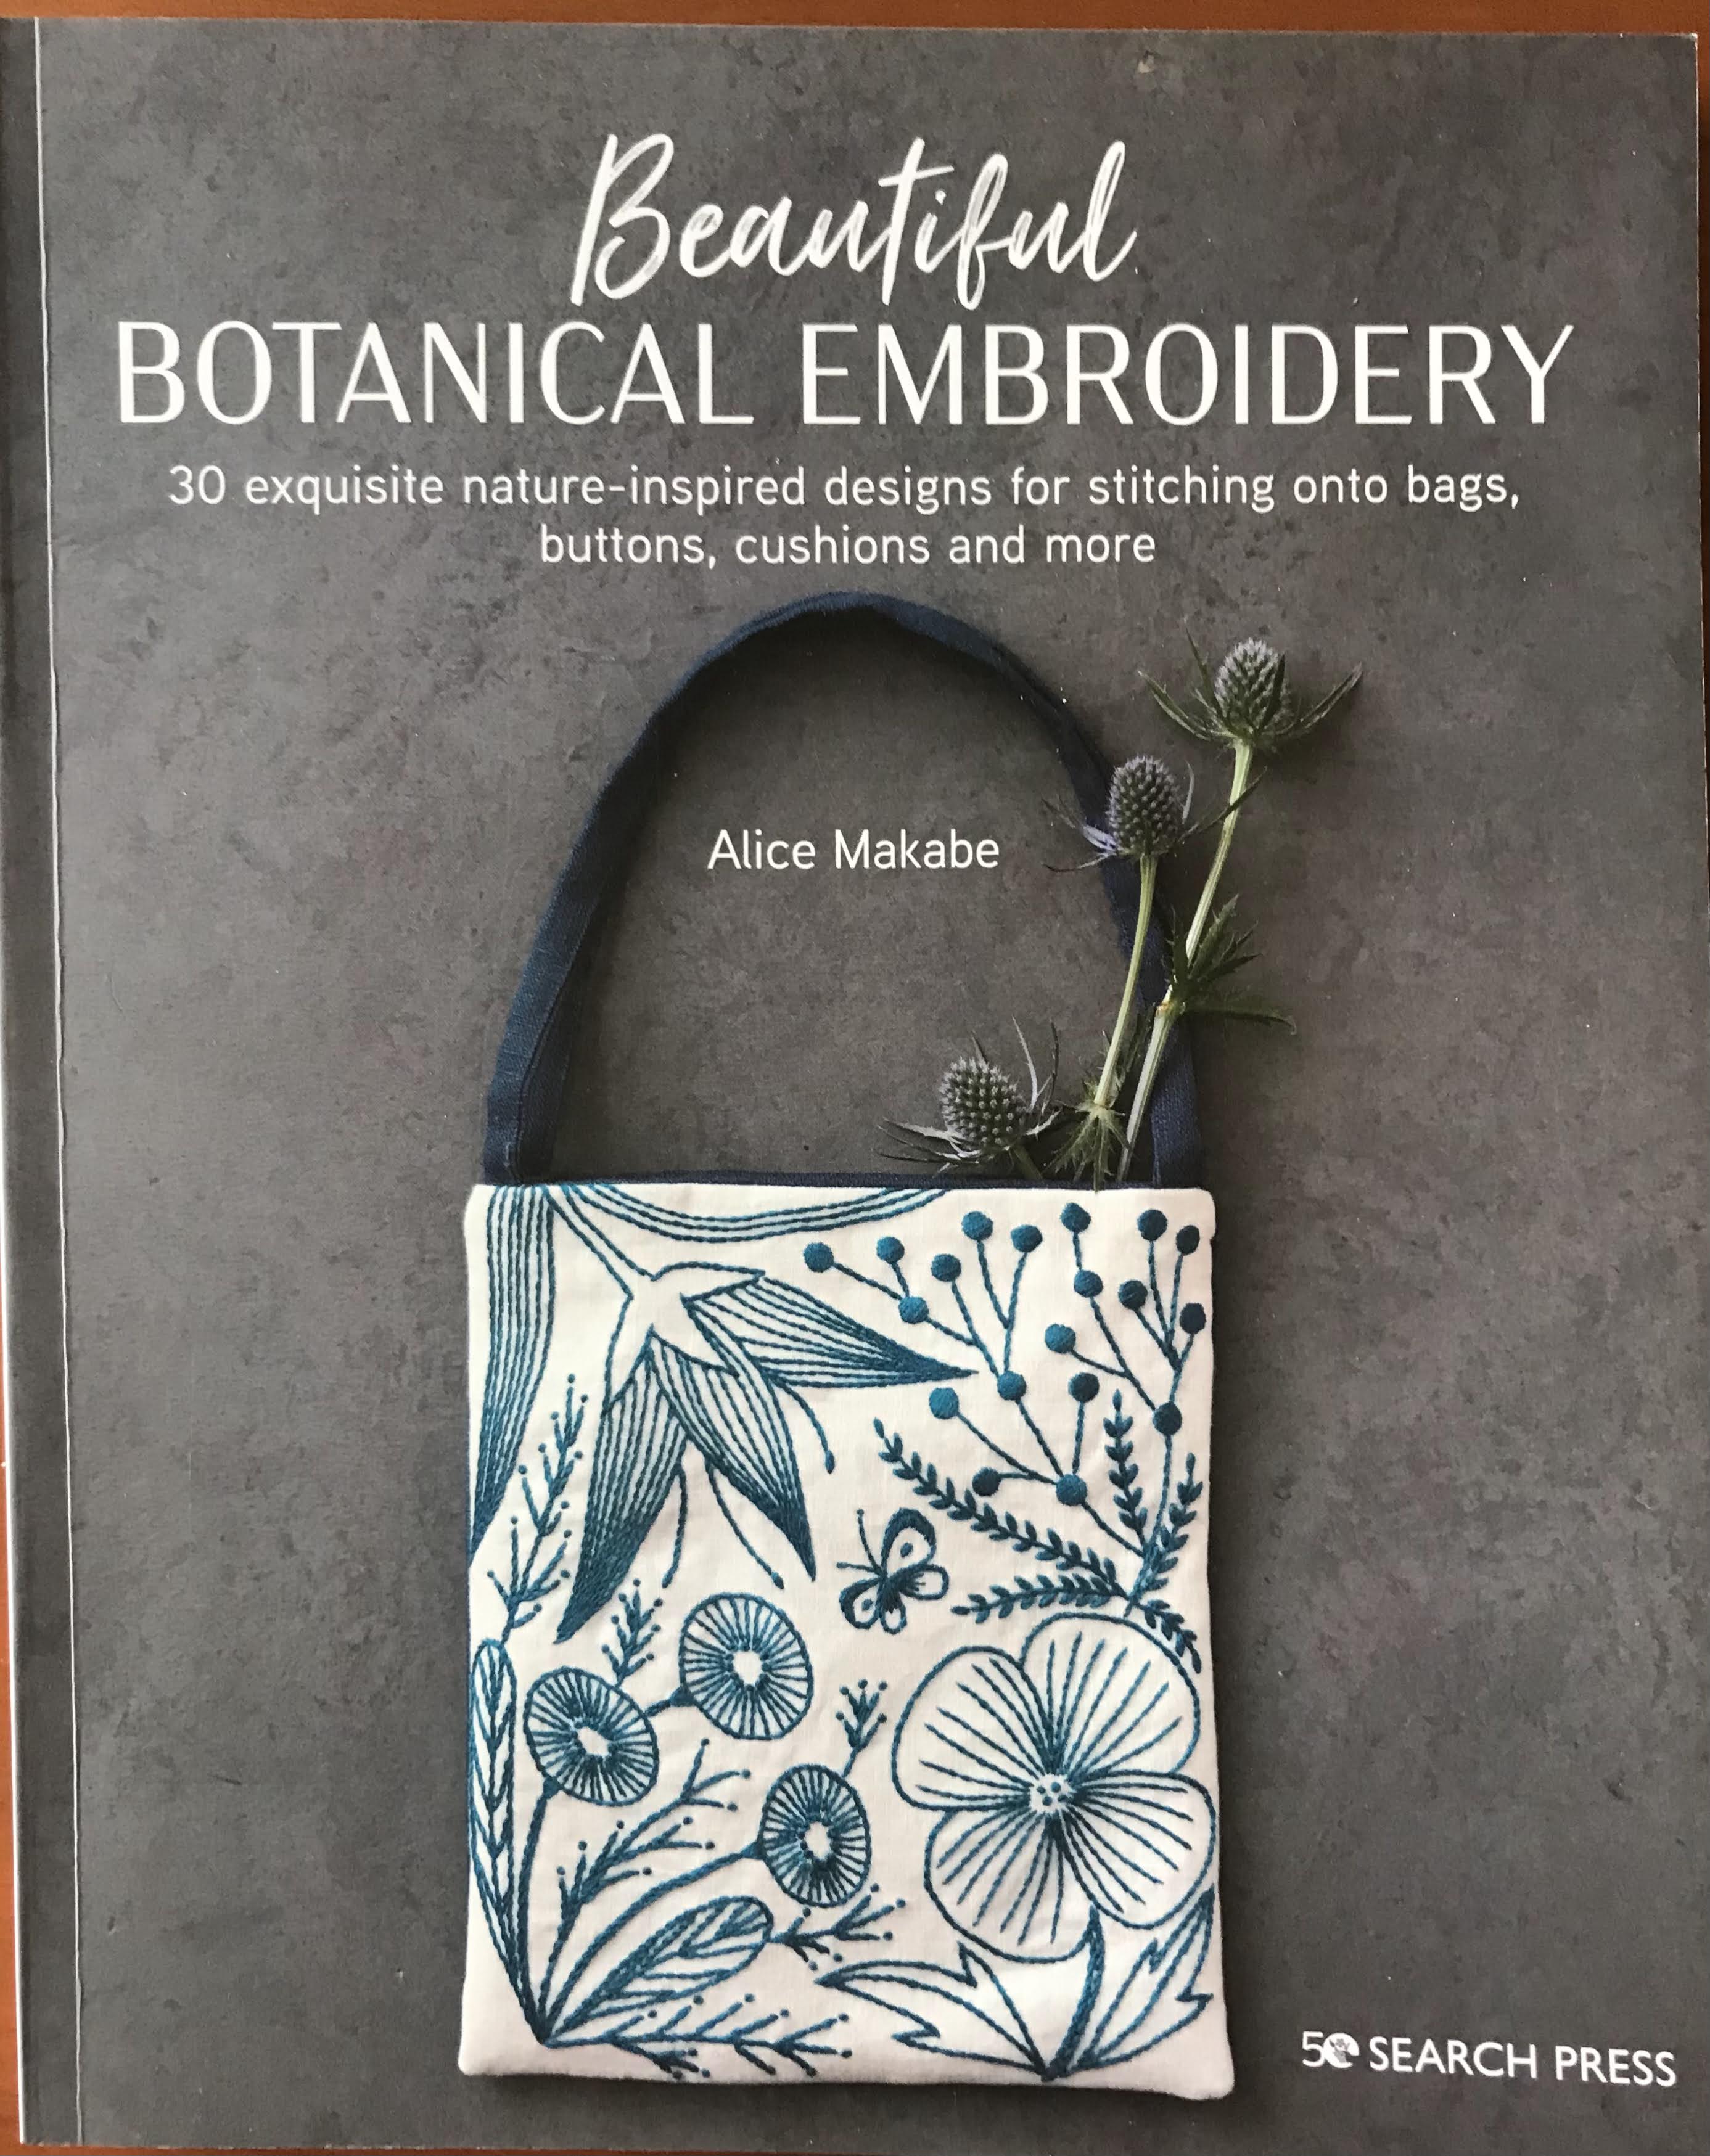
I am going to use adaptations of some of the motifs from this book on all three bags. For the first bag, I'm using a version of the design on the front cover.


Once I was sure I couldn't trace on to this weight of cloth, I tried a couple of different pens, settling in the end for an archive one. I drew them by hand, enlarging them to fit the shape I had. 


I chose my hoop size to fit the large motif on the bottom corner, and assembled a bundle of threads I thought might work.   


I used a  variegated perle 5 thread for the large bloom. I love the opportunity to use acquired specialty threads in projects like this. It used the whole skein.

Here is the finished side. I considered whether to leave the other side plain, but settled on a spray of leaves and blooms, still from the Botanical Embroidery book, in white on the other side. 


I'm using a No 3 Twilley's Stalite cotton, which gives a good coverage and texture.

It took three moves of the hoop and a few touch ups on the edges to finish. The denim has stretch in it which seemed to help in maintaining tension.

A single strap was enough and I lined it with some spotted cotton from my stash. It required a join - but no hassle (believe it or not, it has been ironed, though not with my steam iron. Never was much of an ironer!)

Here's the finished product, back and front. I am delighted with the result and am looking forward to making the next one - this time a night scene with owl.

Sunday, April 10, 2022

My Crewel Work Chair is Finished!

 The Aesop frame is in the crewel chair, which is now finished.

I wasn't looking forward to attaching the Aesop panel as it involved removing the cover from the chair, stitching the panel on and replacing the cover. It's a tight fit, with no zip. It proved, however, easier than I had feared.


I finished the text  using Quaker stitch and blocked the piece for a second time. I was pleased with the text but it blocked a little spiky, I probably could have used a larger font, but it is quite readable.

My faithful little Janome sewing machine was probably not designed for stitching of this weight and shape, but rose to the occasion. The space left on the chair was exactly the size of the Aesop panel, so I folded the linen right to the border of the frame and stitched in the ditch.

I must have improved each time I've removed and returned the cover as it seemed to go on in record time (not easily, but easier). 

The following are photos from various angles to show the final result. 


The chair was originally in my sewing room but I moved it a couple of months ago into my living room where it can be viewed from all sides.


The back view.

There are 21 Crewel Work Company works on the chair (counting the Feathers as one work, although they are distributed separately around the chair), 


some large, 


some small.
I considered adding small pieces to those narrow front panels, but decided it would be overkill.  I like the contrast of the plain linen.


View from the top.


It isn't a large chair.  The one I worked years ago to accommodate Alison Snepp's Men of Skiros is larger and more supportive for longer sitting.


It is nevertheless comfortable and useful. I'm pleased to have done it. It has been a satisfying project to work on - and will remain a tribute to the beautiful historic works produced by Phillipa Turnbull and the Crewel Work Company.

And yes, of course it is for sitting in - it's crewel work after all!